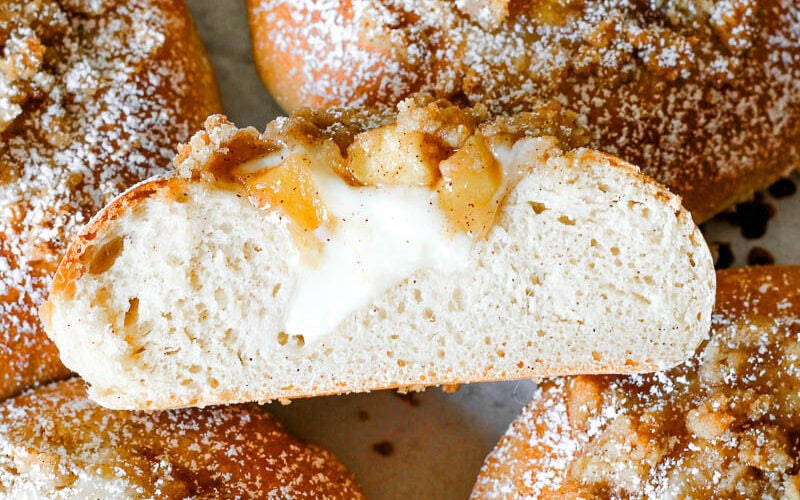
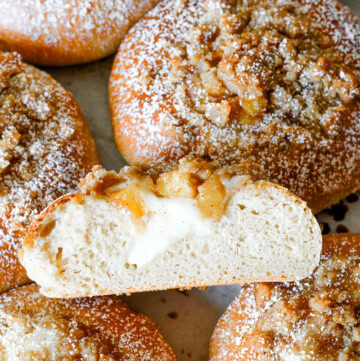
These Apple Cheesecake Brioche Buns are filled in the center with a sweet cream cheese and apple pie filling, then topped with a crumble, making them a delicious treat.

Fall Baking is so warm and cozy and filled with comforting spices like cinnamon. These Apple Cheesecake Brioche Buns gives all the fall vibes. It's a little bit of a process, but the results are so worth the effort. This recipe is inspired by my Sweet Brioche Buns with Cream Cheese and Lemon Curd. I've been experimenting with different fillings to use with the Brioche Buns and I've come up with some delicious recipes. First up is this cozy fall Apple Cheesecake Brioche Buns!
What Are Brioche Buns?
Sweet Brioche Buns or Brioche Buns are made with an enriched dough and have an added sweetness factor to them than regular dough. Enriched doughs contain milk, eggs and butter. Basically, a lot more fat than a regular dough would have. Brioche dough typically contains more sugar than you would find in a normal dough, as well as a lot more butter.
Brioche Buns Dough Recipe
The dough is pretty simple, but can be a little time-consuming because of the kneading and the two proofs it needs.
Ingredients for Brioche Buns Dough Recipe
- Bread flour
- Milk
- Yeast
- Sugar
- Egg Yolk
- Vanilla extract
- Butter
How to Make Brioche Dough
First, add the yeast ingredients to a small bowl and set aside to activate and foam. Should take about 5 minutes.
Next, in a bowl of a stand mixer fitted with a hook attachment, add the dry ingredients, the egg yolks, sugar, and vanilla extract, then add the yeast mixture and let it knead for at least 10 minutes until the dough forms a sort of ball and pulls away from the bowl.
Then, add in the softened butter until combined and let knead until the the butter is incorporated in the dough and it becomes smooth, silky, and satiny and pulls away from the bowl. Could take anywhere from 10-15 minutes, but don't skimp out on the time because this is very important. Transfer to an oiled bowl and let proof/rise for at least an hour.

Apple Filling
Ingredients for Apple Filling
- Apples
- Butter
- Brown Sugar
- Cinnamon
How to Make Apple Filling
- In a pan over medium heat, add the butter and brown sugar.
- Once the butter and brown sugar are melted and combined, add the diced apples and cinnamon and let cook until tender.
- Set aside to cool
Sweet Cream Cheese
The sweet cream cheese filling is incredibly easy to put together. All you need is softened cream cheese, granulated sugar, and vanilla extract. Add them to a bowl and mix until completely combined. Set it aside until you're ready to fill the buns.
How to Shape the Brioche Buns
Once dough has risen, remove from bowl and divide into 8 equal pieces using a kitchen scale. Roll each piece into a ball, then using your fingers press into the center of each Brioche bun ball, forming a center indent (see image), which creates a soft of disc that has a hole where we will fill them with the sweet cream cheese. Let them proof on a baking sheet for 30-45 minutes until puffy and doubled in size.
After the second proof
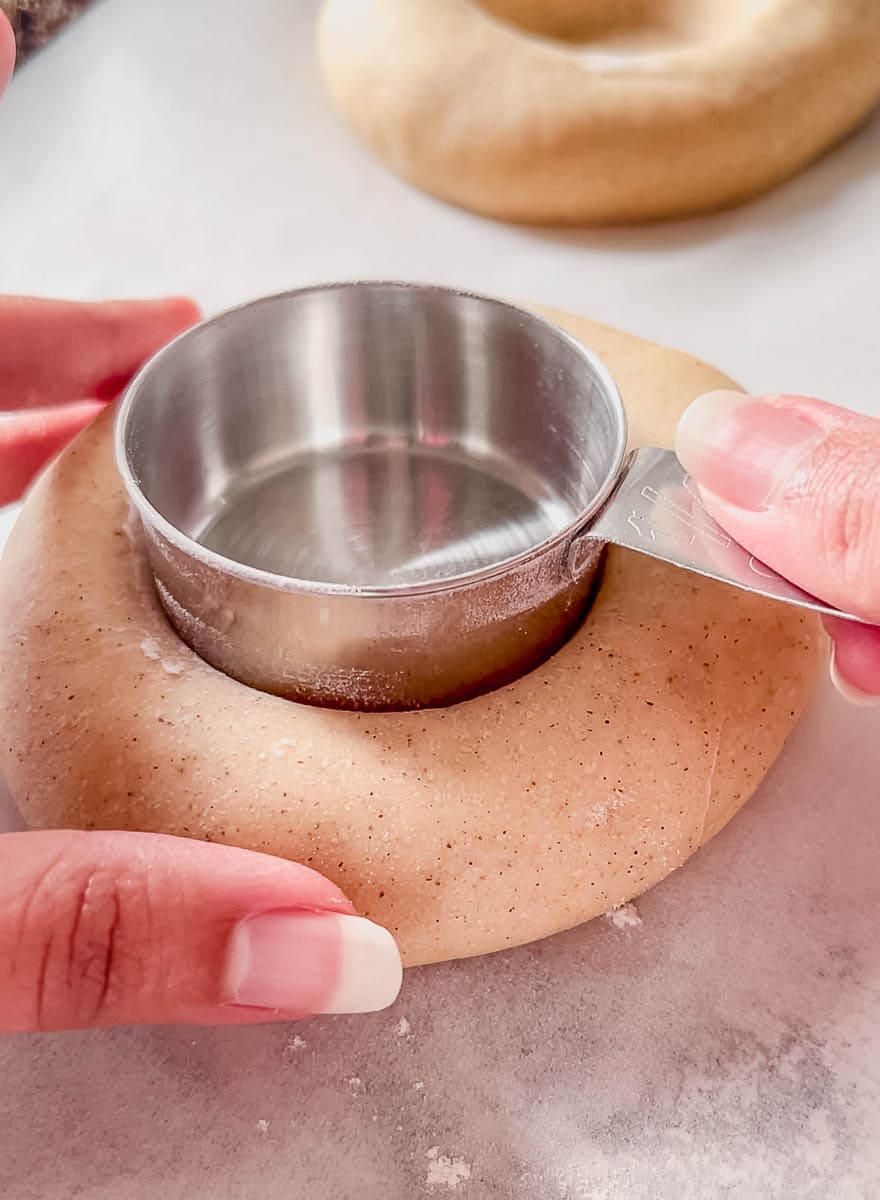
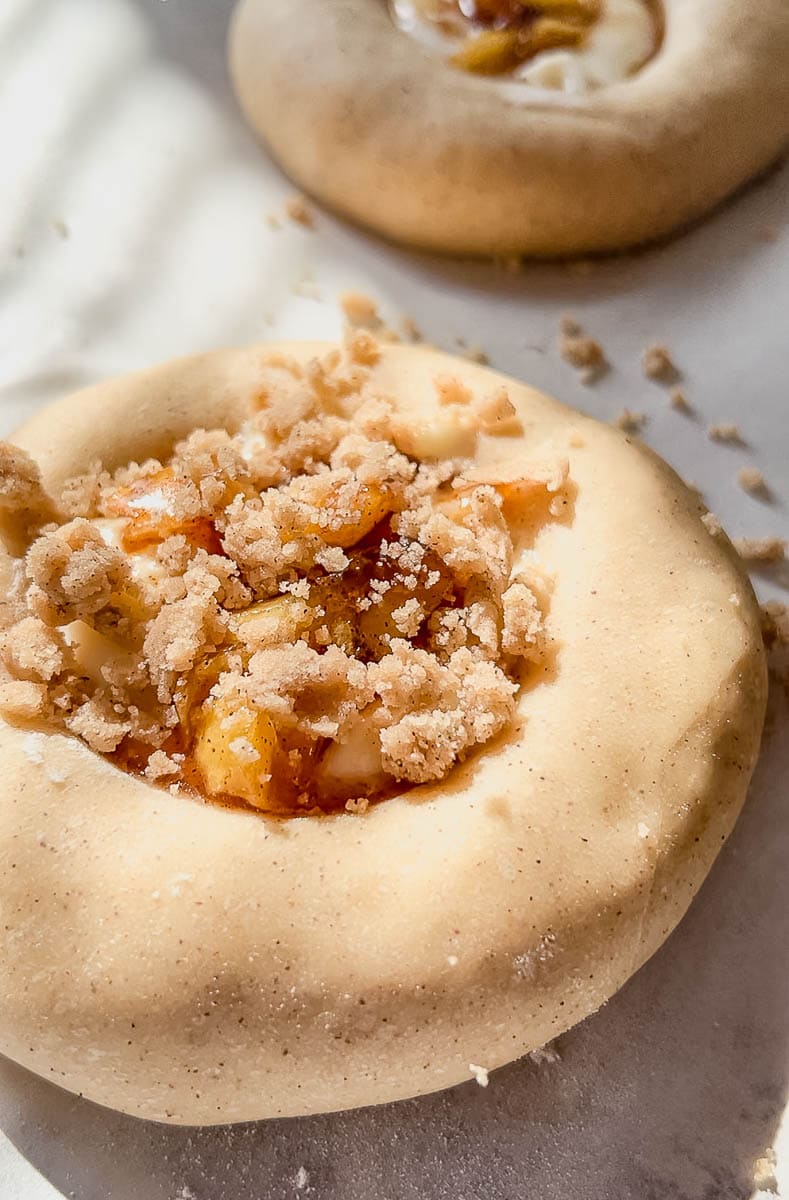
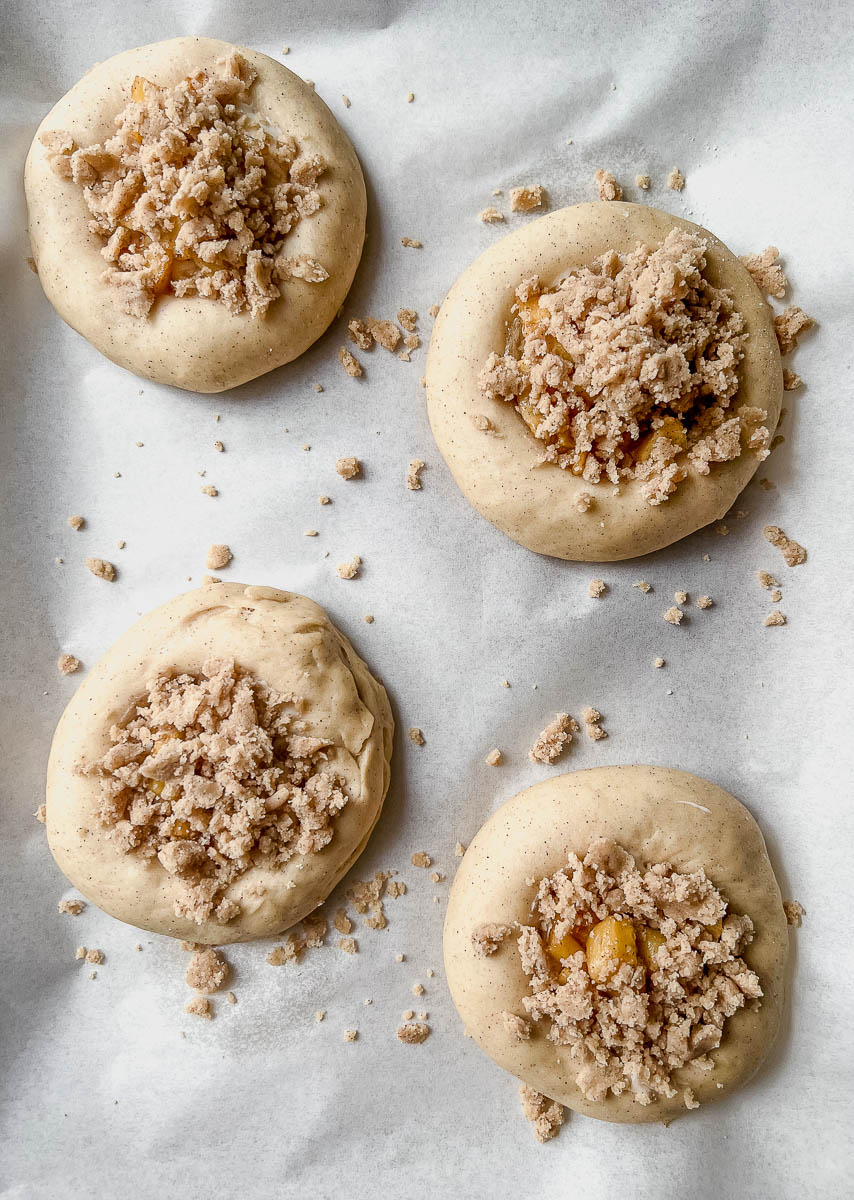
- Once the Brioche Buns have doubled in size, take a cup or a small bowl (make sure it's floured so it doesn't stick) and create an even larger indent in the center (I used a ¼ cup initially, but found that a ⅓ cup was better).
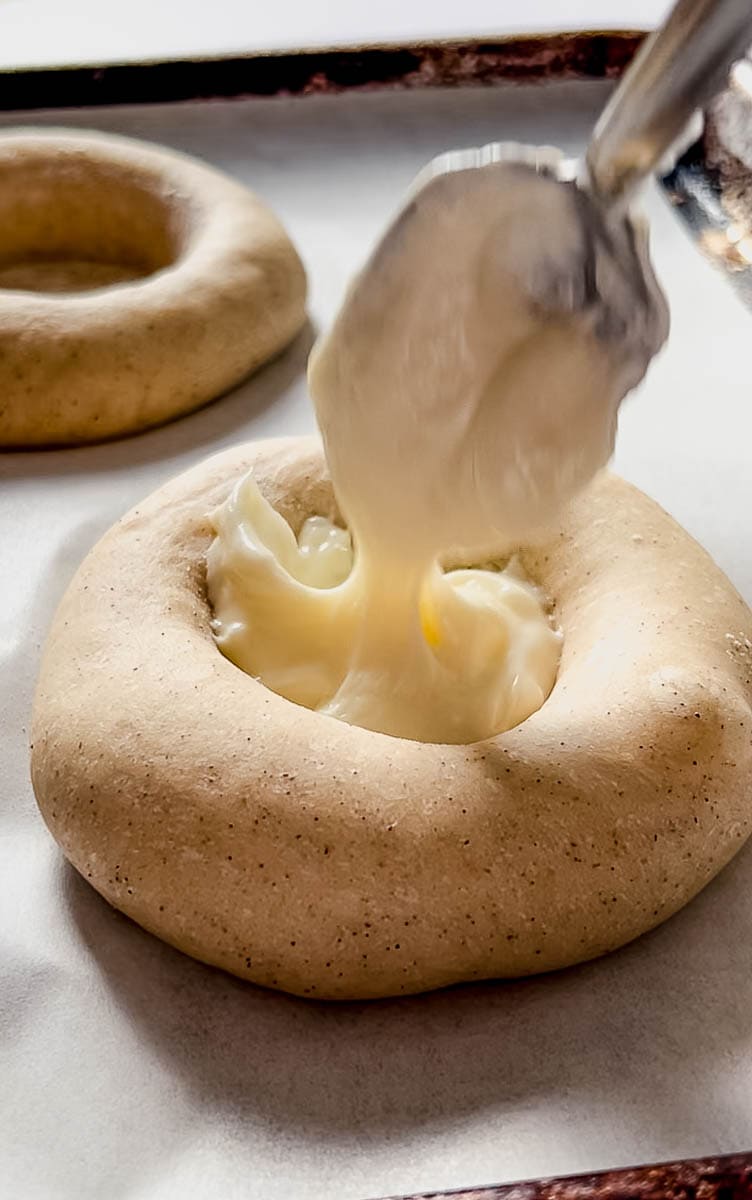
- Fill each indent with cream cheese
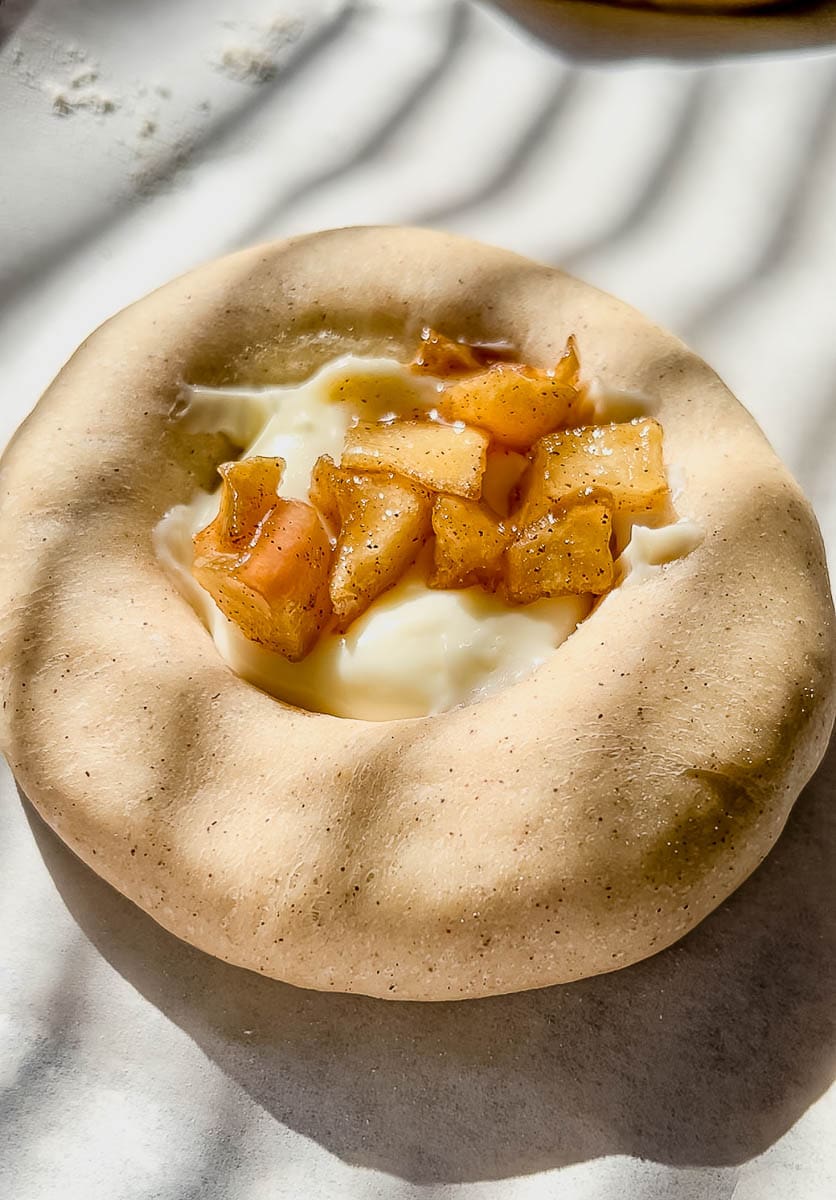
- Then fill top with apple filling
- Sprinkle crumble on top of each
Baking Apple Cheesecake Brioche Buns
- Preheat oven to 375° and bake for 15-18 minutes until golden on the outside and the buns form a color on the bottom.
- Remove from oven and let cool for at least 5 minutes
- Top with powdered sugar if desired.
Tips to Make the Best Apple Cheesecake Brioche Buns Recipe
- The best way to measure your ingredients is using a kitchen scale because it's the most accurate. If you don't have a kitchen scale, use the spoon and level method of measuring your flour.
- First, fluff the flour with a spoon, then spoon the flour into a measuring cup and level off with a butter knife. This will prevent you from adding more flour than necessary.
- Knead the dough for at least 10 minutes before adding the softened butter. This will ensure the dough forms and pulls away from the bowl. Then once you add the butter, knead for another 10-15 minutes until the butter is completely incorporated the dough has pulled away from the bowl again.
- This dough will be tacky, but shouldn't stick to your hands. It will also be very silky (this due to all the butter added). If while kneading, the dough doesn't come together after 15 minutes, you can add one tablespoon of flour at a time. But be patient before adding the flour. You don't want a dry dough.

FREQUENTLY ASKED QUESTIONS
Why is Brioche Buns Recipe different?
Brioche Buns recipe or Brioche bread recipes are different than regular dough recipes because of the amount of fat it contains. A regular bread recipe typically contains flour, yeast, water, salt. A brioche bread recipe is an enriched recipe that contains milk, eggs, and butter. My Brioche Buns recipe contain 1/24cup of sugar to give it an extra hint of sweetness, which is not typical in a regular bread recipe.
Can I use this Brioche Buns Recipe for Other Recipes?
Absolutely! This Brioche Buns Recipe can be a base for so many bread recipes. You can top it with whatever you desire, sweet or savory. You can even make them into Burger Buns! Stay turned because this will be a base for many great recipes to come.
What Sweet Brioche Fillings Can I use?
I have several different brioche buns variations that you could try.
Lemon Curd - switch out the cranberry sauce with lemon curd, like my Lemon Curd Buns recipe.
Pumpkin - A perfect fall recipe, or any other time you're craving pumpkin, use my Pumpkin Brioche Buns.
Berries - Use any type of berry, like my Raspberry Cheesecake Brioche Buns.
Pastry Cream - Make an easy pastry cream and turn these buns into Vanilla Custard Buns.
Cranberries - Use my Orange Cranberry Buns recipe for a holiday or winter twist.
Savory - Turn these buns into a breakfast delight with my Breakfast Brioche Buns recipe.
Are there Store-Bought Alternatives to Brioche Buns?
Unfortunately, you can't really substitute Brioche Buns with anything you'd fund at the store pre-made because the doughs you typically find are pizza doughs which are not enriched doughs. If you really don't want to make a dough but want to try these fillings, you can use puff pastry. It won't be the same texture or taste, but you'll still get a delicious treat.
How Can I Store These Brioche Buns?
Once completely cooled, store the Sweet Brioche Buns in an airtight container or a ziploc bag and keep it at room temperature. You can eat them at room temperature or warm them slightly in the microwave or oven.
Can I Freeze Brioche Buns?
Yes! Once they're completely cooled, store them in a freezer ziploc bag and they should keep for several months.O
More Recipes to Try
- Sweet Brioche Buns with Cream Cheese and Lemon Curd
- Soft and Fluffy Cinnamon Rolls Recipe
- Homemade Bagels
- Apple Galette
Reader Feedback
Since developing my first brioche bun recipe in 2022, I've had many people remake them, with such great feedback. I have, however, had people mention that the dough can be a little too sticky/wet and they needed to add more flour. For this reason, I went back to the drawing board to test the recipe with ¼ cup less milk, so only ¾ cup total milk instead of 1 cup, and it turns out great! However, this is with my controlled environment, and with using a scale to weigh my flour.
If you're a long-time reader who has had success with a whole cup of milk, then keep making the recipe that way.
📖 Recipe Card
Apple Cheesecake Brioche Buns
Equipment
- 1 Large baking sheet
Ingredients
Sweet Brioche Dough
- ¾ cup +1 tablespoon warm milk, 110℉ (202g) (see notes)
- 1 package active dry yeast (7g)
- 1 teaspoon granulated sugar
- 3 cups (360g) bread flour
- ⅓ cup (66g) granulated sugar
- ¾ teaspoon salt
- 2 egg yolks
- 2 teaspoon vanilla extract
- 6 tablespoon unsalted butter softened
Apple Filling
- 1 large apple* peeled and diced
- 1 tablespoon unsalted butter
- 2 tablespoon brown sugar
- ¾ teaspoon cinnamon
Sweet Cream Cheese
- 8 oz. cream cheese room temperature
- 4 tablespoon granulated sugar
- 1 teaspoon vanilla extract
Crumble Topping
- 2 tablespoon unsalted butter melted
- ¼ cup (50g) brown sugar
- ½ teaspoon cinnamon
- ¼ cup (30g) all purpose flour
Instructions
Brioche Dough
- In a small bowl, combine the warm milk, packet of yeast and a teaspoon of sugar and let sit and foam for about 5 minutes.
- In a bowl of a stand mixer fitted with a hook attachment, add flour, sugar, salt, 2 egg yolks, vanilla extract, and the activated yeast mixture and let knead for at least 10 minutes until the dough comes away from the bowl and forms a sort of ball.
- Start adding the softened butter slowly until all is incorporated and knead for an additional 12-15 minutes until the dough forms a smooth ball and does not stick to the sides of the bowl. When touching with your finger, the dough should not stick at all. The dough will be tacky and a lot smoother/silkier than a regular dough.Humidity: If you live in an area with high humidity, you may need to add extra flour or reduce the amount of milk added to the dough. I've had readers have success with either adding more flour or reducing the milk. I've had to add more flour during the summer months when humidity is high.
- Place the dough in an oiled bowl and cover and let rise for at least an hour.
Apple Filling
- In a pan over medium heat, add the butter and brown sugar.
- Once the butter and brown sugar are melted and combined, add the diced apples and cinnamon and let cook until tender.
- Set aside to cool
Sweet Cream Cheese
- In a bowl, combine softened cream cheese, granulated sugar, and vanilla extract and mix until completely smooth.
Crumble Topping
- Melt the butter, then add the brown sugar, cinnamon, and all purpose flour and combine.
- The mixture will be wet but let it come to room temperature completely before using. Once you're ready to use it, stir the mixture and it should be a crumble consistency.
Shaping the Sweet Brioche Buns
- Prepare a large baking sheet lined with parchment paper.
- Once dough has risen, remove from bowl and divide into 8 equal pieces using a kitchen scale. Roll each piece into a ball, then using your fingers press into the center of each ball, forming a center indent, which creates a soft of disc that has a hole where we will fill them with the sweet cream cheese.
- Once all have been formed, transfer them to a baking sheet, cover with saran wrap and let rise for 30-45 minutes. Try to make sure there is enough space between them so that they aren't touching when rising. I like to have 4 on a baking sheet at a time.
- Preheat oven to 375°
- After 30-45 minutes, the buns should now be doubled in side. Take a cup or a small bowl (make sure it's floured so it doesn't stick) and create an even larger indent in the center (I used a ¼ cup initially, but found that a ⅓ cup was better).
- Add the sweet cream cheese to each bun. Then top with some apple filling, then sprinkle the crumble topping over it.
- (optional) brush the sides of each bun with egg wash or milk. This will create a deeper color. Otherwise, it's not necessary.
- Bake for 15-18 minutes until the buns become golden brown and the bottoms have a color.
- Remove from the oven and let cool for at least 5 minutes, then top with powdered sugar.
- These Sweet Brioche Buns are delicious warm, but taste great at room temperature as well.
- Store any leftovers in an airtight container.
Notes
- I used one apple (honeycrisp or gala or any other sweet apple). If you want more apple in the filling, use 1 ½ or 2 apples. You'll need to adjust the brown sugar and cinnamon ratios.
Reader Feedback
Since developing my first brioche bun recipe in 2022, I've had many people remake them, with such great feedback. I have, however, had people mention that the dough can be a little too sticky/wet and they needed to add more flour. For this reason, I went back to the drawing board to test the recipe with ¼ cup less milk, so only ¾ cup total milk instead of 1 cup, and it turns out great! However, this is with my controlled environment, and with using a scale to weigh my flour. If you're a long-time reader who has had success with a whole cup of milk, then keep making the recipe that way. Tips for the best results:- Measure Flour Correctly: As always, with any recipe, use a kitchen scale, as it is the best form of measuring your ingredients. If you don’t have a kitchen scale, fluff your flour, scoop flour with a spoon into a measuring cup and level off.
- Don’t Skip Kneading: Knead the dough for at least 10 minutes before adding the softened butter. This will ensure the dough forms and pulls away from the bowl. Then once you add the butter, knead for another 10-20 minutes until the butter is completely incorporated and the dough has pulled away from the bowl again.
- Don’t add too much flour: This dough will be tacky, but shouldn’t stick to your hands. It will also be very silky (this due to all the butter added). If while kneading, the dough doesn’t come together after 15 minutes, you can add one tablespoon of flour at a time. But be patient before adding the flour. You don’t want a dry dough.
- Make Ahead: You can absolutely make this recipe ahead of time by letting the dough proof in the refrigerator overnight for the first rise. When you’re ready to use, remove from the refrigerator and continue with the recipe. You won’t need to let the dough come to room temperature because you’ll still need to proof a second time, so it will have plenty of time.
- Proof in pre-heated oven: One trick I love doing is to pre-heat the oven to 170 degrees Fahrenheit, then turning off the oven and letting my dough proof in the oven. This cuts down on proofing time, especially if I’m in a hurry, but it also helps in the winter when it’s especially cold.
- Windowpane test: To know if your dough is ready, perform the windowpane test where you take a small piece of dough and stretch it out between your fingers. If it stretches out without tearing and light can pass through, then it has passed the windowpane test. If it tears, let the dough knead another 5 minutes, then perform the test again.
- Humidity: Due to reader feedback, I've updated the recipe to reduce the amount of milk to ¾ of a cup instead of a whole cup. See Reader feedback for more info.



Lindsay Z says
This is such an excellent recipe! I followed it almost exactly, just used slightly more cinnamon than called for. The buns turned out perfectly. I can’t wait to try out your other brioche bun recipes.
Hakima says
Thank you so much for such a wonderful review! I'm so happy you liked the recipe! 🙂
Amy says
I made these yesterday (just minus the apple filling part for personal flavor preference) and they were utterly delicious! My husband took a batch to work and they were a huge hit! Everyone said they tasted like they came from a bakery! These will definitely be made again!!
Hakima says
Thank you for the review and for trying out another recipe of mine! I'm so glad you enjoyed these buns. 🙂
Manuela says
I made this over the weekend, but made 12 instead of 8 because I wanted them a bit smaller and to feed more people. They were such a hit. I've never seen anything like this with a brioche bun, so I had to try it. It's a win. It's like fall in a bun. Everyone loved it so much, they thought I bought them from a bakery.
Hakima says
Thank you so much for the review, Manuela! So glad everyone loved the buns. 🙂
gracie says
i just made this recipe and it was amazing! i’m definitely going to be making this again!!! i would give it 100 stars if i could
Hakima says
oh my goodness, Gracie, that makes me so happy! Thank you so much for this beautiful review! I'm so glad you loved it. 🙂
Jossalynn - Sick Sweets says
This recipe is super easy to follow and worked perfectly! It tasted amazing, even my fellow taste tester friends agreed! I added a glaze drizzle on top of mine and next time will be adding more filling because it’s so good. Definitely worth making, enjoy!
Hakima says
Thank you so much for trying out the buns and leaving a review! The glaze is such a great idea. I'll need to try that. 🙂
Jackie says
Hands down, the best kolaches I've ever made! They were amazing and the house smelled great. The brioche takes these to a whole different level. I'll only use this recipe from now on. Thank you!!
Hakima says
Thank you so much for the wonderful review, Jackie! Much appreciated. I'm so glad you loved the recipe. 🙂
Nicolette says
Easy to follow directions, and so yummy. Also added more cinnamon on both cause I love cinnamon.
For the apple filling I also added nutmeg, cloves and all spice.
I doubled the recipe and made 24 instead of 16.
I also added a 1/2 cup of chopped walnuts to the crumble…
So amazing will definitely keep it in my favorites.
Thank you for the amazing recipe.
Hakima says
Thank you so much, Nicolette! The walnuts is a great idea. I bet it was amazing. Thank you for sharing and leaving a review. 🙂
Rachel says
I've never commented on anything but LOVED this recipe and how easy it is! Baking bread is intimidating for me and this was super easy to follow and they turned out fantastic! The 8 larger buns is great but will try out the 12 smaller versions on the next go around for more people to try.