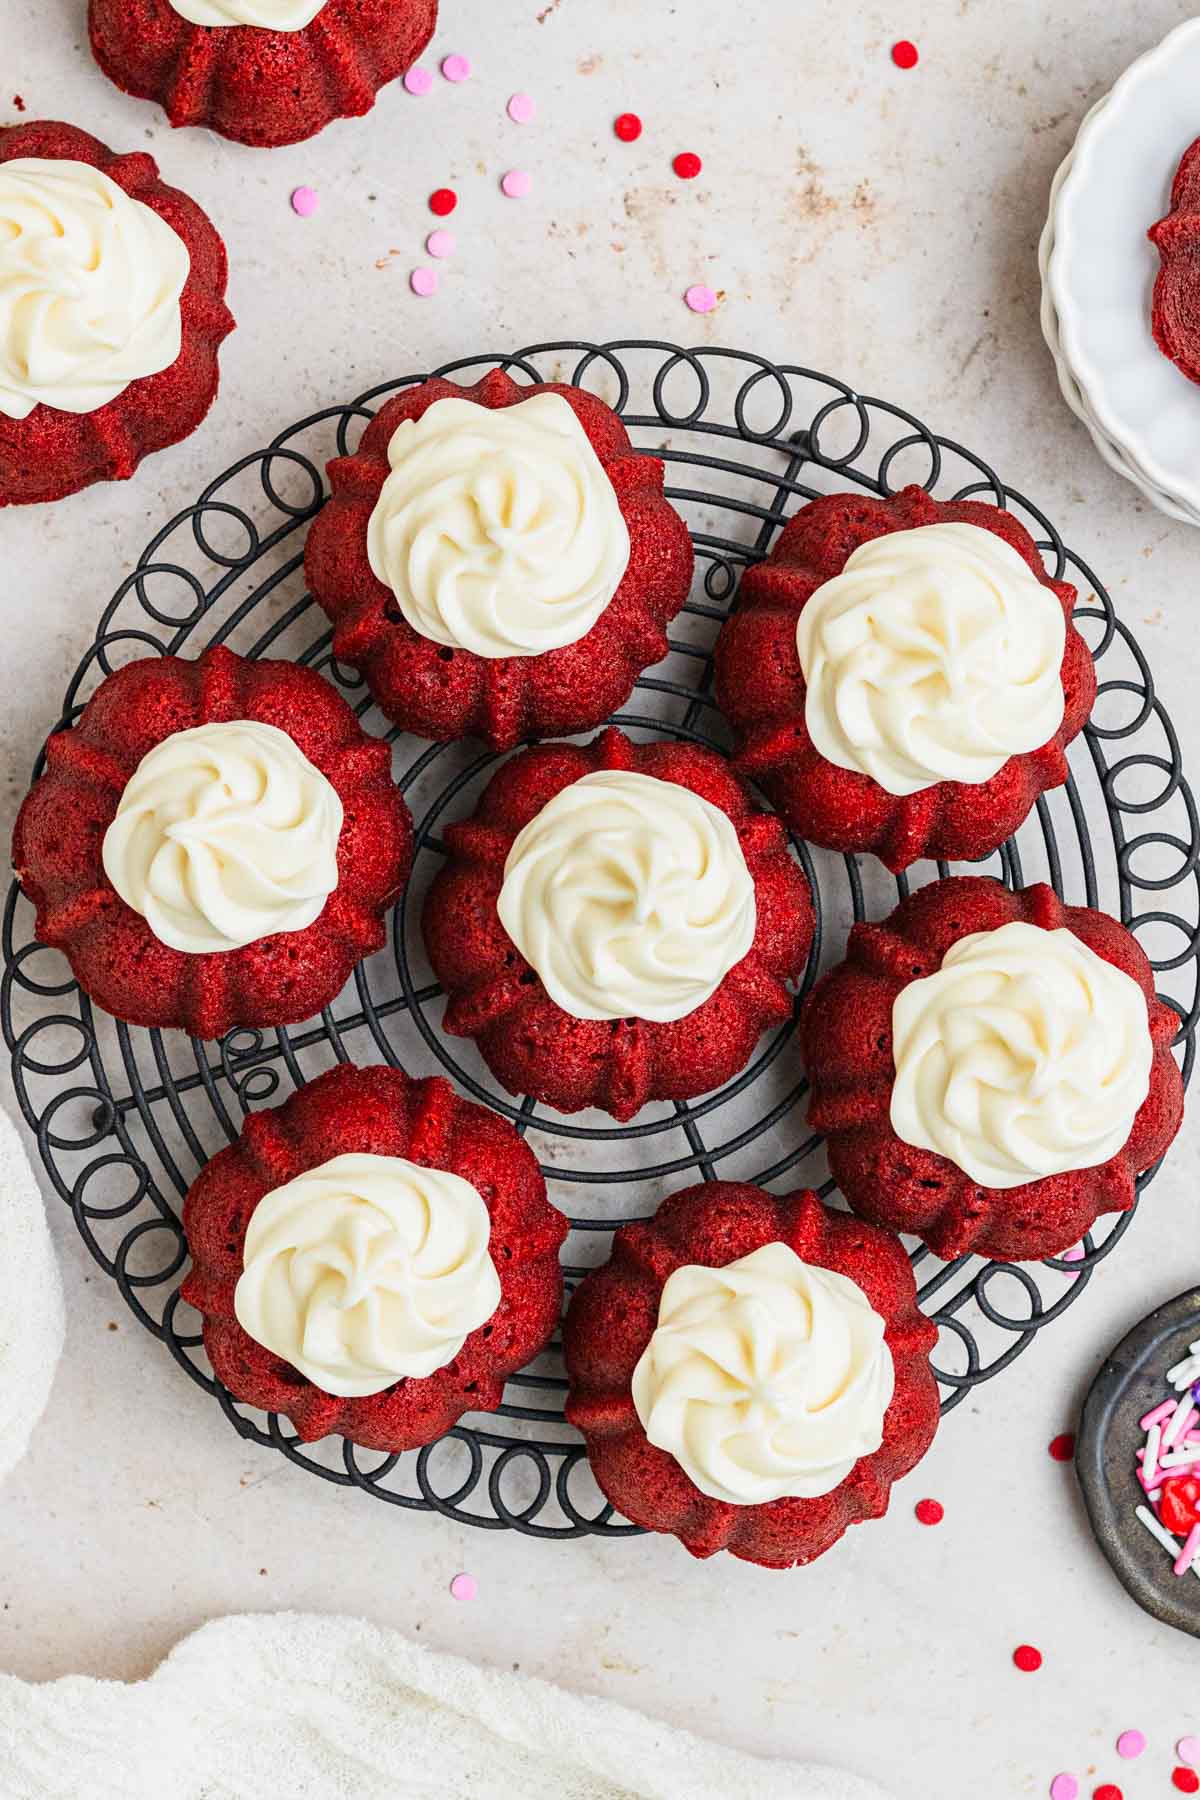
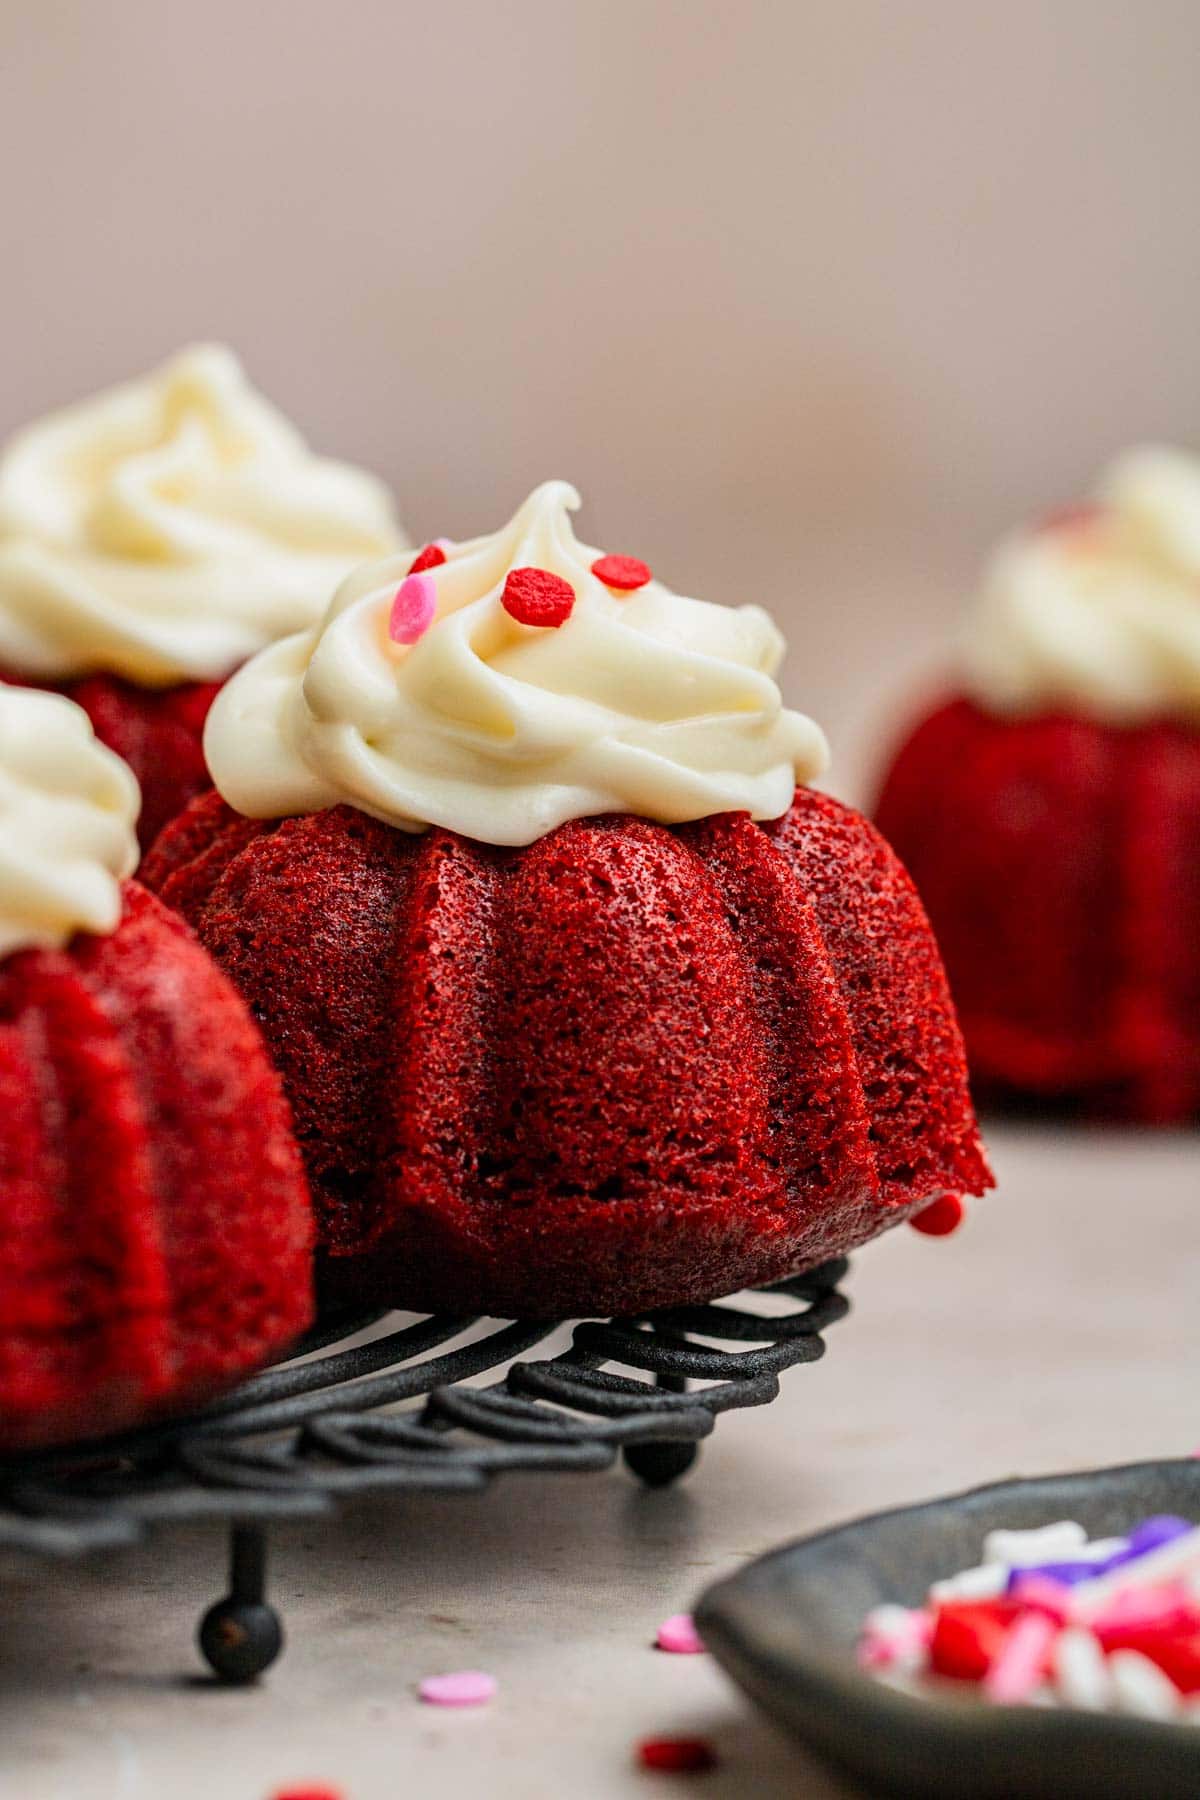
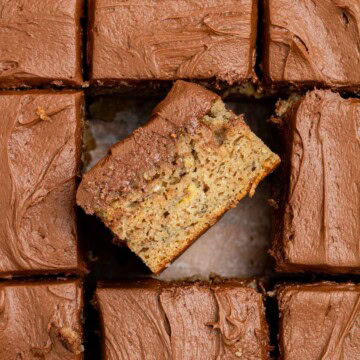
These Red Velvet Mini Bundt Cakes are soft, moist, and full of the classic red velvet flavor, with a subtle hint of cocoa. Topped with creamy, tangy cream cheese frosting, they offer the perfect balance of sweetness and richness. Their charming Bundt shape makes them a beautiful and festive treat for any occasion.
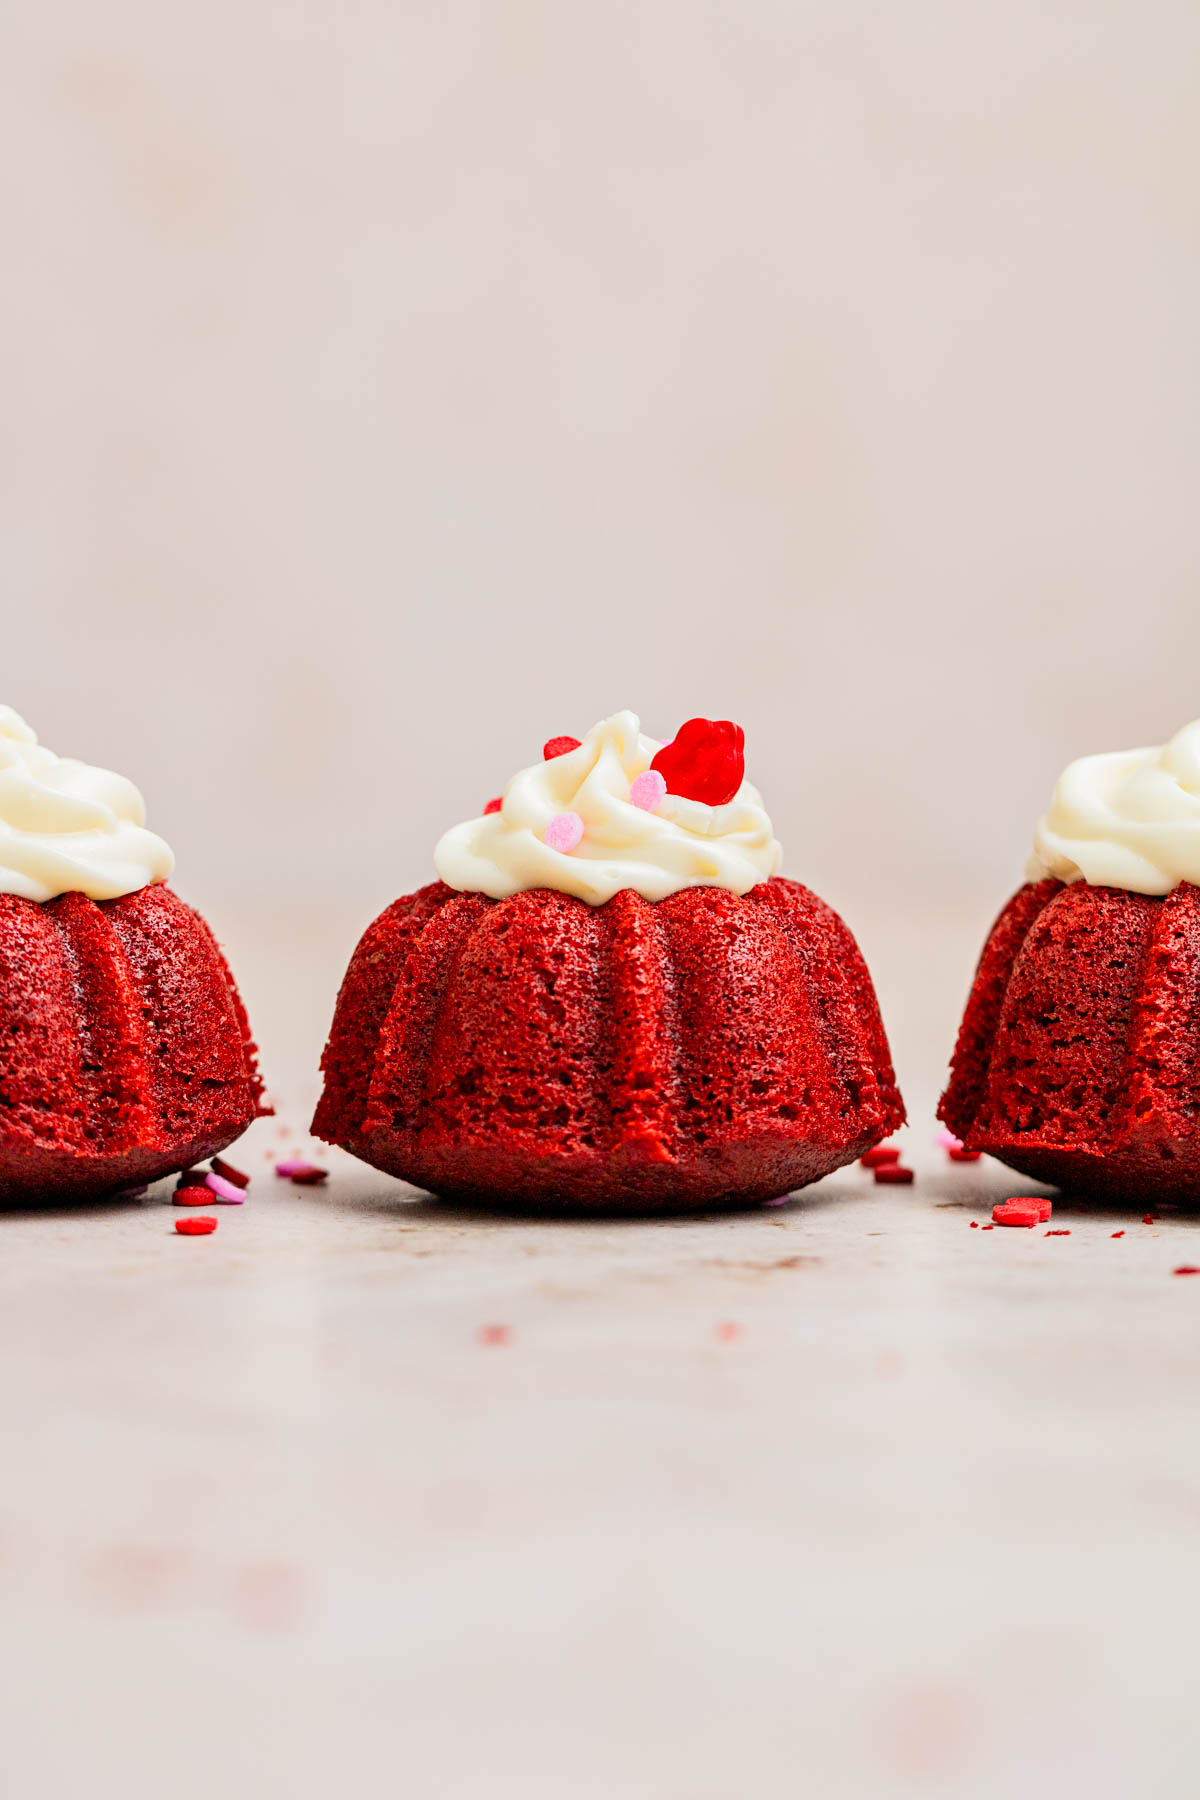
These Red Velvet Mini Bundt Cakes are the perfect treat for any occasion-whether you're celebrating Valentine's Day with someone special, cheering on the Chiefs at game day, or just indulging in a sweet moment. With their rich, velvety texture and bright red color, these little mini cakes make any gathering feel extra festive. Topped with a luscious cream cheese frosting, they offer the perfect balance of sweet and tangy, making them a crowd favorite. No matter the occasion, these mini Bundts are sure to bring joy and a little extra cheer to your day!
If you're interested in more Valentine's Day treats, try my Mini Chocolate Bundt Cakes or Mini No-Bake Cheesecakes.
Jump to:
♥ Why You'll Love This Recipe
Mini desserts - I love making mini desserts, especially when they're cute little mini bundt cakes, like my Mini Berry Bundt Cakes. They're perfect to make when you're making individual portions, and they're easy to transport. They're also so elegant and cute!
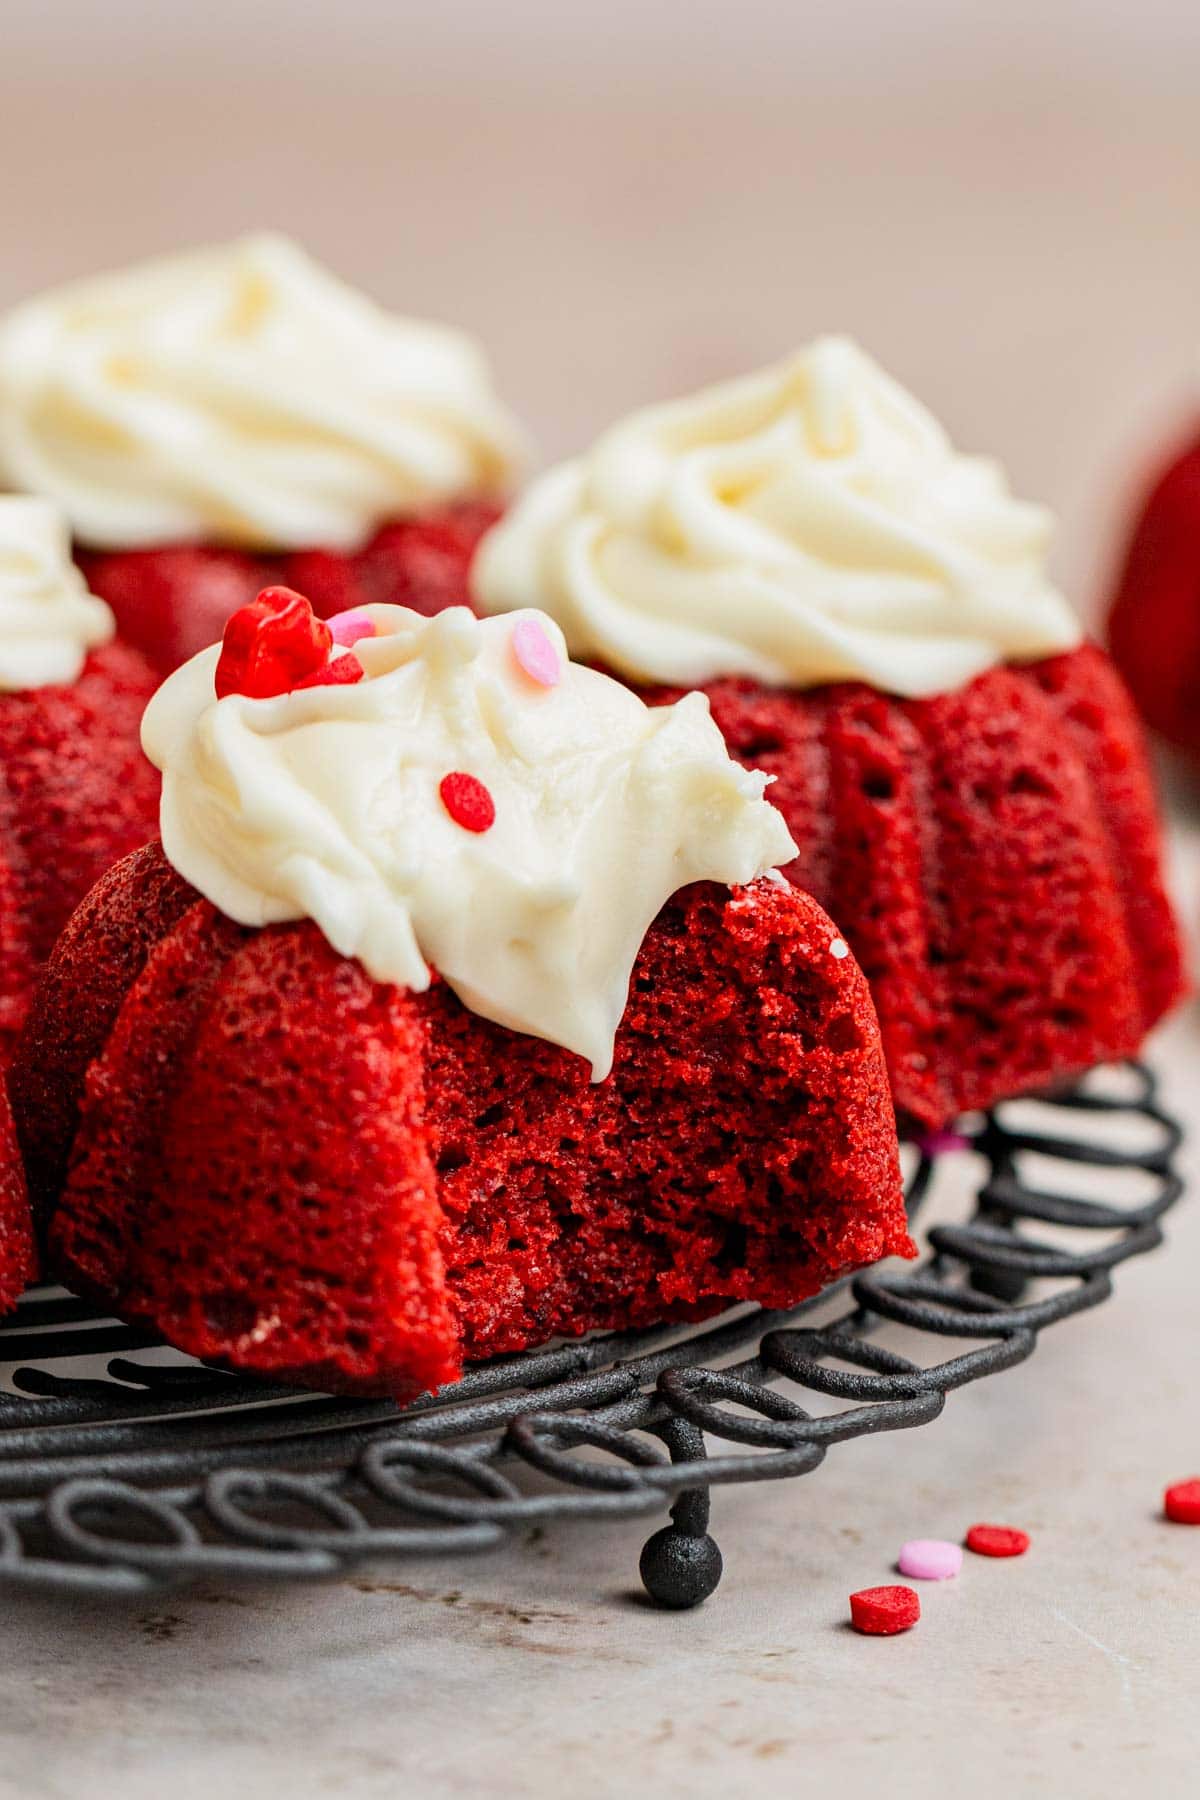
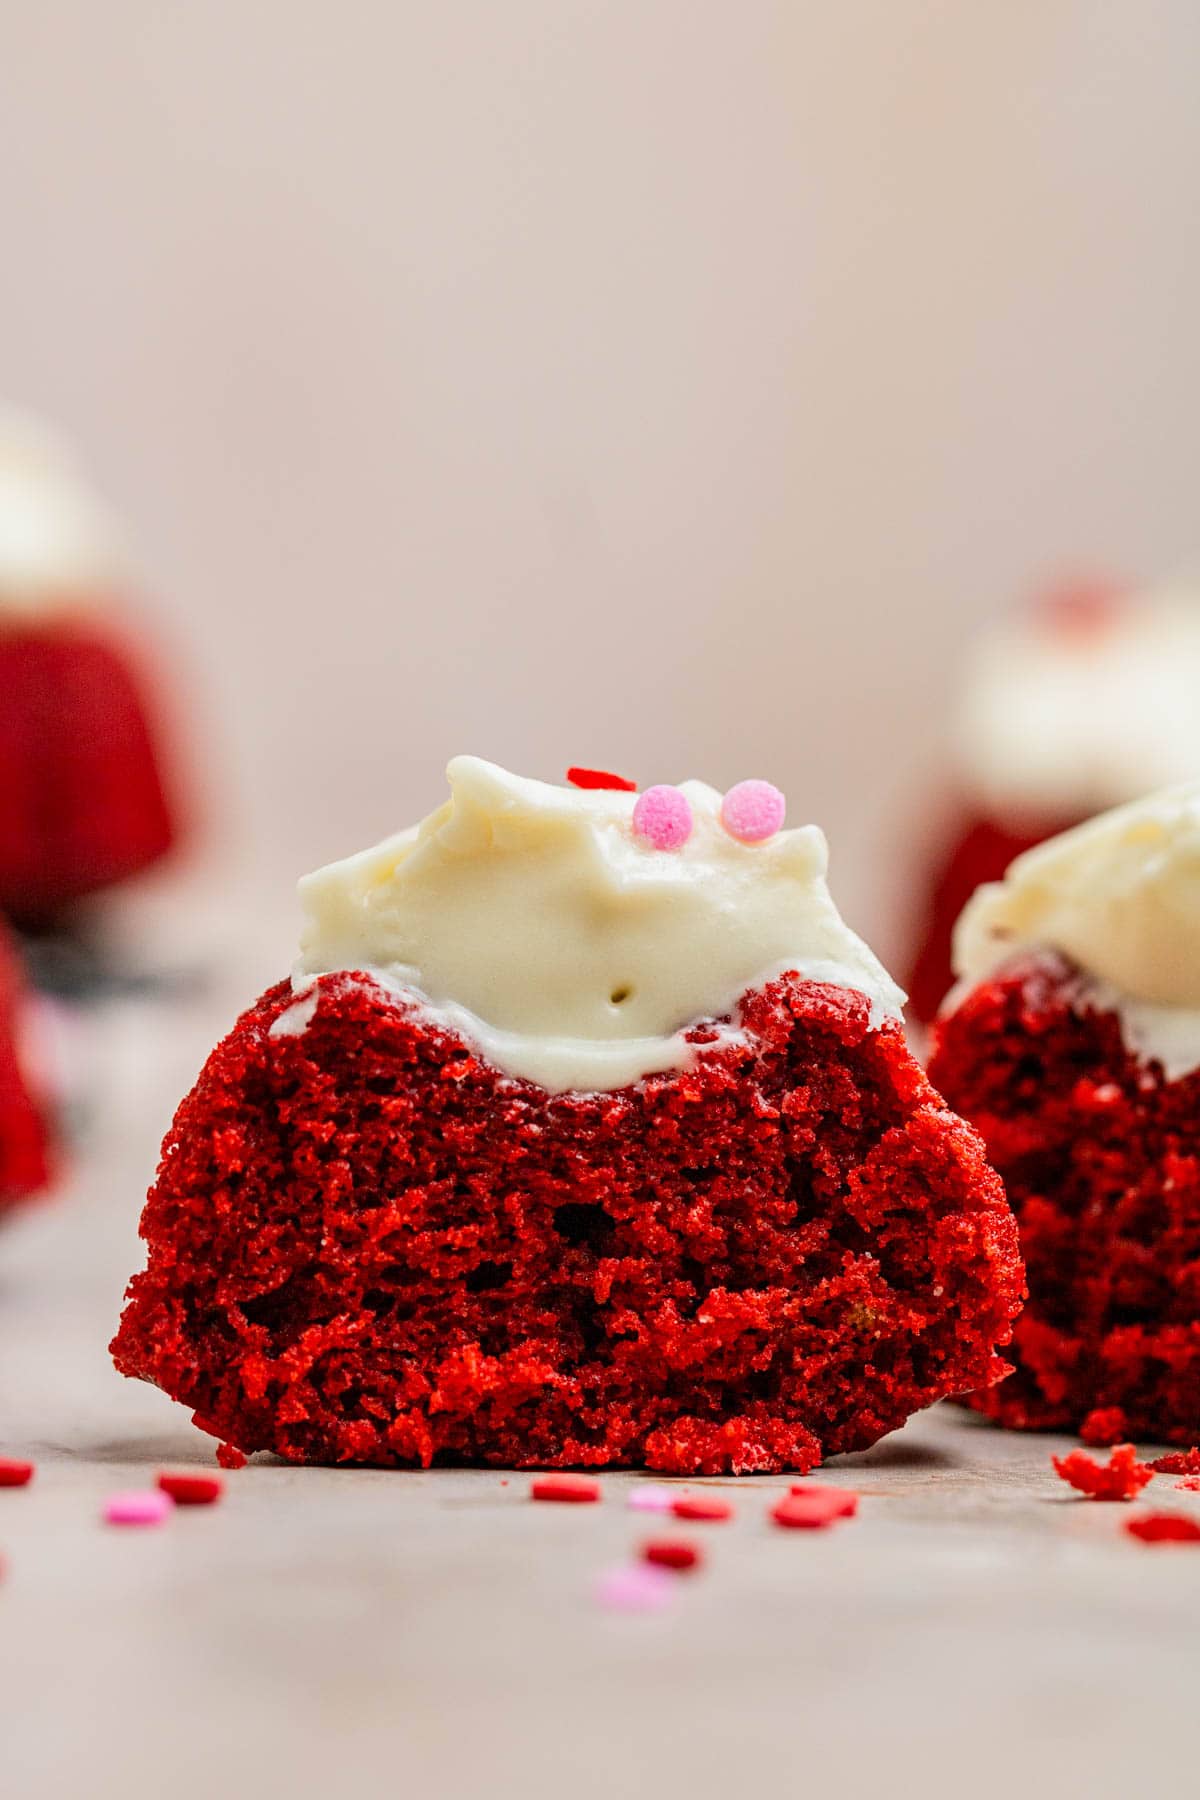
Moist crumb - These red velvet cakes are incredibly moist, with a crusty outer layer!
Easy to serve - The individual portions make them incredibly versatile, and perfect for a small or large gathering, or the perfect treat for any occasion. If you're making them for a party, these mini bundt cakes can be a great grab and go treat without having to slice a cake.
Red Velvet - who doesn't love a red velvet cake? Taking a bite of these, you'd think you bought them straight from Nothing Bundt Cakes! They're decadent, tangy, and extra flavorful! And so darn adorable.
🍰 What is Red Velvet Cake?
Red velvet is a type of cake known for its bright red color, moist texture, and subtle cocoa flavor. It's traditionally made with ingredients like buttermilk, vinegar, and a small amount of cocoa powder, which create a mild chocolate taste and a slightly tangy flavor. The cake's characteristic smooth, velvety crumb comes from the combination of these ingredients, which help it stay moist and light. Red velvet is typically paired with cream cheese frosting, which complements the cake's tanginess and adds a rich, creamy contrast. Red velvet cake has become a classic dessert, especially popular for special occasions like Valentine's Day, weddings, and holidays. Or, if you're a huge Kansas City Chiefs fan, you can make it to celebrate them (possibly) going to the Superbowl for the gazillionth time.

📝 Ingredient Notes
A full list of ingredients, quantities, and instructions are located in the recipe card at the end of the post.

Red Velvet Mini Bundt Cakes
- Flour: Some recipes, you'll see the use of cake flour, which creates a very tender crumb. Since we're turning these into mini bundt cakes, I wanted a bit more structure, so I opted for all purpose flour, which works great!
- Cocoa powder: I usually use dutch process cocoa powder in baked goods, but a traditional red velvet cake uses natural cocoa powder because the acidity in the cocoa powder, vinegar, and buttermilk reacts with the baking soda and creates that iconic red color. Since dutch process isn't acidic as natural cocoa powder, it does not create the same color.
- Neutral oil: I use butter to cream with the sugar to create better structure, but I add oil to make a more moist crumb. Any neutral oil will work.
- Distilled Vinegar: Vinegar helps activate the baking soda, it also helps produce that vibrant red color, and give the cake a slight tang.
- Buttermilk: Make sure to use buttermilk for this recipe to produce a moist and flavorful crumb. It also helps add a tangy flavor to the cake.
Cream Cheese Frosting
- Butter: Make sure your butter is softened to room temperature. Unsalted works great in this cream cheese frosting.
- Cream cheese: One of my favorite ingredients in almost any frosting is cream cheese. If you're not a fan, you could leave this out and the frosting will taste just fine, but keep in mind it will be a little sweeter, so adjust accordingly. Make sure your cream cheese is COLD right out of the fridge.
- Powdered Sugar: Gives the frosting sweetness and also creates a stiffer cream cheese frosting.
- Salt: Balances the flavors and sweetness.
See recipe card for quantities.
🍴Special Equipment

Mini Bundt Pan
I use a mini bundt pan for this recipe, which creates tiny bundts.
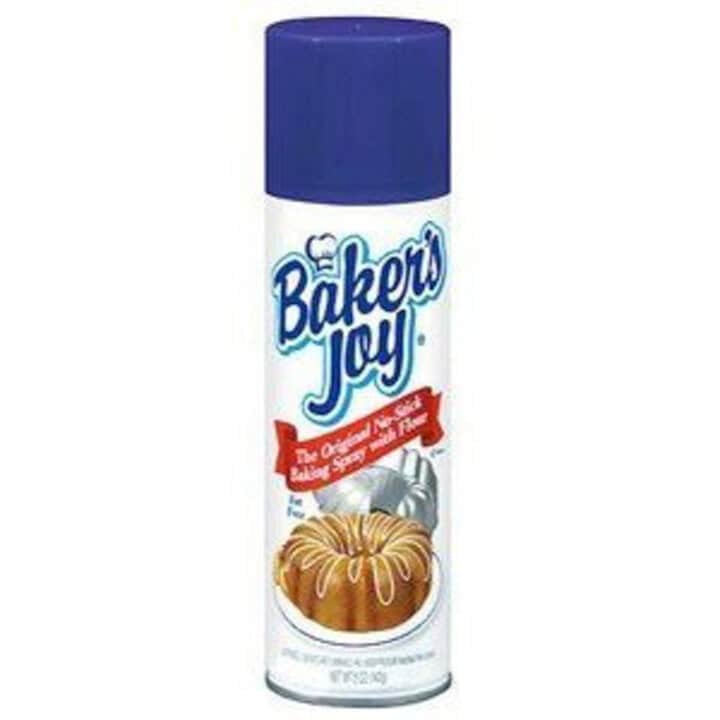
Baker's Joy
This is the only product I use when I want a clean cake release from a bundt pan. It's a must for any baker who loves making bundt cakes!

⇄ Substitutions
Food coloring - You can use any type of food coloring you like in this recipe. I am familiar and have always used the liquid food coloring, but if you're more into natural options, you can try that. It hasn't been tested by me though.
Buttermilk - If you don't have any buttermilk, you can make your own (although I highly recommend you buy it since homemade buttermilk isn't as thick). Add a tablespoon of vinegar or lemon juice to your milk and wait 5-10 minutes for it to curdle before using.
✨ Variations
Chocolate frosting - Switch it up with a chocolate frosting for deeper chocolate flavors!
Mini chocolate chips - Fold in some mini chocolate chips to the batter for a little fun!
Red Velvet Bundt Cake - Make a full size cake by doubling the recipe. I haven't fully tested this option so I can't recommend how long you'll have to bake it for. I'd probably start checking the cake around 40 minutes and go from there.
Larger Mini Cakes - Make them a little larger, like I do in my Mini Chocolate Bundt Cakes. You'll end up with about 5 or 6 individual cakes using this mini bundt pan.
Red Velvet Cupcakes - You can turn these into cupcakes by using a standard cupcake/muffin pan. They should bake up about the same amount of time.
𓎩 Step-by-Step Instructions
A few instruction photos to help you nail this recipe every time.

Step 1
In a medium bowl, cream together the butter and sugar using a handheld mixer with beater attachments, about 3 minutes until smooth. Scrape down the bowl, then add the oil and beat for about 30 seconds until incorporated.

Step 2
Add in the eggs, vanilla extract and vinegar and beat again until smooth.

Step 3
Sift in half the dry ingredients, then beat the batter with your mixer, then add all of the buttermilk and beat again, then add in the remainder of the dry ingredients and the tablespoon of food coloring and beat until just combined. Stir it a couple times just to make sure all dry ingredients are incorporated.
💡 Hint: Prepare your bundt pan by spraying it heavily with baking spray. Make sure to get every single nook and cranny so that the cake doesn't stick. My favorite method is to spray using a baking spray like Baker's Joy. This is the method that works 100% of the time for me.

Step 4
Scoop batter into each bundtlette ¾ of the way up.
Bake for 13-15 minutes until toothpick inserted comes out clean (if it has a few crumbs, that's ok).
Let cool for at least 10 minutes before removing from the pan. Let cool completely before frosting.
🎩Trick: Use a 3 tablespoon cookie scoop to fill the mini bundts.

Step 5
In a medium bowl, Beat together the cold cream cheese and butter until smooth. Add vanilla extract, salt, and powdered sugar ¼ cup at a time and beat until completely smooth. Start out with 1½ cups and increase from there if you like.If needed, add a splash of milk to thin out the batter if you feel it's too thick. Swirl frosting onto each cake.
💬 FAQ
The number one reason cakes stick to bundt pans is that the pan was not greased enough. I know a lot of people swear by buttering and flouring the pans, but I have never had success using that. I highly recommend using a baking spray like Baker's Joy. The cakes come out in one piece.
Absolutely! Just make it the day before you plan to serve it. You can even frost it the day before and let it sit in the fridge or a cold room. Serve at room temperature.
Yes, if you prefer to skip the food coloring, you can make a naturally colored red velvet cake by using beetroot powder or beet juice as a natural colorant. While the color might not be as bright, the flavor will remain just as delicious. You can even opt out of using any food coloring at all, which will result in a mild chocolate-looking cake.
If you don't have buttermilk, you can make a quick substitute by adding 1 tablespoon of lemon juice or white vinegar to your milk. Let it sit for about 5 minutes before using it in the recipe.
If you've frosted them with cream cheese frosting, they should be stored in the refrigerator.
💡Pro Tips
Measure Flour Correctly - As always, with any recipe, use a kitchen scale, as it is the best form of measuring your ingredients. If you don't have a kitchen scale, fluff your flour, scoop flour with a spoon into a measuring cup and level off.
Room temperature - Make sure your ingredients are at room temperature so that your cake batter properly mixes.
Grease Bundt Pan - It's so important to make sure your bundt pan is heavily greased when making bundt recipes because they tend to stick. To avoid a cake from sticking, grease every single nook and cranny of the pan. I HIGHLY recommend the Baker's Joy cooking spray because I have had success 100% of the time using it.
Don't over mix - Once the ingredients are incorporated, stop mixing.
Don't overflow - fill each bundt ¾ of the way up. Filling it all the way will make the batter overflow on the sides and you'll end up with a large bottom (which is still delicious and a little crispy!).
Don't over bake - Start checking the red velvet bundtlettes at 13 minutes by inserting a toothpick. If it comes out clean, remove them from the oven. Depending on your oven, it could take longer.
Cool cake - Before inverting the cake onto a cooling rack, make sure the cake cools down for at least 10 minutes.
Sizing - Make red velvet cupcakes by using a standard cupcake pan. No need to change any of the recipe. You can make larger mini bundt by using a larger mini bundt pan; it should make about 5 or 6. If you want to use a 10-12 cup bundt pan, you'll need to double the recipe.
❄ Storage
Room temperature - Once cake is frosted, it should remain chilled. If you plan to eat it within the same day, a cool room temperature environment is ideal. Make sure to keep them stored in an airtight container.
Refrigerator - for long term storage, keep refrigerated in an airtight container for 3-5 days. Make sure to let it come to room temperature before enjoying. No one likes cold cake lol!
Freezer - Unfrosted, wrap them individually in saran wrap, then place them in a ziploc bag and freeze for up to 2 months. Let defrost overnight in the fridge (or a couple hours at room temperature) when ready to enjoy.
Did you make this recipe or any other recipe on my website? I'd love to hear about it! Please leave a 🌟 star rating and let me know how it went in the 📝 comments below. Don't forget to Tag me on Instagram or Facebook when you recreate a recipe! The feedback helps both me and the readers!
Also, be sure to add us as a trusted site on Google so that our recipes show up more in your searches!
📖 Recipe Card

Red Velvet Mini Bundt Cakes
Equipment
Ingredients
Red Velvet Cakes
- 4 tablespoon (56 g) unsalted butter softened to room temperature
- ¾ cup (150 g) granulated sugar
- ¼ cup (56 g) neutral oil
- 2 (112 g) large eggs
- 2 teaspoon (8 g) vanilla extract
- 2 teaspoon (10 g) distilled white vinegar
- 1¼ cup (150 g) all purpose flour
- 2 tablespoon (10 g) unsweetened natural cocoa powder
- ½ teaspoon (2 g) baking soda
- ½ teaspoon (3 g) salt
- ½ cup (120 g) buttermilk
- 1 tablespoon (15 g) red food coloring
Cream Cheese Frosting
- 6 oz. (170.1 g) Full Fat cream cheese, brick style cold, straight out of the fridge
- 3 tablespoon (42 g) unsalted butter softened to room temperature
- 1½-2 cup (195-260 g) powdered sugar
- ½ teaspoon (2 g) vanilla extract
- pinch of salt
Instructions
Red Velvet Cakes
- Pre-heat oven to 350℉ / 178℃Prep the pan: Prepare your bundt pan by spraying it heavily with baking spray. Make sure to get every single nook and cranny so that the cake doesn't stick. My favorite method is to spray using a baking spray like Baker's Joy. This is the method that works 100% of the time for me.
- In a medium bowl, cream together the butter and sugar using a handheld mixer with beater attachments, about 3 minutes until smooth. Scrape down the bowl, then add the oil and beat for about 30 seconds until incorporated. Add in the eggs, vanilla extract and vinegar and beat again until smooth.4 tbsp (56 g) unsalted butter, ¾ cup (150 g) granulated sugar, ¼ cup (56 g) neutral oil, 2 (112 g) large eggs, 2 tsp (8 g) vanilla extract, 2 tsp (10 g) distilled white vinegar
- Sift in half the dry ingredients, then beat the batter with your mixer, then add all of the buttermilk and beat again, then add in the remainder of the dry ingredients and the tablespoon of food coloring and beat until just combined. Stir it a couple times just to make sure all dry ingredients are incorporated.1¼ cup (150 g) all purpose flour, 2 tbsp (10 g) unsweetened natural cocoa powder, ½ tsp (2 g) baking soda, ½ tsp (3 g) salt, 1 tbsp (15 g) red food coloring, ½ cup (120 g) buttermilk
- Scoop batter into each bundtlette ¾ of the way up. I used a 3 tablespoon cookie scoop.
- Bake in the middle rack of the oven for 13-15 minutes until toothpick inserted comes out clean (if it has a few crumbs, that's ok).
- Let cool for at least 10 minutes before removing from the pan. Let cool completely before frosting.
Cream Cheese Frosting
- In a medium bowl, Beat together the cold cream cheese and butter until smooth. Add vanilla extract, salt, and powdered sugar ¼ cup at a time and beat until completely smooth. Start out with 1½ cups and increase from there if you like.If needed, add a splash of milk to thin out the batter if you feel it's too thick.6 oz. (170.1 g) Full Fat cream cheese, brick style, 3 tbsp (42 g) unsalted butter, 1½-2 cup (195-260 g) powdered sugar, ½ tsp (2 g) vanilla extract, pinch of salt
- You can smother the frosting on each bundlette, or place in a piping bag and pipe rosettes. I used a 1M Wilton tip.
- Store leftovers in the fridge. Let come to room temperature when ready to enjoy.
Hi this recipe is missing the measurements for the buttermilk.
Thank you so much, Yasmeen. I've updated the recipe card.
How many minis does this make?
It makes around 15 mini cakes.
Can we use vegetable oil?
Yes, you can use vegetable oil. Any neutral oil would work, like canola, vegetable, light olive oil, or avocado oil.
These turned out great! Made for nieces wedding dessert table. First batch I had to add more red food coloring. I was afraid red wasn’t right but turned out. Second time I made needed no extra. Frosting tasted good. I’ll add to my recipes.