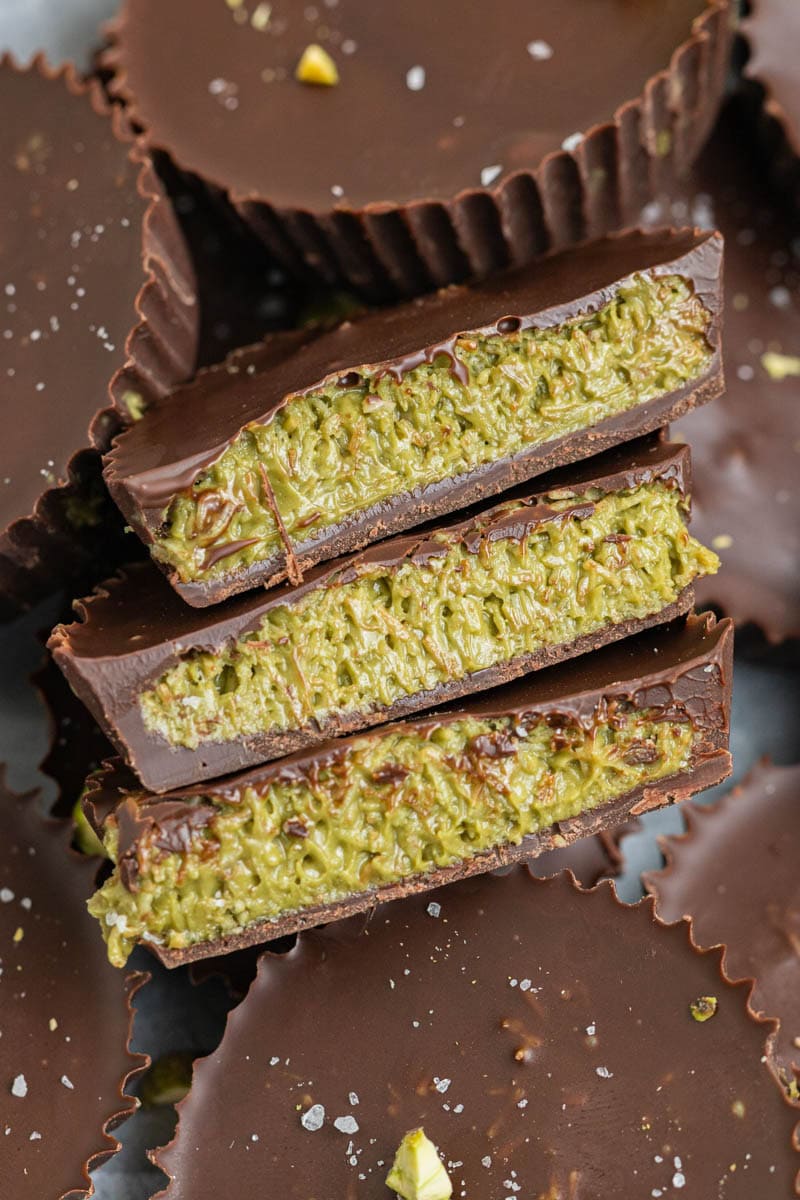
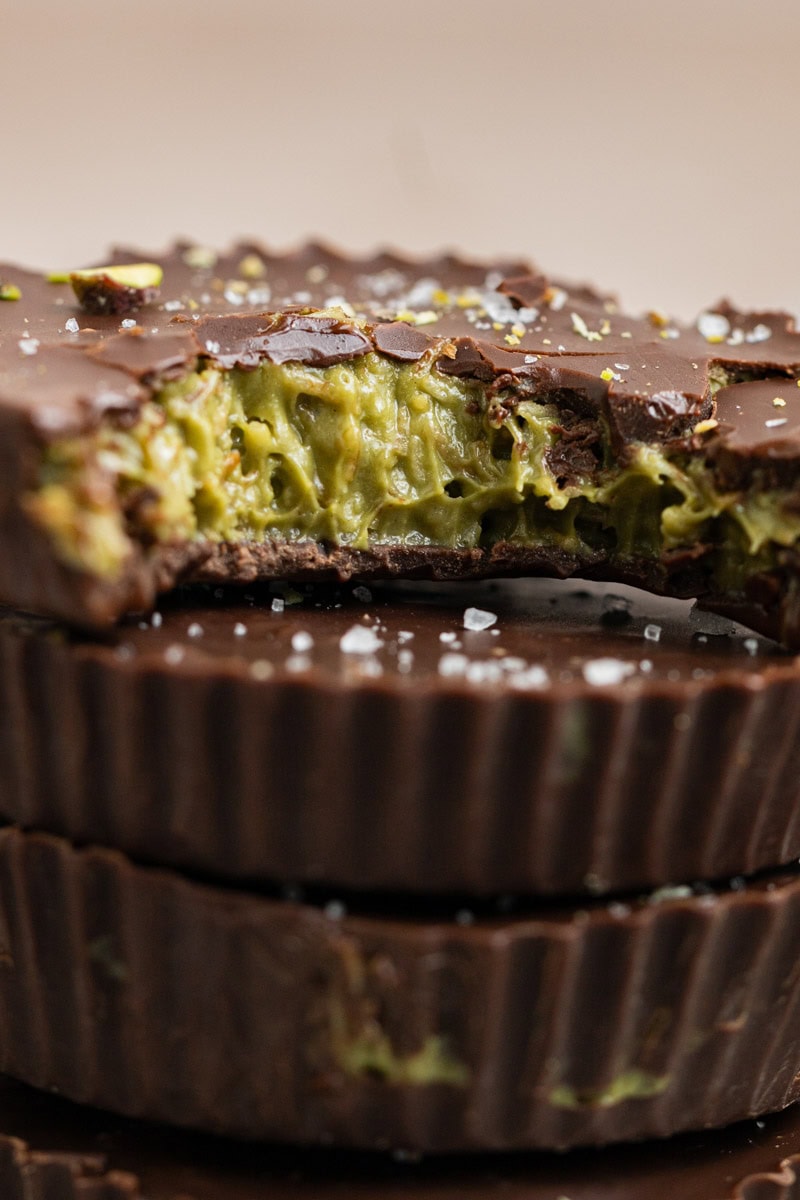
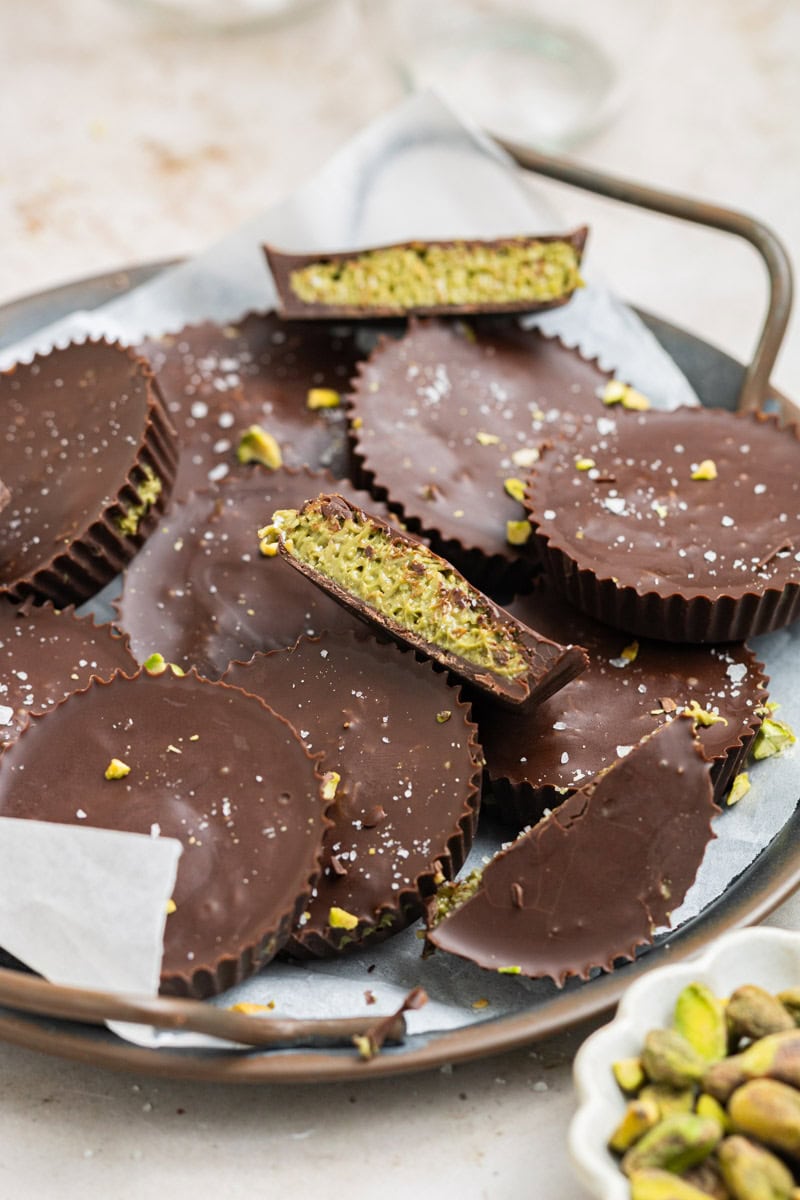
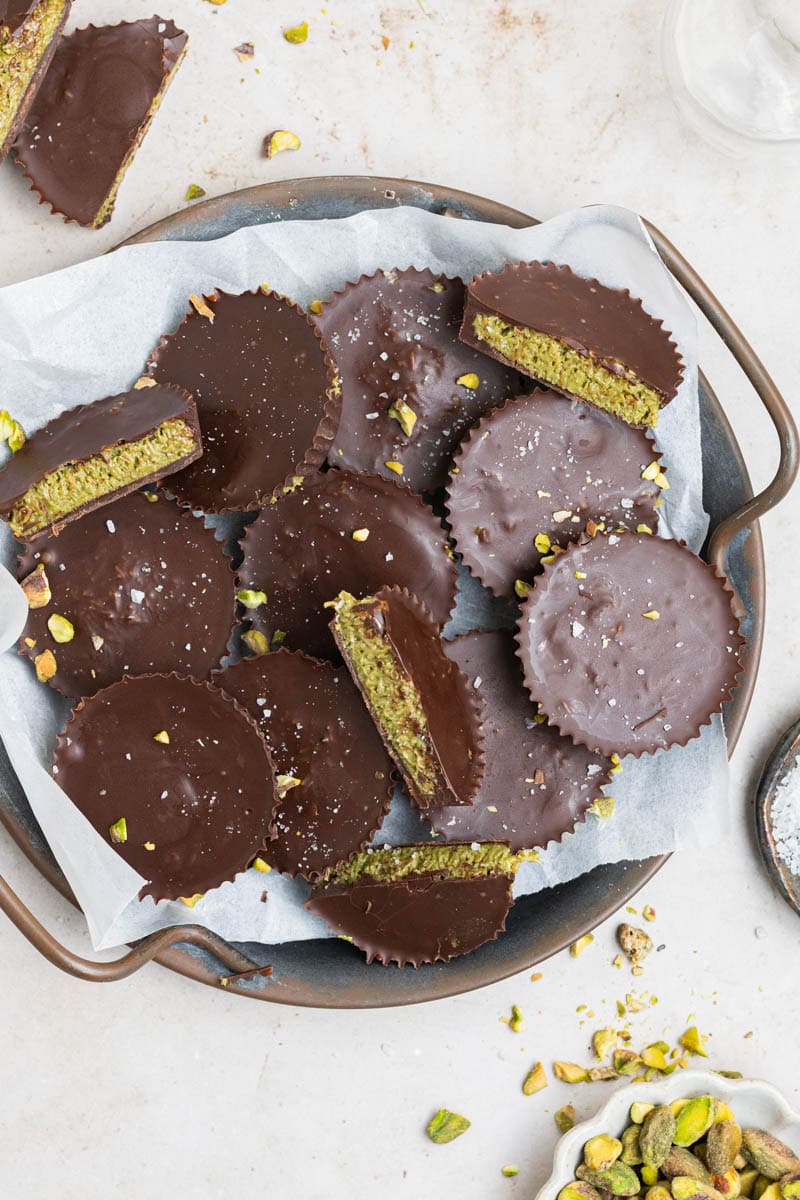
This irresistible, bite-sized Viral Dubai Chocolate Bar Recipe is super simple to whip up, incredibly tasty, and guaranteed to have you reaching for more! Featuring crispy kataifi dough, rich pistachio cream and tahini filling, all coated in smooth melted chocolate and topped with a sprinkle of sea salt.
Have you ever wanted to make the Viral Dubai Chocolate Bars but you didn't have chocolate molds and didn't know how to make them? Well, I've got you covered. I'll teach you how to make the Dubai chocolate bar recipe, but the best part is that you don't need to purchase any extra equipment that you may never use again.
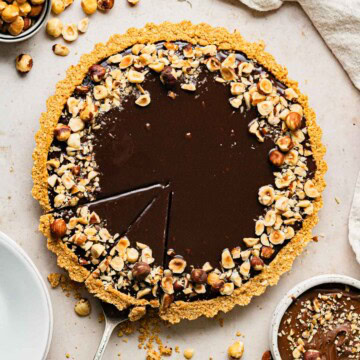
I've been making this recipe for a year now, and everyone who has tried it, has loved it, so you know this recipe is GOOD! I've successfully made this Pistachio Chocolate Bar recipe into bite-sized cups, bars using an 8x8 pan, a round 9 inch tart, as well as made them in a loaf pan. This recipe is easy, versatile, and straightforward! If you're a chocolate and pistachio lover, you'll absolutely love these!
Once you nail this recipe, try my Dubai Chocolate Cheesecake Bars, Dubai Chocolate Brioche Buns, and Pistachio Brownies.
Jump to:
"Had extra white choc & pistachios..finished these then topped with melted white choc and chopped pistachios.
Rave reviews!"- Tina.
♥ Why You'll Love This Recipe
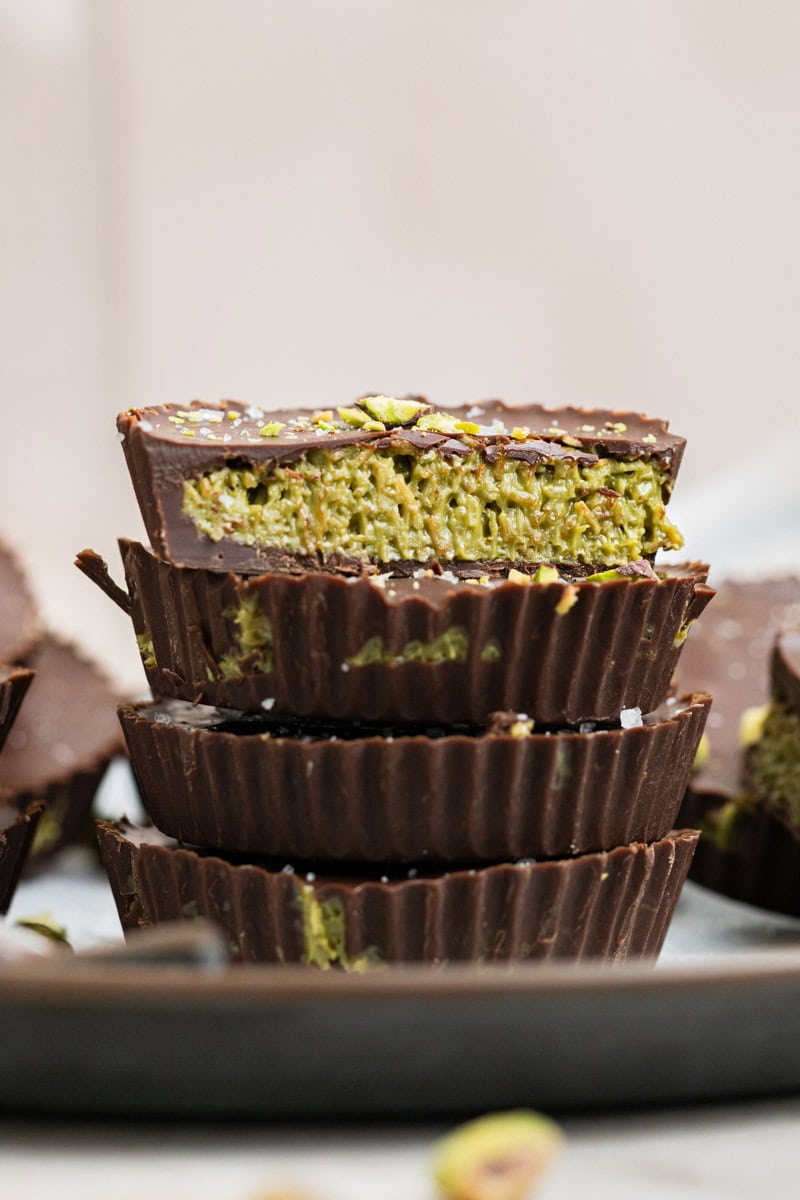
Bite-Sized - These are PERFECT for a party, or just to grab when you want a snack. They're individually portioned, and no waste. These Pistachio Butter Cups are just like my Homemade Peanut Butter Cups.
No Molds - You don't need to buy a mold to make this recipe. Just use what you have!
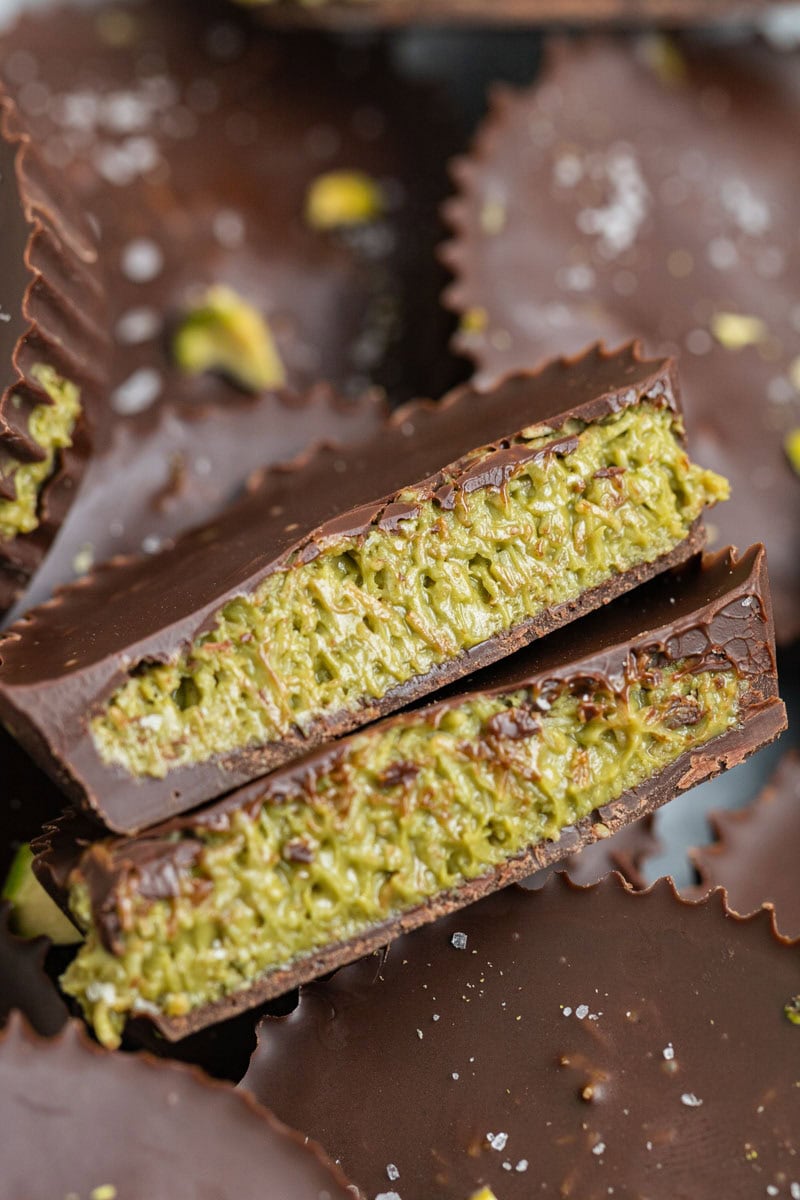
Crispy - The crunch is so satisfying in these! The crispy kataifi dough works PERFECTLY with the pistachio cream filling.
Pistachio cream - The filling, which contains pistachio butter, is absolutely smooth, creamy, and so delicious! Pistachio cream is featured in a few of my recipes, like my Pistachio Blondies, Stuffed Pistachio Cookies, and Chocolate Pistachio Rolls.
📝 Ingredient Notes
A full list of ingredients, quantities, and instructions are located in the recipe card at the end of the post.
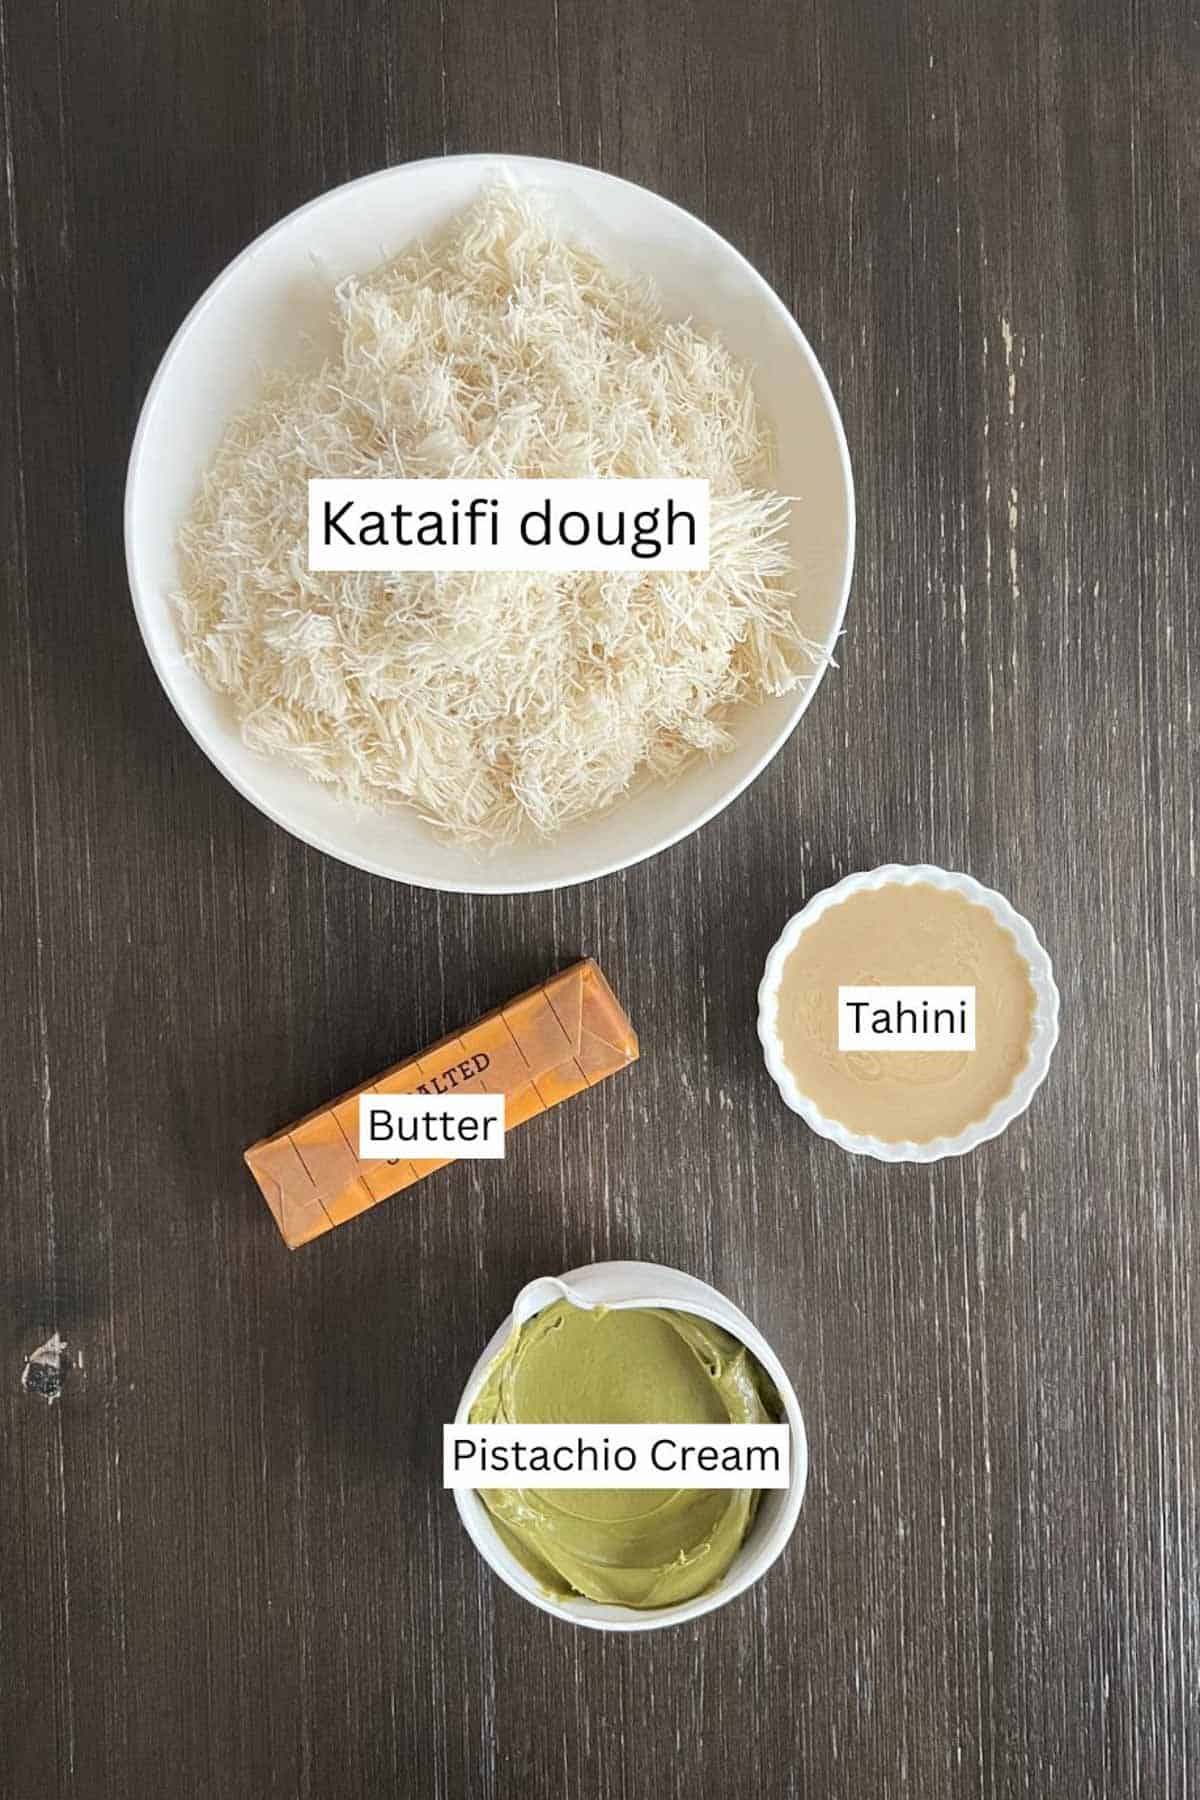
- Kataifi dough - Kataifi dough is shredded phyllo dough, and it's used in many Middle Eastern desserts. You can usually find it in Middle Eastern shops.
- Pistachio Cream - I like buying my Pistachio Cream instead of making it, but feel free to make your own if you like. There are so many types out there. Some are much greener than others, so use whatever you like.
- Tahini - The tahini adds a bit of a nuttier flavor. You could skip this if you're not a fan of tahini. If you have a lot of tahini leftover, you can turn it into Tahini Sauce.
- Chocolate - I like using a mix of dark and milk chocolate because I think it goes well with the filling. If you're not a fan, you could use semi-sweet or dark.
See recipe card for quantities.
🍴Special Products
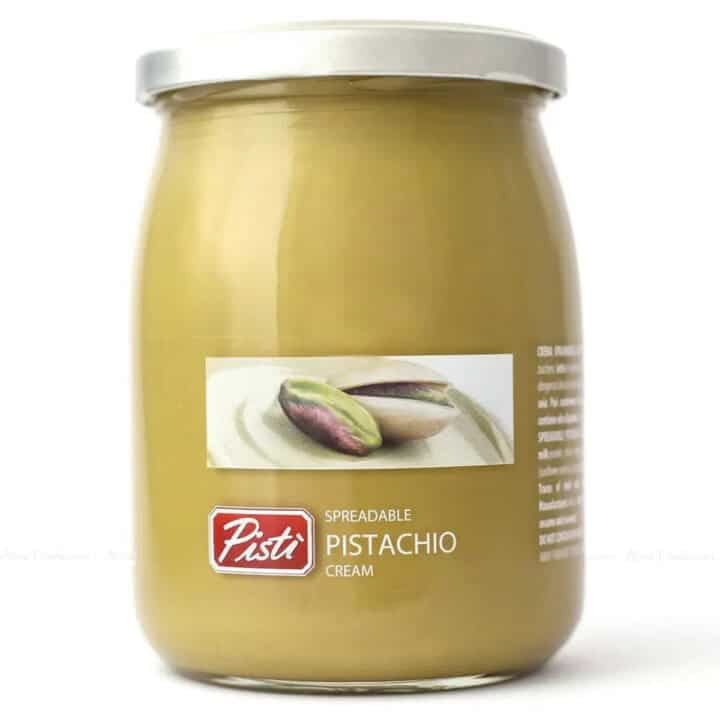
Pistachio cream
This brand has been my favorite from all the pistachio creams that I've bought.
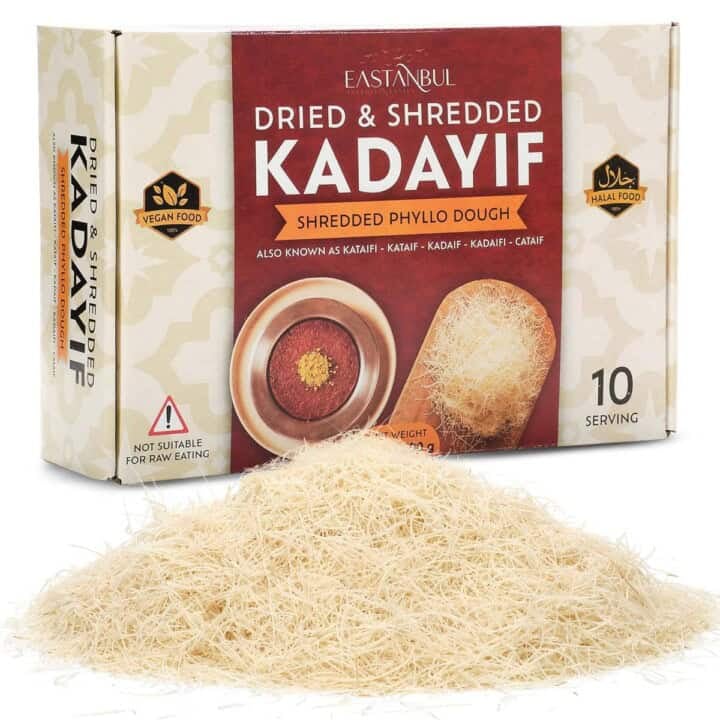
Shredded Kataifi
You'll need Kataifi, which is essentially shredded phyllo dough. If you buy it from a local Middle Eastern market/shop, they won't come pre-cut, so you'll have to cut them. I've started buying mine online because they come already cut, which I love because it saves me a step.
✨ Variations
Pistachios - You can chop up pistachios and add it to the filling for a bit more texture and crunch.
Chocolate bars - Instead of cups, you can use chocolate molds to create large chocolate bars.
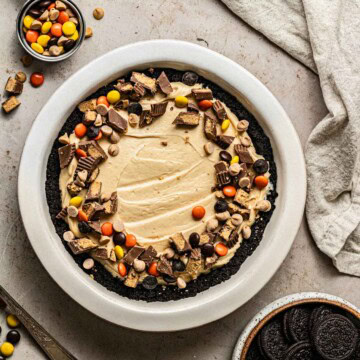
Tart - I've made this in a tart pan multiple times and it turns out wonderful!
Deconstructed - Turn them into strawberry chocolate cups. In a tall glass or cup (or a bowl), layer chopped strawberries, kunafa pistachio filling, then drizzle with chocolate and extra pistachio cream. You can create multiple layers and then finish it off with crushed pistachios. This is amazing and I recently just made this for a dinner party and everyone loved it!
𓎩 Step-by-Step Instructions
A few instruction photos to help you nail this recipe every time.

Step 1
weigh out and cut up shredded phyllo dough (kataifi).
Step 2
Preheat a large skillet on medium heat and melt 4 tablespoon of butter, then add the kataifi dough and coat in butter.
4 tablespoon might seem like a lot of butter initially but it's important to coat all the pastry dough in butter so that it crisps up.
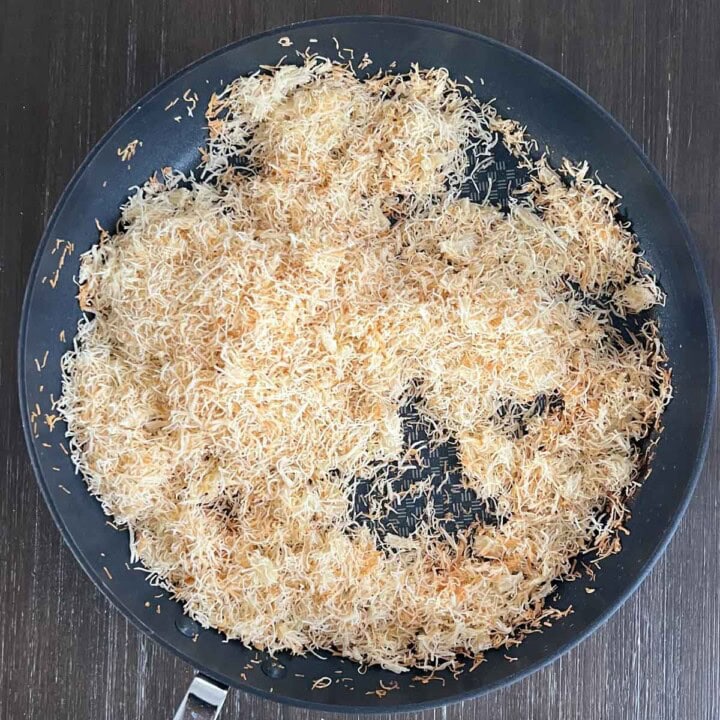
Step 3
Continue stirring (don't leave it, otherwise parts of it could start burning).
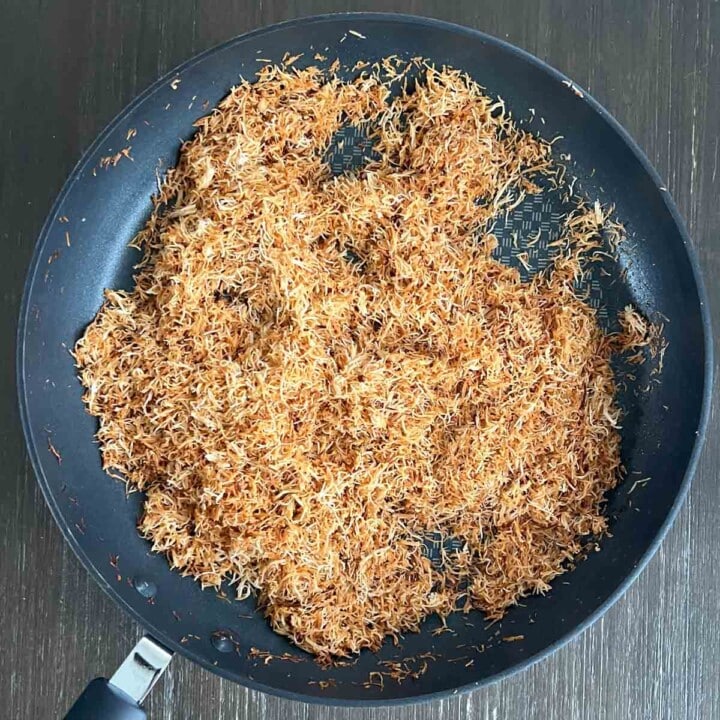
Step 4
It will take about 10-15 minutes to get all the pastry dough crispy and golden brown. Just keep stirring until you reach the desired color and all the dough is now golden brown.
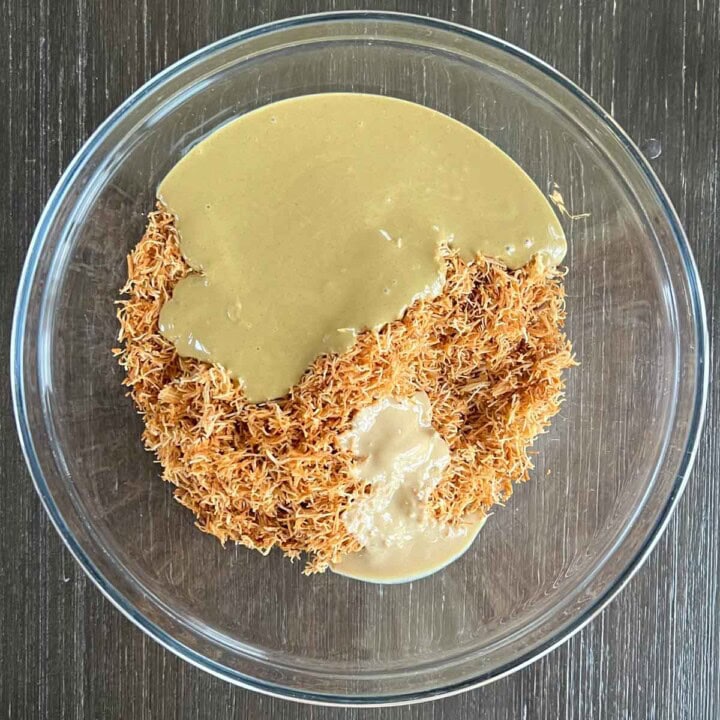
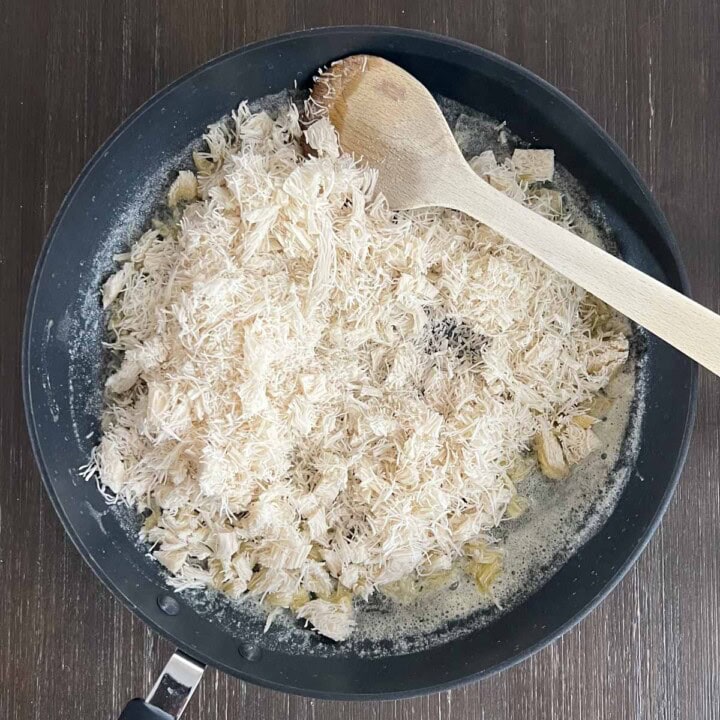
Step 5
Pour crispy kataifi into a bowl, add the pistachio cream and tahini.
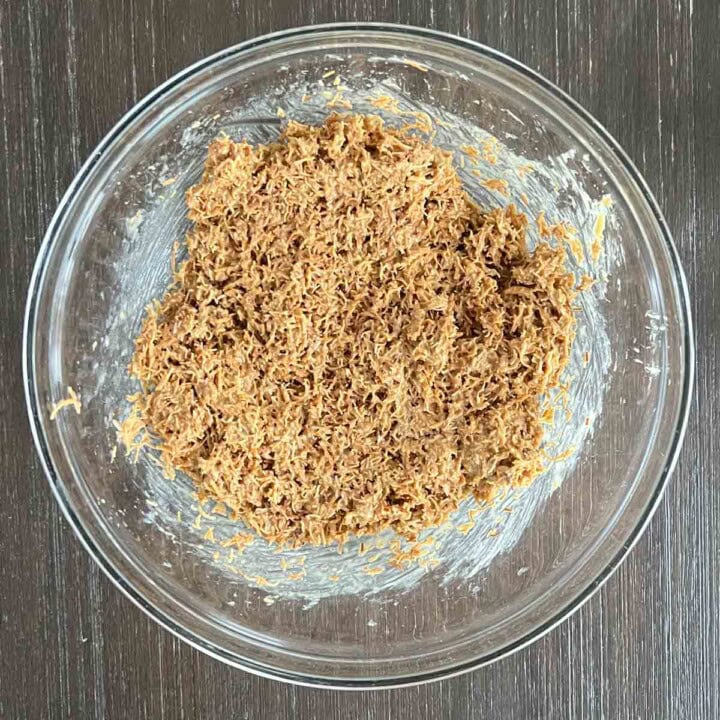
Step 6
Stir the filling together and set aside while you prep the chocolate.
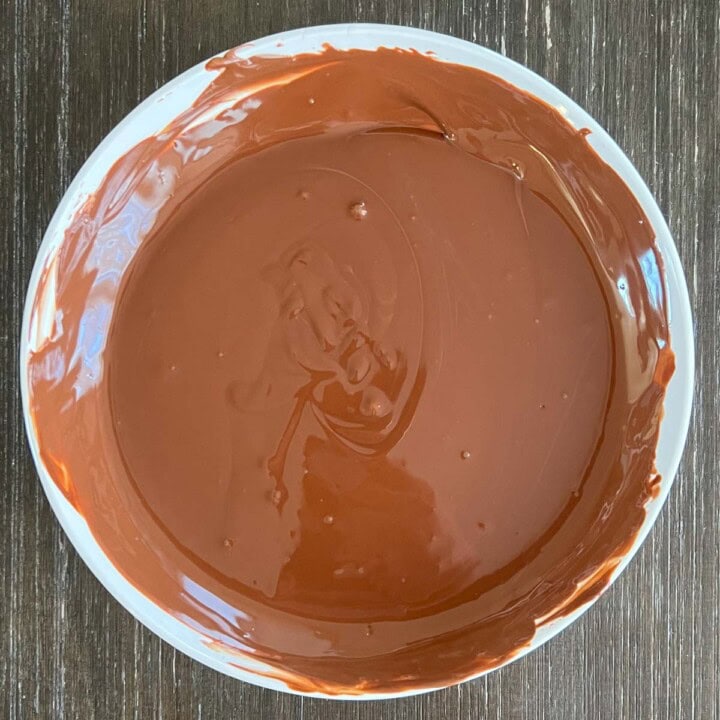
Step 7
In a microwave safe bowl, add the chocolate (you could do this in batches, if you're more comfortable melting chocolate in smaller quantities) and microwave in 30 second increments until melted, making sure to stir between increments.
see notes in recipe card for how to use a double boiler
💡 Hint: If you've never melted chocolate before, this is how you do it. Place the chocolate in the microwave and microwave for 30 seconds. Remove it from the microwave and stir for about 30 seconds. Continue this until the chocolate is completely melted.
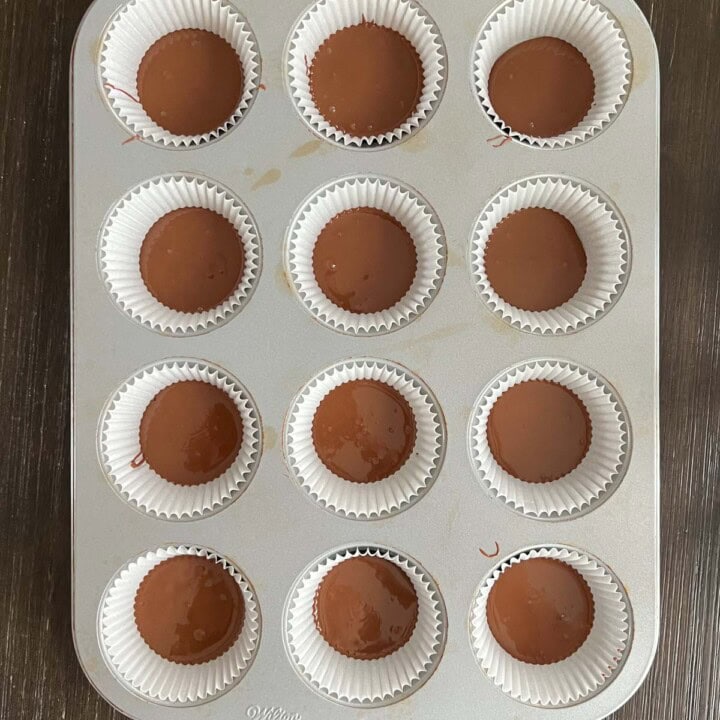
Step 8
Using a tablespoon, pour chocolate into each cupcake liner. To spread it out, move the liner from side to side and it should spread out on its own.
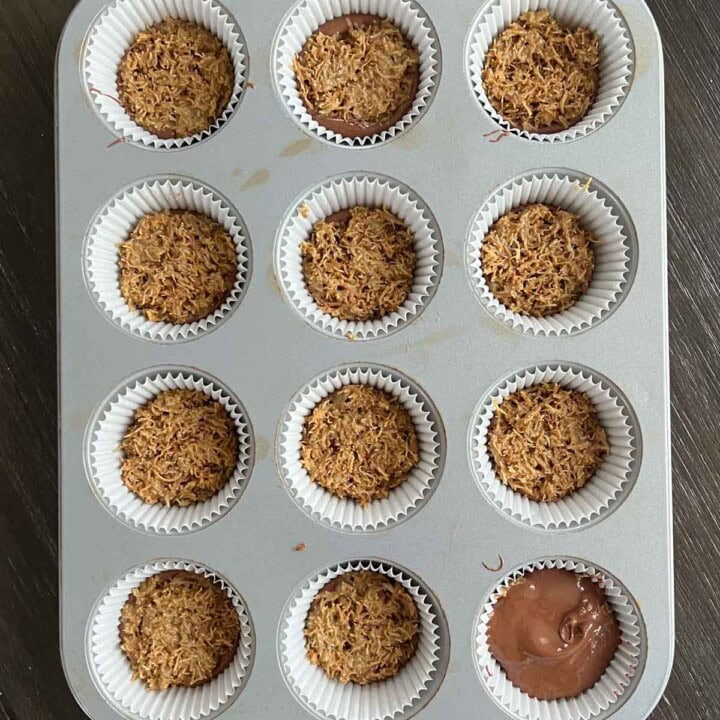
Step 9
Once evened out, scoop in about 1 to 1½ tablespoon of filling to each cup. You can use a spoon to flatten it out just a little.
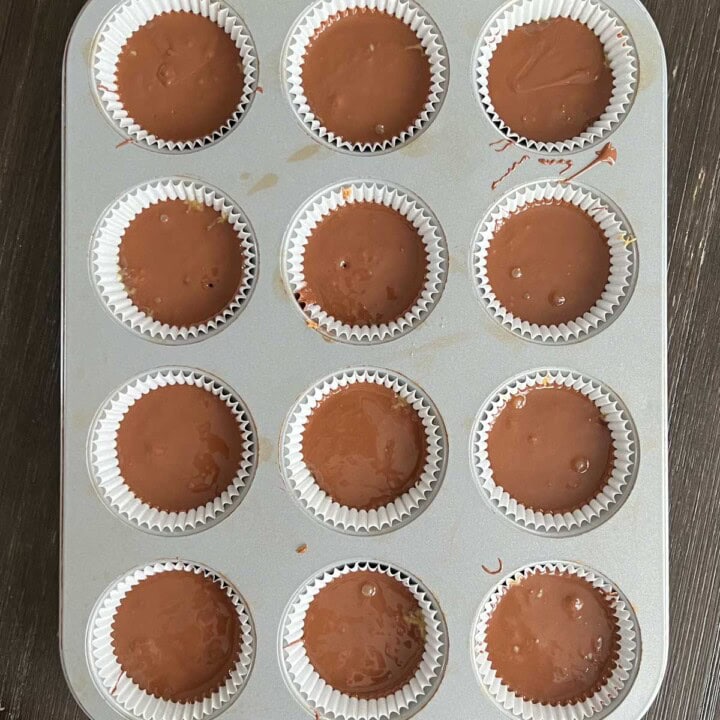
Step 10
Once you're satisfied, fill the cups with a tablespoon of chocolate each, or more if you have any leftover and it looks like it needs more chocolate.
Chill for 30 minutes, then enjoy!
🎩Trick: To spread out the chocolate evenly around, just lift the cupcake pan and tilt it back and forth slowly and it should move the chocolate around. If it doesn't spread all around the filling, it's ok!
📹 Recipe Video
🍫 Tempering Chocolate
I generally don't temper the chocolate when making the mini cups version, but if I were to make them into a bars, it's definitely needed.
Tempering chocolate is the process of gently melting and cooling chocolate to specific temperatures so it sets with a shiny finish and a satisfying snap. It keeps the cocoa butter crystals in check, which means no streaks, no bloom, just smooth, glossy magic. Whether you're dipping, drizzling, or molding, tempered chocolate gives you that pro-level finish and the perfect melt-in-your-mouth texture.
How to properly temper chocolate
- With thermometer: To temper chocolate, melt two-thirds of it slowly over a double boiler or in the microwave until it reaches 110-115°F (for dark chocolate) or 105°F (for milk or white). Remove from heat and stir in the remaining third of finely chopped chocolate to cool it down to 82-84°F. Then gently reheat it to 88-90°F for dark or 86-88°F for milk and white. Now it's smooth, shiny, and ready to use!
- Without thermometer: Start by melting about two-thirds of it slowly over a double boiler or in short increments in the microwave until smooth. Then, stir in the remaining third (finely chopped) to cool it down, stirring constantly until fully melted and slightly thickened. Gently warm it back up just a little if needed. Now it's ready to use.
Best chocolate to use for tempering
You want couverture chocolate, the kind with extra cocoa butter that melts like a dream and sets like a pro. Brands like Valrhona, Callebaut, and Guittard are top-tier if you're going all in. But hey, a good-quality bar like Lindt (the plain kind!) can totally work too. Just say no to chocolate chips or candy melts-they're the stubborn ones in the bunch, made to hold their shape and not play work well with tempering.
Tips
- Chop the chocolate finely. This helps it melt evenly, and then will allow it to cool quicker when you're reading to add.
- Avoid water getting into your chocolate. This will make the chocolate seize.
- Make sure to stir continously.
- For best and most accurate results, use a thermometer.
- When in doubt, test a small amount on parchment paper to check if it's properly tempered. If it sets and it's shiny after a few minutes, then it's good to go.
💬 FAQ
The Dubai Chocolate Bar is a chocolate bar that is filled with pistachio cream, tahini, and crispy kataifi dough. It was created in Dubai, UAE and became viral at the end of 2023 and into 2024 and became very popular across all social media channels, with people recreating it at home!
Store these in an airtight container in the refrigerator. Let them sit at room temperature for 10 minutes before eating.
Yes! Buy or make a dairy free version of pistachio cream and use vegan butter to toast the shredded kataifi. For the chocolate, you can use any type of vegan chocolate, but I personally love Guittard's Dairy-Free chocolate chips.
For these cups, I generally don't temper the chocolate, but if you're making bars, or if you want your cups to have a shine and a snap, then you must temper. I have details steps in my post on how to achieve that.
💡Pro Tips
Measure Flour Correctly - As always, with any recipe, use a kitchen scale, as it is the best form of measuring your ingredients. I like to measure out my shredded phyllo as well as my chocolate.
Stir! - Make sure to stir the kataifi dough so that it cooks evenly and browns all around, and to avoid burning.
Add more! - If you want a creamier filling, add more pistachio cream!
Avoid burning - Don't burn the chocolate. It's very easy to overheat chocolate, which will cause it to seize. Make sure to stir after each 30 second heating in the microwave. This will make sure you're not overheating the chocolate, but it will also melt chocolate pieces as you stir.
Chill - Don't skip chilling these chocolate cups to make sure the chocolate sets.
High quality chocolate: I like using Ghirardelli, Lindt, or Guittard because I know they all taste wonderful in recipes. When I'm looking to splurge a little more, I like to use Valrhona. Here's more info on baking with the right chocolate.
❄ Storage
Un-tempered: Store any leftovers in an airtight container and keep refrigerated for up to 5 days.
Tempered: If properly tempering the chocolate, no need to store in the refrigerator as the chocolate will set. Just store it in an airtight container.

Did you make this recipe or any other recipe on my website? I'd love to hear about it! Please leave a 🌟 star rating and let me know how it went in the 📝 comments below. Don't forget to Tag me on Instagram or Facebook when you recreate a recipe! The feedback helps both me and the readers!
Also, be sure to add us as a trusted site on Google so that our recipes show up more in your searches!
📖 Recipe Card
Dubai Chocolate Bar Recipe (Bite Size)
Ingredients
- 200 grams shredded kataifi dough cut into small pieces
- 4 tablespoon (56 g) unsalted butter
- 185 grams pistachio cream (more if you like it creamier)
- 2 tablespoon (30 g) tahini
- pinch of salt
- 3 cups (540 g) milk, semi-sweet or dark chocolate see notes on tempering chocolate
- sea salt for finish
Instructions
- Prep:- line two 12-cup muffin/cupcake pans with cupcake liners and set aside (this recipe makes about 20).- Cut up the kataifi dough into pieces.200 grams shredded kataifi dough
- Preheat a large skillet on medium heat and melt 4 tablespoon of butter, then add the kataifi dough and coat in butter. 4 tablespoon might seem like a lot of butter initially but it's important to coat all the pastry dough in butter so that it crisps up. Continue stirring (don't leave it, otherwise parts of it could start burning). It will take about 10-15 minutes to get all the pastry dough crispy and golden brown. Just keep stirring until you reach the desired color and all the dough is now golden brown. Pour crispy kataifi into a bowl, add the pistachio cream, tahini, pinch of salt, and stir. Set aside.4 tbsp (56 g) unsalted butter, 185 grams pistachio cream , pinch of salt, 2 tbsp (30 g) tahini
- In a microwave safe bowl, add the chocolate (you could do this in batches, if you're more comfortable melting chocolate in smaller quantities) and microwave in 30 second increments until melted, making sure to stir between increments. -see notes below for how to use a double boilerIf you've never melted chocolate before, this is how you do it. Place the chocolate in the microwave and microwave for 30 seconds. Remove it from the microwave and stir for about 30 seconds. Return to the microwave and again, heat for 30 seconds. Remove from the microwave and stir again. As you stir, the chocolate will continue to melt. If chocolate chunks remain, return it to the microwave and add an additional 30 seconds. Continue this until the chocolate is completely melted. If using chocolate chips, add a teaspoon of coconut oil to help it thin out and melt more evenly. It also helps stay melted for longer.3 cups (540 g) milk, semi-sweet or dark chocolate
- Using a tablespoon, pour chocolate into each cupcake liner. To spread it out, move the liner from side to side and it should spread out on its own. SIDE NOTE: you could freeze the bottom layer for 5 minutes to avoid the chocolate mixing with the filling. I don't do this because I don't mind it mixing. But if you feel more comfortable, you could freeze it.
- Once evened out, scoop in about 1 to 1½ tablespoon of filling to each cup. You can use a spoon to flatten it out just a little. Once you're satisfied, fill the cups with a tablespoon of chocolate each, or more if you have any leftover and it looks like it needs more chocolate.To spread out the chocolate evenly around, just lift the cupcake pan and tilt it back and forth slowly and it should move the chocolate around. If it doesn't spread all around the filling, it's ok!
- Refrigerate for about 30 minutes to an hour until the chocolate is set. You can add a sprinkle of sea salt to the top.sea salt for finish
- Place them in an airtight container and refrigerate for up to 5 days. You can eat them cold, straight from the fridge, or let them come to room temperature.
Video
Notes
- Set Up the Double Boiler: Fill a medium-sized pot with about 1-2 inches of water. Make sure the water doesn't touch the bottom of the bowl you'll be using. Place the pot over low to medium heat. Use a heatproof glass or metal bowl that fits snugly over the pot without touching the water. Place your chopped chocolate or chocolate chips in the bowl.
- Melt the Chocolate: Let the heat from the steam gently melt the chocolate, stirring occasionally with a spatula or spoon to encourage even melting. Keep an eye on the water level to prevent it from evaporating, and avoid letting the bowl touch the water directly (this will burn or seize the chocolate). Stir the chocolate until it's fully melted and smooth.
- Once melted, remove the bowl from the pot and use as directed in the recipe above.
- With thermometer: To temper chocolate, melt ⅔ of it gradually over a double boiler or in the microwave until it reaches 115°F (for dark chocolate) or 105°F (for milk or white). Remove from heat and stir in the remaining third of finely chopped chocolate to cool it down to 84°F. Then gently reheat it to 89°F.
- Without thermometer: Start by melting ⅔ of it slowly over a double boiler or in short increments in the microwave until smooth. Then, stir in the remaining ⅓ (finely chopped) to cool it down, stirring constantly until fully melted and slightly thickened. Gently warm it back up just a little if needed.


So delicious! The texture is just so good!
YAY, thanks, Besma! 🙂
Had extra white choc & pistachios..finished these then topped with melted white choc and chopped pistachios.
Rave reviews!
Thanks for the review, Tina! Loved seeing your photos on Instagram. So glad you loved it!
Easy recipe to make and they were a great option for a party since everyone could take their own cup. Thank you for the recipe.
Thank you for the review, Isra! Appreciate it. 🙂
These are amazing!! I made these today, and my kids DEVOURED them!!
These were so good and the instructions were easy to follow. I loved making them in the cupcake pan. I appreciate the recipe.
Thank you for making this recipe easy and not complicated. Appreciate that. They were delicious and turned out great.
Woah! These are amazing! I bought all my ingredients from Amazon and made it last week. I'm making them again soon. 10/10
I ended up with 22 cups. I added crushed pistachios to the filling. Delicious.
easy to make, I used all dark chocolate and put maldon salt on top, absolutely delicious.
Excellent recipe. Came out perfect.
So much better than bars. Thank you for the recipe
Easy to make and they were gone so fast. I'm glad I bought more ingredients. I'll be making them again this weekend.