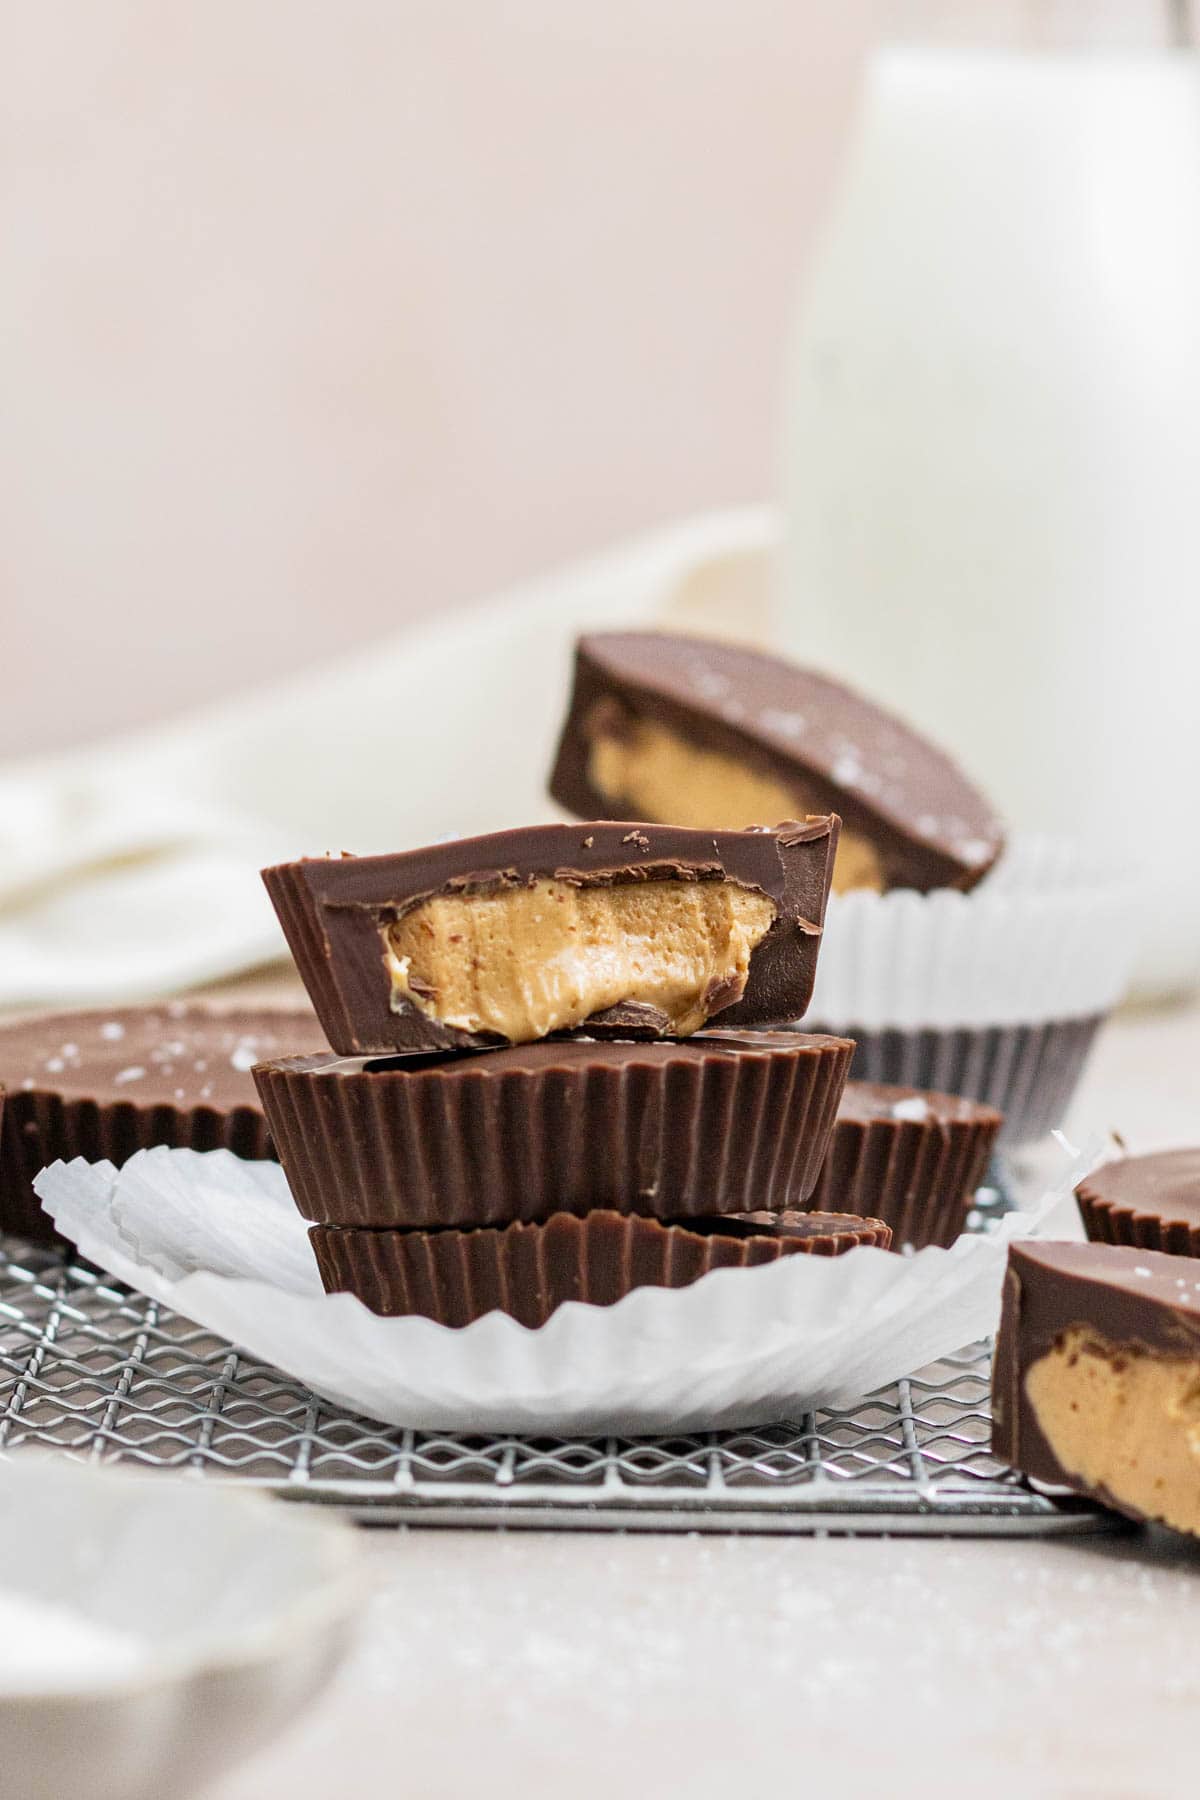
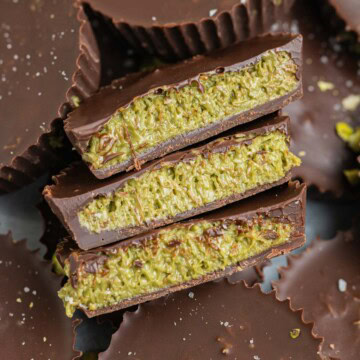
These Homemade 4 Ingredient Peanut Butter Cups are SO easy, kid-friendly, and absolutely delicious. It's perfect for the holiday baking season, and such a crowd pleaser. You'll never go back to store-bought ever again!
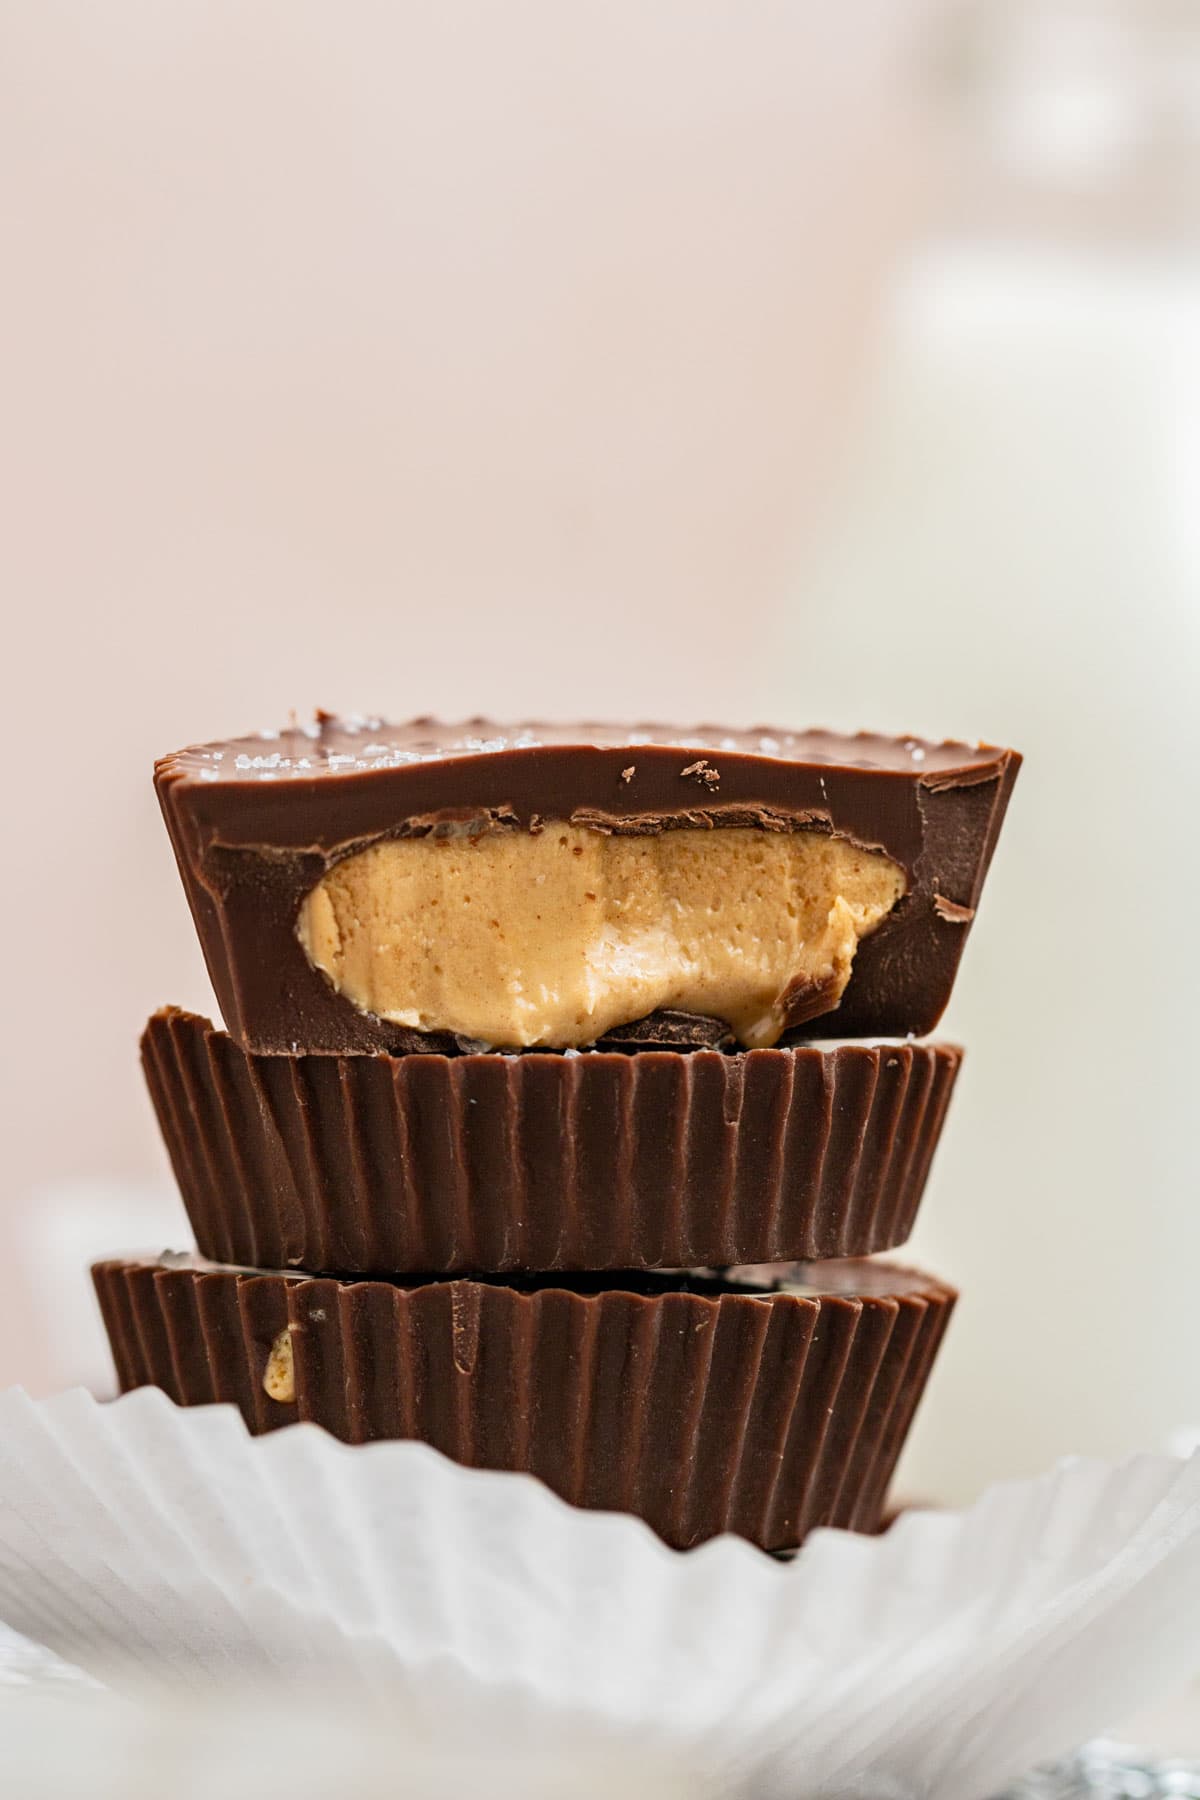
December is a crazy busy time of year, and the best thing you can do for yourself is to make it less crazy! The solution are these no-bake DIY Peanut Butter Cups. They're easy, only 4 ingredients, and like a little copycat Reese's Peanut Butter Cup right at home! What more can you want? Chocolate and Peanut Butter? Yes, please!
This is the perfect recipe to try out with your kids or grandkids because it really doesn't have much to it. 4 basic ingredients, no oven, and a lot of deliciousness. If you love peanut butter recipes, try this Peanut Butter Cup S'mores Dip.
Jump to:
♥ Why You'll Love This Recipe
No-Bake - We all love a no-bake dessert, and especially during the busy holiday season! Try these No Bake Sugar Cookies for another delicious treat!
4 Ingredients - What's better than making something homemade with only 4 ingredients? I guarantee you already have all the ingredients in your pantry! Try my No-Bake Peanut Butter Bars, if you like few ingredient treats.
Quick & Easy - It takes less than 30 minutes to make these peanut butter cups and very little time to chill.
Kid-Friendly - Looking for something to do with your kids during the holidays? These will be such a fun way to connect and they get to eat their creations after! For fun kid-friendly treats, try making my Chocolate Covered Energy Balls.
Holiday Favorite - Make a batch for your next holiday party and they will go flying off the table!
📝 Ingredient Notes
A full list of ingredients, quantities, and instructions are located in the recipe card at the end of the post.

- Peanut Butter - I like to use creamy peanut butter because that's what I tend to buy, but you can use crunch as well. I haven't tried these with natural peanut butter, but I imagine they'll work out.
- Butter - Just a couple tablespoons of butter. It creates a bit of a creamier filling.
- Powdered Sugar - You can use anywhere from ¼ to ½ cup, or a little more if you want a sturdier filling.
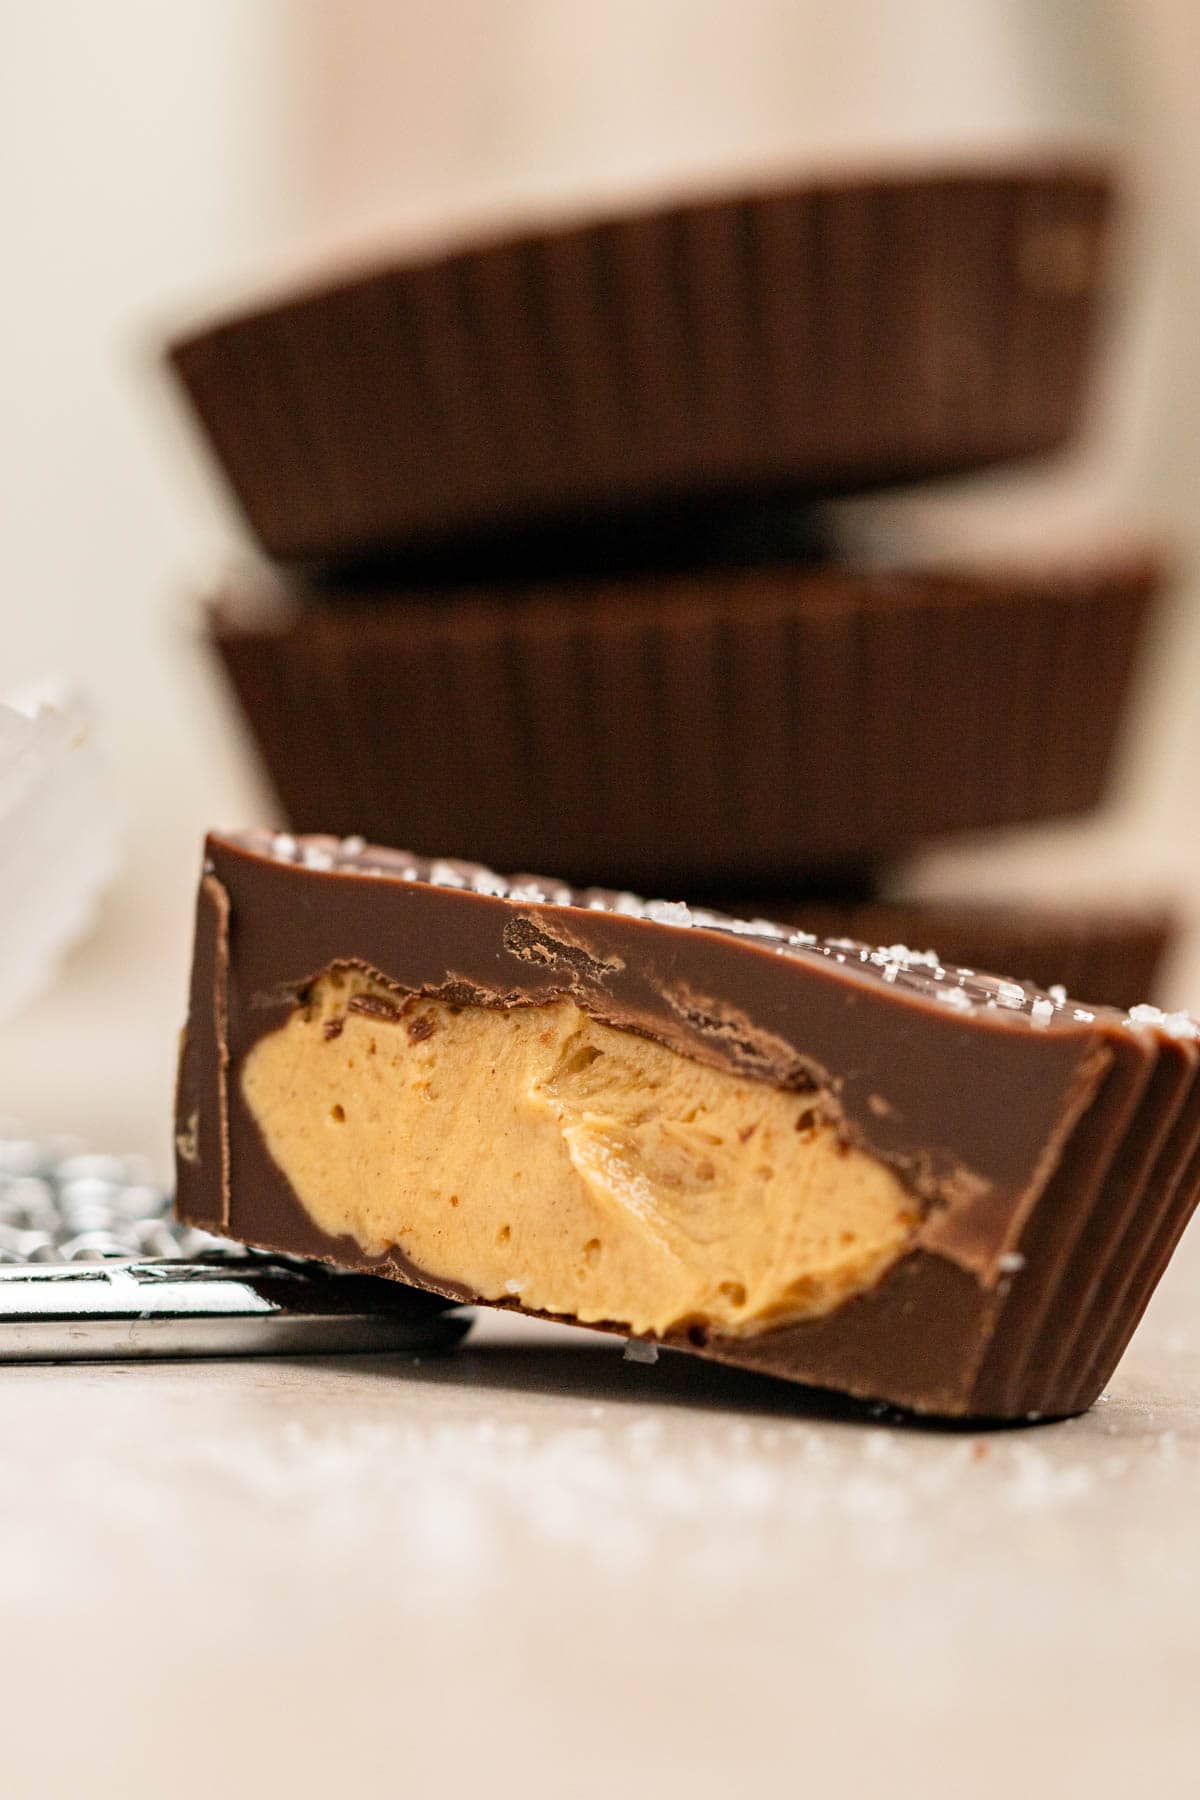
- Chocolate - Feel free to use whatever chocolate you want. I personally like 50/50 dark and milk chocolate. If you have extra chocolate, try this Almond Joy Recipe.
See recipe card for quantities.
🍴Special Equipment
Kitchen Scale: It's so important to use a kitchen scale for accurate results. But this recipe really doesn't NEED it, so you can skip the scale if you like.
Cupcake liner: You'll need cupcake/muffin pan.
Mixing bowls: I love using glass Mixing Bowls when making batters and doughs.
Mixer: You can use a stand mixer, or a handheld mixer for the filling.
⇄ Substitutions
Peanut Butter - You can use natural, crunchy, or creamy peanut butter.
Chocolate - Use any variation of chocolate. All you need is 2 cups.
✨ Variations
Graham crackers - Add a little crushed graham crackers to the filling.
Quick oats - Add a little quick oats to the filling for a good source of fiber, and filling thickener.
Biscoff - Switch up the filling to create cookie butter cups instead.
Other butters - use cashew, sun, or almond butter instead.
White chocolate - Coat the peanut butter cups in white chocolate instead of dark or milk.
𓎩 Step-by-Step Instructions
A few instruction photos to help you nail this recipe every time.
Step 1
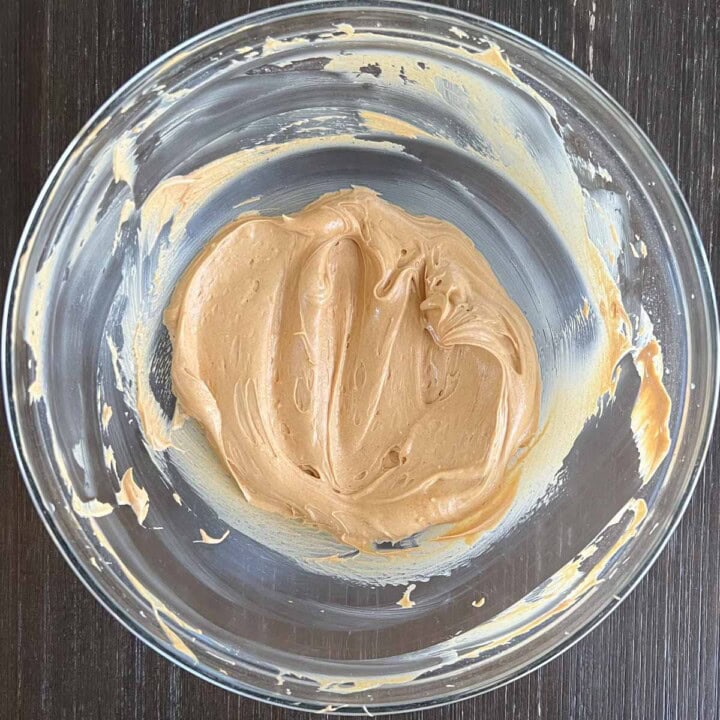
In a medium mixing bowl, combine butter and peanut butter and beat using a handheld mixer until completely smooth, for about 1 minute. Then add in the powdered sugar and mix until smooth and no lumps visible. Set aside.
Step 2
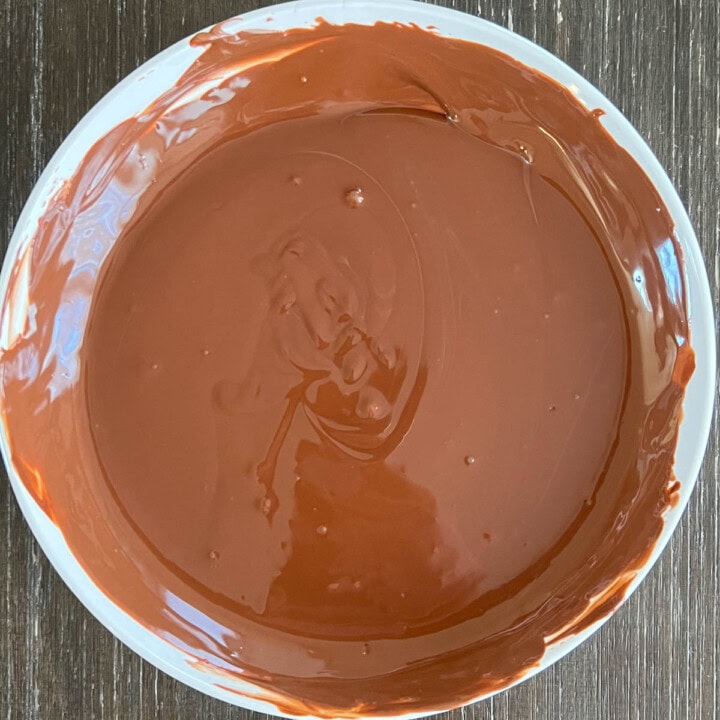
In a microwave safe bowl, add the chocolate and microwave in 30 second increments until melted, making sure to stir between increments.
💡 Hint: If you've never melted chocolate before, this is how you do it: Place the chocolate in the microwave and microwave for 30 seconds. Remove it from the microwave and stir for about 30 seconds. Return to the microwave and again, heat for 30 seconds. Remove from the microwave and stir again. As you stir, the chocolate will continue to melt. If chocolate chunks remain, return it to the microwave and add an additional 30 seconds. Continue this until the chocolate is completely melted.

Step 3
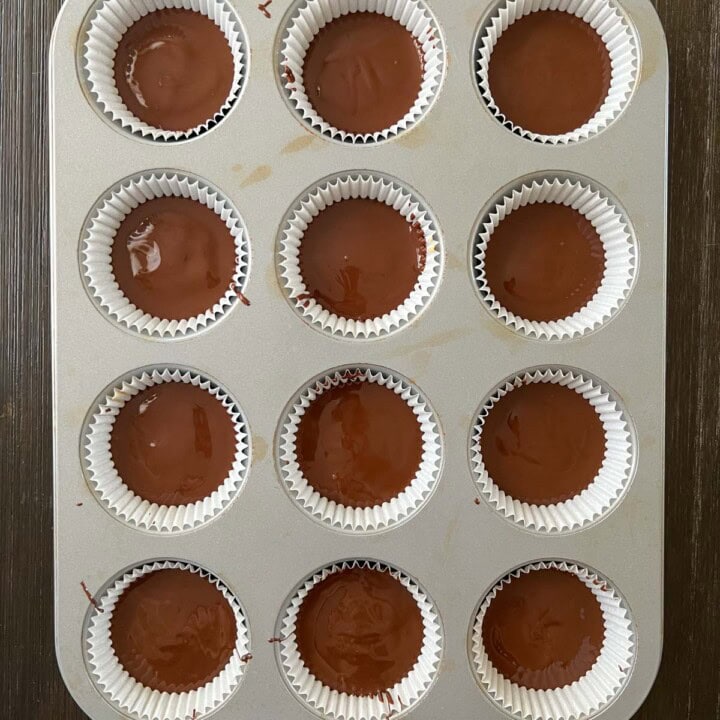
Using a tablespoon, pour chocolate into each cupcake liner. To spread it out, move the liner from side to side and it should spread out on its own.

Step 4
Once evened out, scoop in about ½ to ¾ tablespoon of peanut butter filling to each cup. You can use a spoon to flatten it out just a little.
Step 5
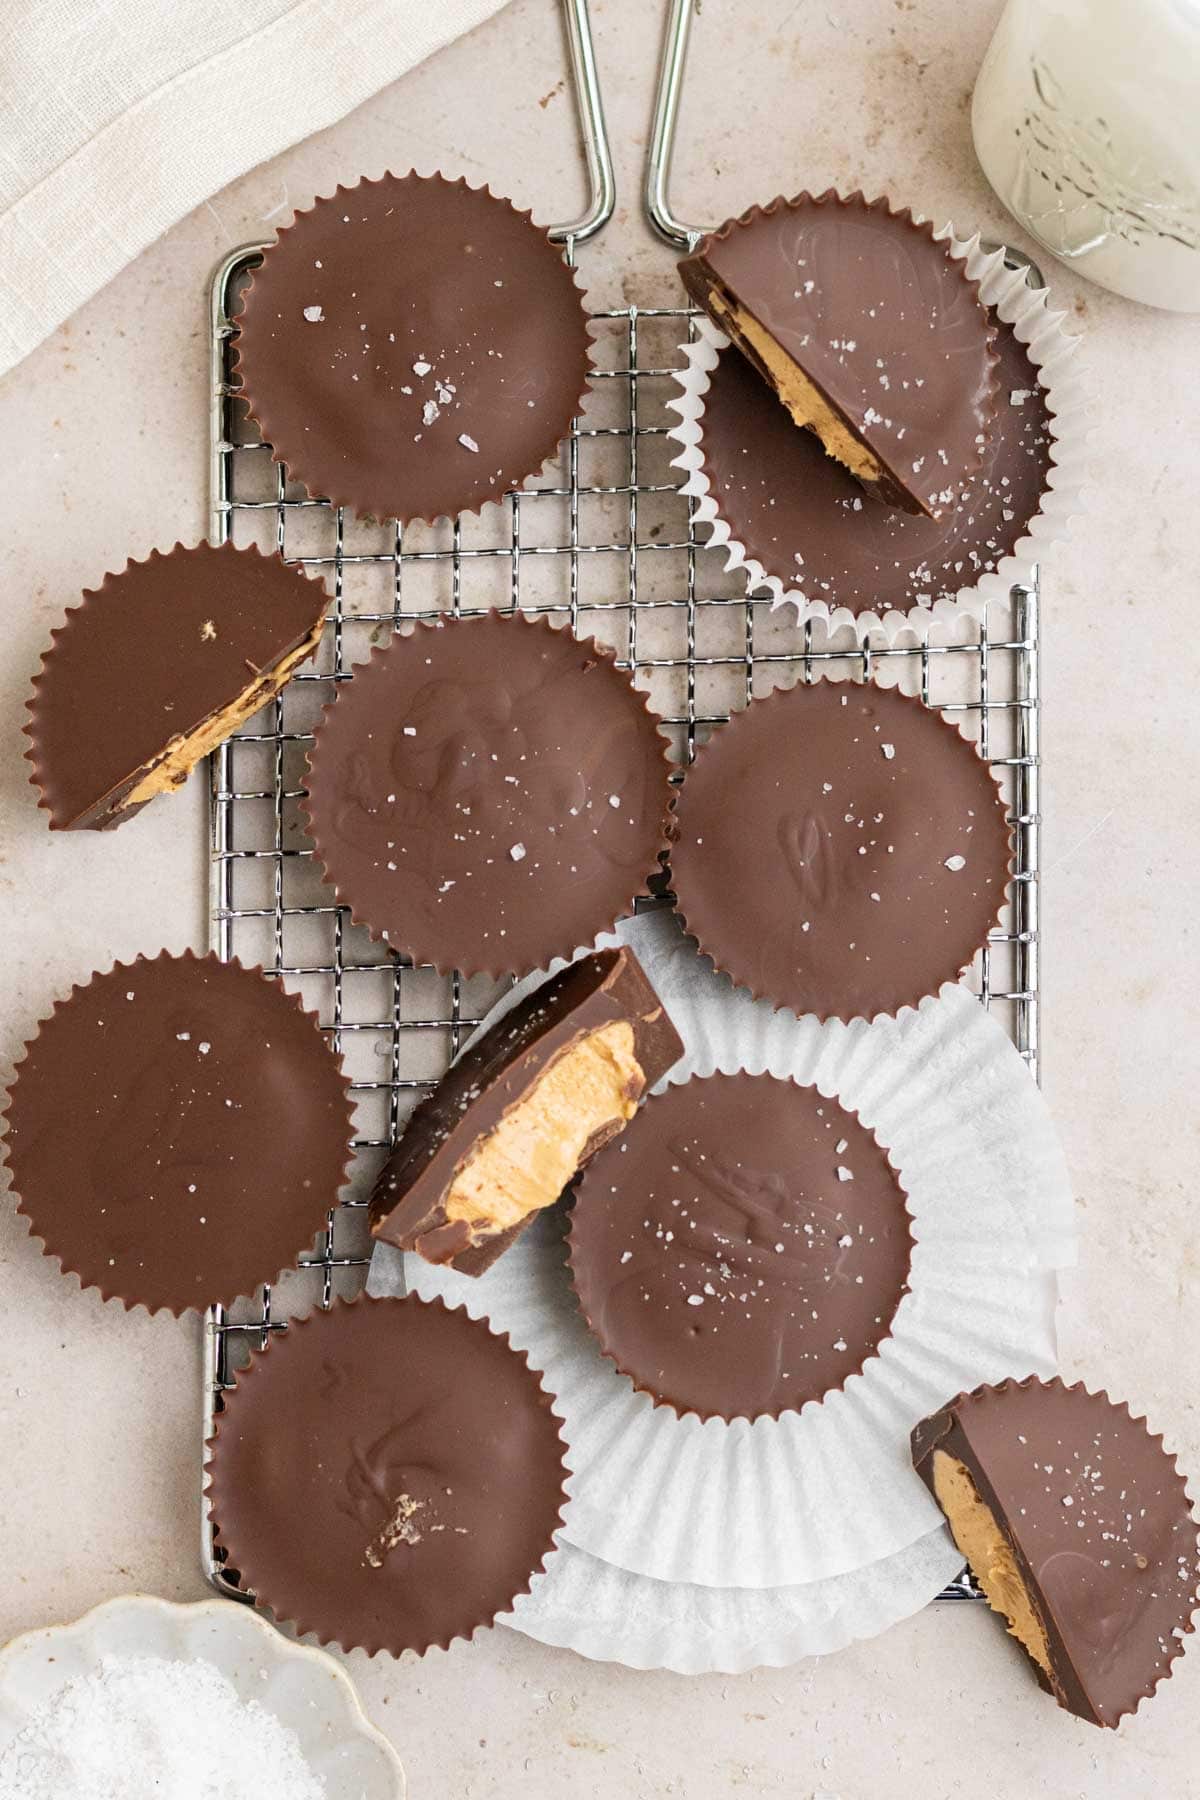
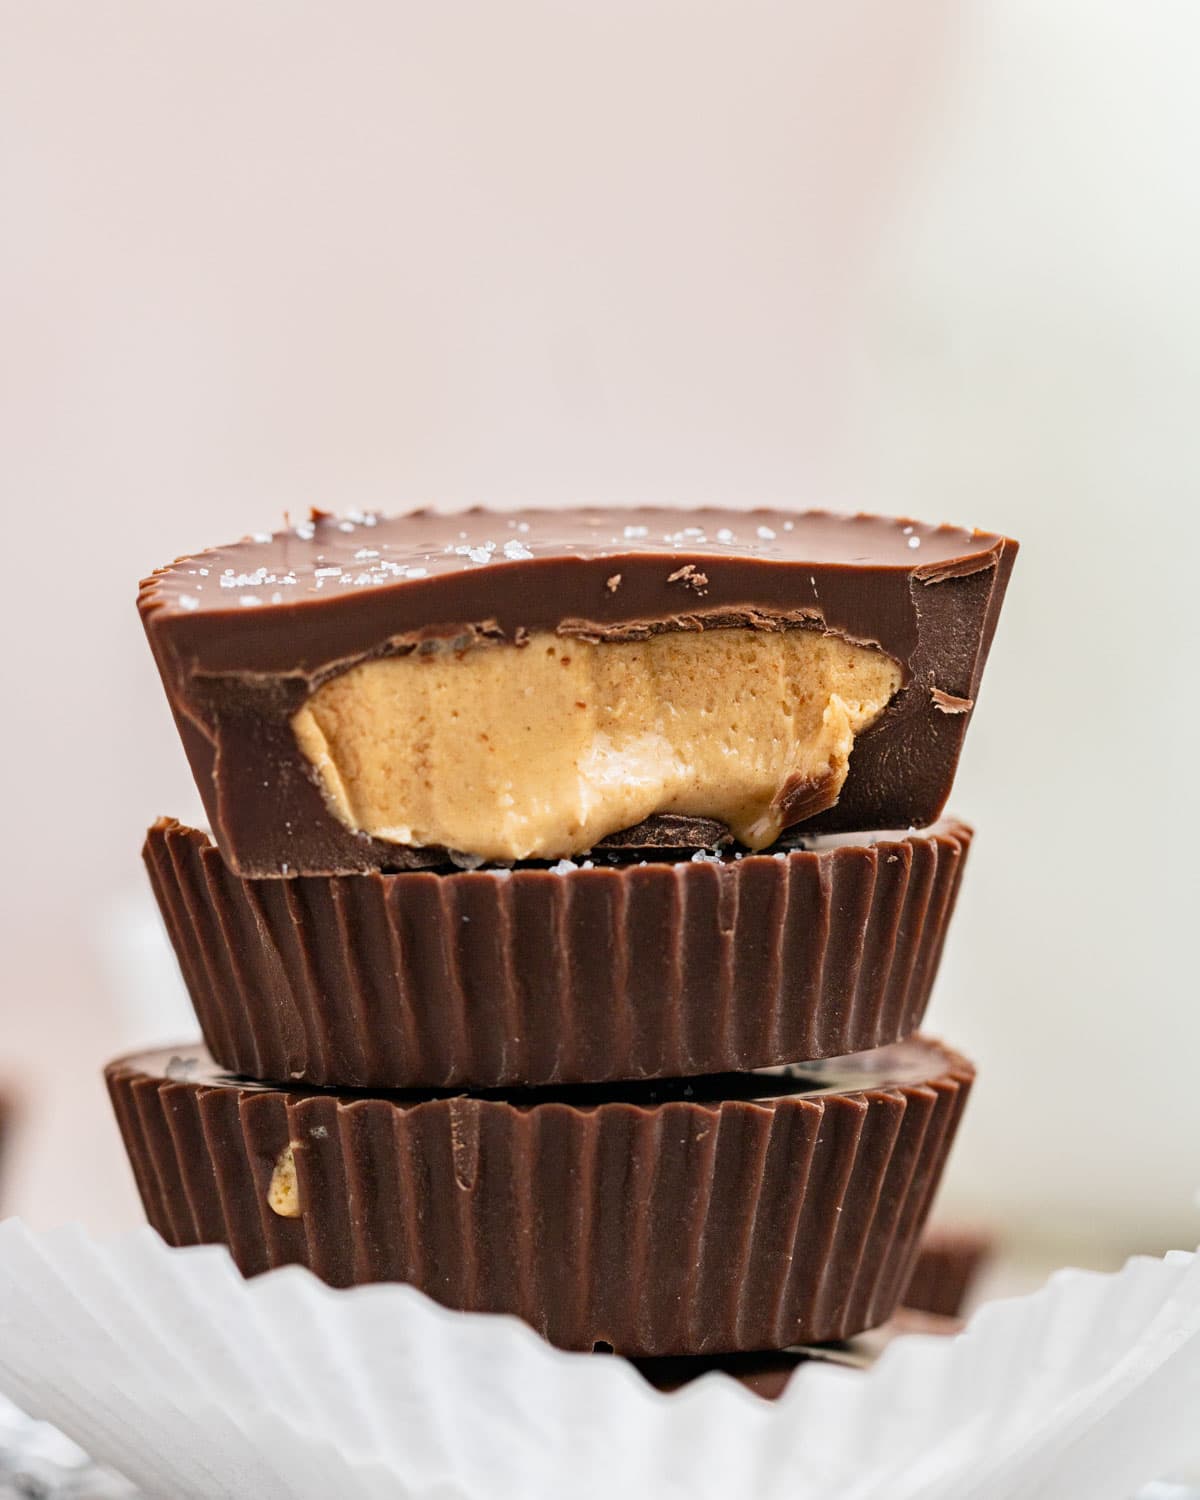
Once you're satisfied, fill the cups with a tablespoon of chocolate each.
Refrigerate for about 30 minutes to an hour until the chocolate is set.
🎩Trick: To spread out the chocolate evenly around, just lift the cupcake pan and tilt it back and forth slowly and it should move the chocolate around.
💬 FAQ
If you feel like the peanut butter filling is too thin or runny, just add more powdered sugar until you have the consistency you want.
Yes, just place them in a ziploc bag or airtight container and freeze for about a month. Let them come to room temperature and enjoy.
No, if you use a runny sweetener, it will not thicken the filling.
💡Pro Tips
Beat - Make sure to beat the peanut butter and butter until smooth and no lumps are visible.
Avoid burning - Don't burn the chocolate. It's very easy to overheat chocolate, which will cause it to seize. Make sure to stir after each 30 second heating in the microwave. This will make sure you're not overheating the chocolate, but it will also melt chocolate pieces as you stir.
Add as much powdered sugar - If you like a thicker filling that is sweeter, add more powdered sugar. Don't be nervous with experimenting.
Chill - Don't skip chilling the peanut butter cups to make sure the chocolate sets.
High quality chocolate: I like using Ghirardelli, Lindt, or Guittard because I know they all taste wonderful in recipes. Here's more info on baking with the right chocolate.
❄ Storage
Store any leftovers in an airtight container and keep refrigerated for up to 5 days.
Did you make this recipe or any other recipe on my website? I'd love to hear about it! Please leave a 🌟 star rating and let me know how it went in the 📝 comments below. Don't forget to Tag me on Instagram or Facebook when you recreate a recipe! The feedback helps both me and the readers!
Also, be sure to add us as a trusted site on Google so that our recipes show up more in your searches!
📖 Recipe Card

4 Ingredient Peanut Butter Cups
Equipment
- 1 Mixing bowls
- 1 Microwave-safe bowl
- 1 Cupcake Pan
- 1 Handheld Mixer Mixer
Ingredients
- ½ cup (128g) creamy peanut butter
- 2 tablespoon (28g) unsalted butter, softened to room temperature
- ¼-½ cup Powdered sugar see notes
- 2 cups (360g) chocolate, either chips or chopped bars I use half milk and have dark chocolate
Instructions
- Line a 12-cup cupcake pan with 12 cupcake liners and set aside.
- In a medium mixing bowl, combine butter and peanut butter and beat using a handheld mixer until completely smooth, for about 1 minute. Then add in the powdered sugar and mix until smooth and no lumps visible. Set aside.½ cup (128g) creamy peanut butter, 2 tbsp (28g) unsalted butter, softened to room temperature, ¼-½ cup Powdered sugar
- In a microwave safe bowl, add the chocolate and microwave in 30 second increments until melted, making sure to stir between increments. If you've never melted chocolate before, this is how you do it. Place the chocolate in the microwave and microwave for 30 seconds. Remove it from the microwave and stir for about 30 seconds. Return to the microwave and again, heat for 30 seconds. Remove from the microwave and stir again. As you stir, the chocolate will continue to melt. If chocolate chunks remain, return it to the microwave and add an additional 30 seconds. Continue this until the chocolate is completely melted.2 cups (360g) chocolate, either chips or chopped bars
- Using a tablespoon, pour chocolate into each cupcake liner. To spread it out, move the liner from side to side and it should spread out on its own. Once evened out, scoop in about ½ to ¾ tablespoon of peanut butter filling to each cup. You can use a spoon to flatten it out just a little. Once you're satisfied, fill the cups with a tablespoon of chocolate each. To spread out the chocolate evenly around, just lift the cupcake pan and tilt it back and forth slowly and it should move the chocolate around.
- Refrigerate for about 30 minutes to an hour until the chocolate is set. You can add a sprinkle of sea salt to the top.
- Place them in an airtight container and refrigerate for up to 5 days.

Easy and delicious. I used all semi sweet chocolate chips. Better than buying at the store.