How to Make Brioche Dough
A step-by-step guide on How to Make Brioche Dough so that you can ace this recipe every single time, without fail! Pillowy, soft, and silky dough, with a delicious taste!
Equipment
- Stand mixer with dough hook attachment
- Mixing Bowl
Ingredients
Brioche Dough
- ¾ cup (202 g) +1 tablespoon warm milk, 110℉ (See notes)
- 1 teaspoon (4 g) granulated sugar
- 2¼ teaspoon (7 g) active dry yeast 1 package
- 3 cups (360 g) bread flour
- ⅓ cup (66 g) granulated sugar
- ¾ teaspoon (4.5 g) salt
- 2 (34 g) egg yolks
- 2 teaspoon (8 g) vanilla extract (for sweet doughs)
- 6 tablespoon (85 g) unsalted butter softened
Instructions
Brioche Dough
- In a small bowl, combine the warm milk, packet of yeast and a teaspoon of sugar and let sit and foam for about 5 minutes.¾ cup (202 g) +1 tablespoon warm milk, 110℉, 1 tsp (4 g) granulated sugar, 2¼ tsp (7 g) active dry yeast, 2 tsp (8 g) vanilla extract
- In a bowl of a stand mixer fitted with a hook attachment, add flour, sugar, salt, 2 egg yolks, vanilla extract, and the activated yeast mixture and let knead for at least 10 minutes until the dough comes away from the bowl and forms a sort of ball.3 cups (360 g) bread flour, ⅓ cup (66 g) granulated sugar, ¾ tsp (4.5 g) salt, 2 (34 g) egg yolks
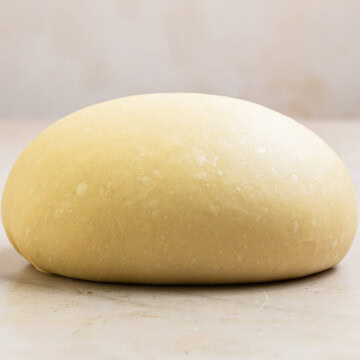
- Start adding the softened butter slowly until all is incorporated and knead for an additional 10-20 minutes until the dough forms a smooth ball and does not stick to the sides of the bowl. When touching with your finger, the dough should not stick at all. The dough will be tacky and a lot smoother/silkier than a regular dough.6 tbsp (85 g) unsalted butter
- You know the dough is ready when it passes the windowpane test: take a small piece of dough and stretch it out between your fingers. If it stretches out without tearing and light can pass through, then it has passed the windowpane test. If it tears, let the dough knead another 5 minutes, then perform the test again.NOTE: If you stretch it long enough, it could still tear, but as long as you can get it thin where it becomes a little see-through, and light can pass through, then you're good to go.
- Place the dough in an oiled bowl and cover and let rise for at least an hour, then follow instructions on specific recipe on what to do next.
Notes
Reader Feedback
Since developing my first brioche bun recipe in 2022, I've had many people remake them, with such great feedback. I have, however, had people mention that the dough can be a little too sticky/wet and they needed to add more flour. For this reason, I went back to the drawing board to test the recipe with ¼ cup less milk, so only ¾ cup total milk instead of 1 cup, and it turns out great! However, this is with my controlled environment, and with using a scale to weigh my flour. If you're a long-time reader who has had success with a whole cup of milk, then keep making the recipe that way. Tips for the best results:- Measure Flour Correctly: As always, with any recipe, use a kitchen scale, as it is the best form of measuring your ingredients. If you don’t have a kitchen scale, fluff your flour, scoop flour with a spoon into a measuring cup and level off.
- Don’t Skip Kneading: Knead the dough for at least 10 minutes before adding the softened butter. This will ensure the dough forms and pulls away from the bowl. Then once you add the butter, knead for another 10-20 minutes until the butter is completely incorporated and the dough has pulled away from the bowl again.
- Don’t add too much flour: This dough will be tacky, but shouldn’t stick to your hands. It will also be very silky (this due to all the butter added). If while kneading, the dough doesn’t come together after 15 minutes, you can add one tablespoon of flour at a time. But be patient before adding the flour. You don’t want a dry dough.
- Make Ahead: You can absolutely make this recipe ahead of time by letting the dough proof in the refrigerator overnight for the first rise. When you’re ready to use, remove from the refrigerator and continue with the recipe. You won’t need to let the dough come to room temperature because you’ll still need to proof a second time, so it will have plenty of time.
- Proof in pre-heated oven: One trick I love doing is to pre-heat the oven to 170 degrees Fahrenheit, then turning off the oven and letting my dough proof in the oven. This cuts down on proofing time, especially if I’m in a hurry, but it also helps in the winter when it’s especially cold.
- Windowpane test: To know if your dough is ready, perform the windowpane test where you take a small piece of dough and stretch it out between your fingers. If it stretches out without tearing and light can pass through, then it has passed the windowpane test. If it tears, let the dough knead another 5 minutes, then perform the test again.
- Humidity: Due to reader feedback, I've updated the recipe to reduce the amount of milk to ¾ of a cup instead of a whole cup. See Reader feedback for more info.
Nutrition
Calories: 250kcalCarbohydrates: 36gProtein: 6gFat: 9gSaturated Fat: 5gPolyunsaturated Fat: 1gMonounsaturated Fat: 2gTrans Fat: 0.3gCholesterol: 59mgSodium: 185mgPotassium: 79mgFiber: 1gSugar: 8gVitamin A: 292IUVitamin C: 0.002mgCalcium: 35mgIron: 0.5mg
Tried this recipe?Mention @siftwithkima or tag #SiftwithKima on Instagram!
