A step-by-step guide on How to Make Brioche Dough so that you can ace this recipe every single time, without fail! Pillowy, soft, and silky dough, with a delicious taste!
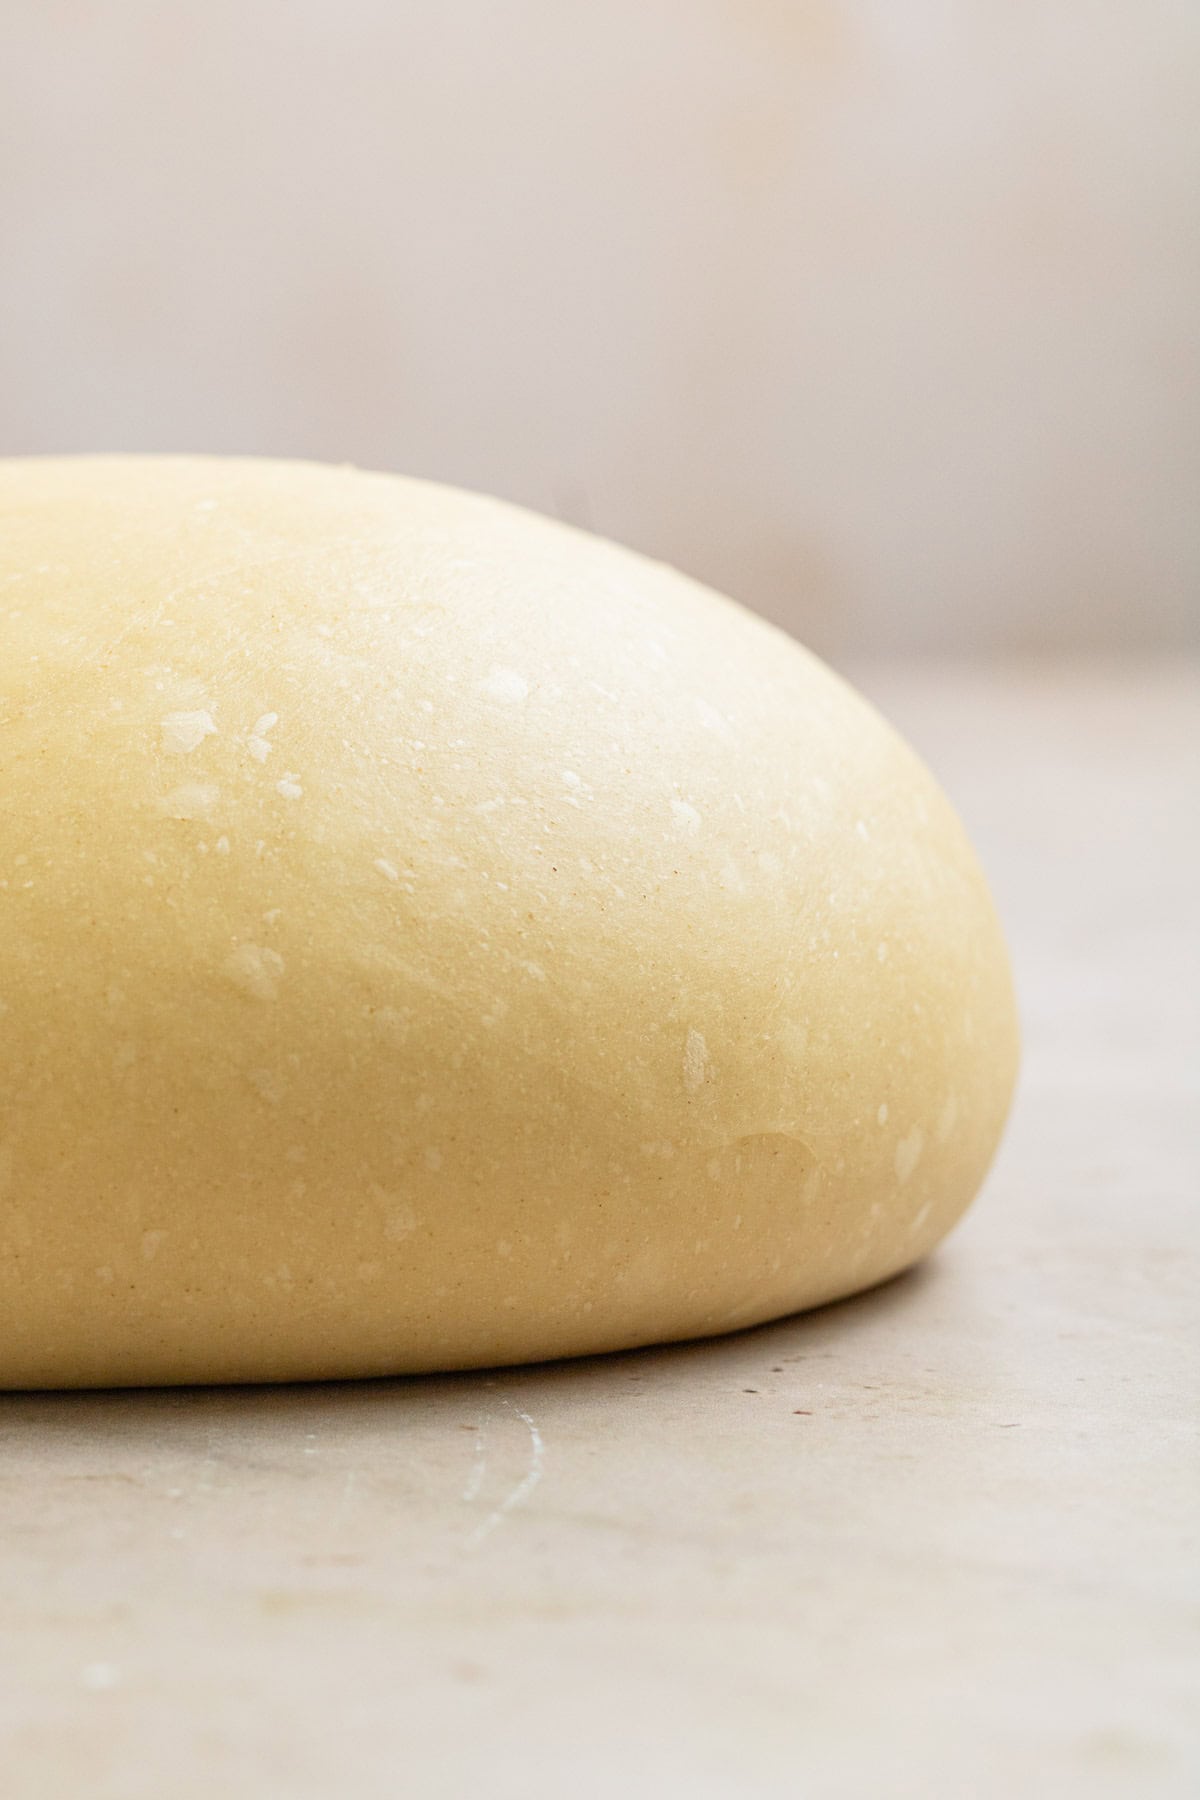
Making Brioche Dough is a lot easier than you might think. You need few simple ingredients and a little patience, and you'll have yourself some of the best bread you've ever eaten. Turn it into a brioche loaf, burger buns, or sweet brioche buns!
This brioche dough recipe is very forgiving, versatile, and can be proofed overnight in the refrigerator for the first rise, making life a little easier if you want some brioche the next day. Follow these simple steps, starting with weighing your ingredients, kneading a ton, and having some patience, and you'll end up with a delicious dough that can be a base for many recipes!
Jump to:
♥ Why You'll Love This Recipe
Fluffy Texture: The dough has a fluffy and soft texture that goes well with both savory and sweet.
Perfect: Following the recipe as written yields a perfect dough every single time!
Lasts for days: The softness of this dough lasts for days, making it the perfect base for many recipes.
Versatile: Turn it into a beautiful loaf, or delicious buns!
🥖 What is Brioche?
Brioche is a rich, buttery French bread made with eggs, butter, milk, and sugar, giving it a soft, airy texture and a slightly sweet flavor. It's known for its golden color and tender crumb, and can be used for a range of things, from breakfast pastries to savory sandwiches. The high fat content distinguishes it from other breads, making it both indulgent and versatile.
📝 Ingredient Notes
A full list of ingredients, quantities, and instructions are located in the recipe card at the end of the post.
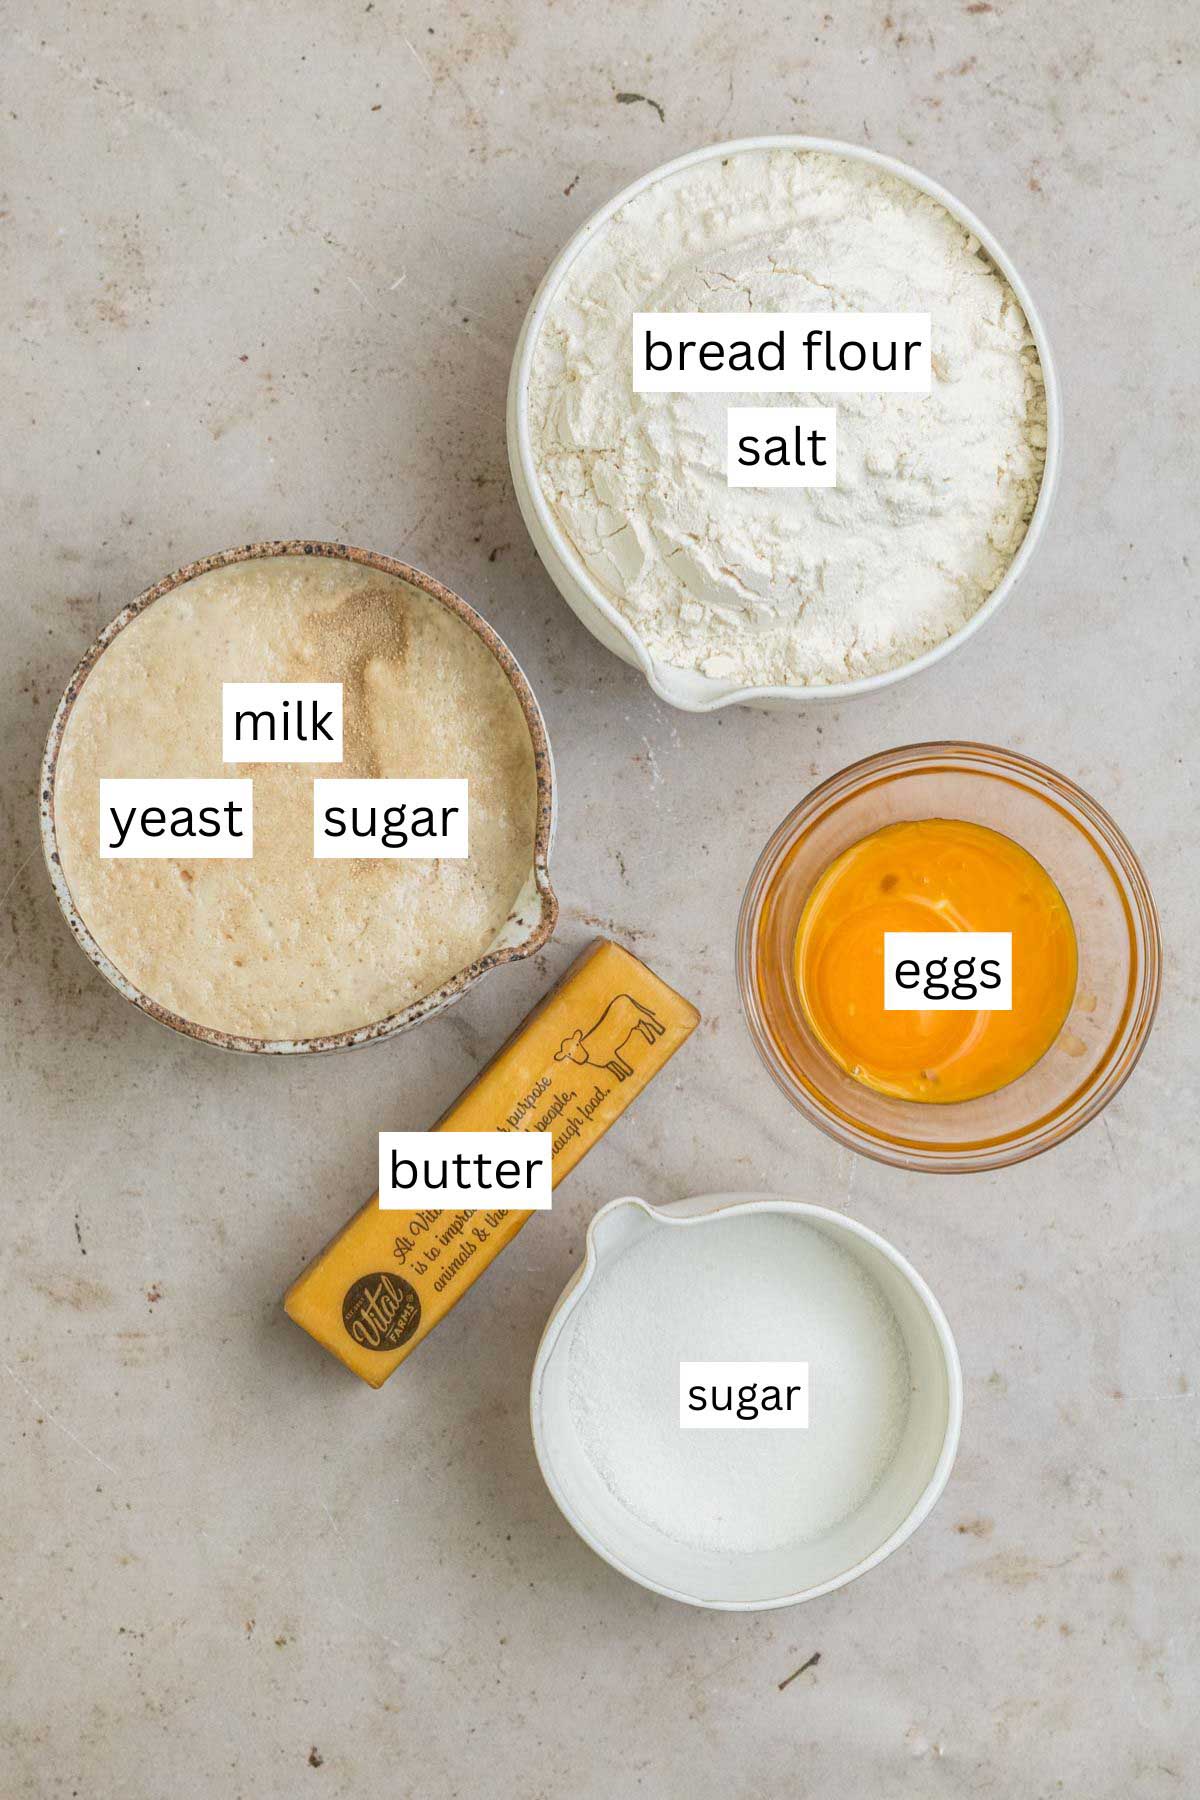
Ingredients for this brioche recipe are very few and simple.
- Flour: This recipe can be used with either Bread Flour or All-Purpose Flour. I prefer bread flour, but if you don’t have any, all-purpose will work.
- Yeast: My favorite yeast to use is Active Dry Yeast, which requires proofing before adding it to the flour mixture.
- Milk: It’s best to use whole milk since this is an enriched dough, the more fat, the better.
- Salt: ALWAYS important in any recipe. Without salt, the bread will taste flat.
- Granulated Sugar: This adds sweetness to the Brioche dough and creates a bit more of a softness.
- Egg: I use two egg yolks for this recipe, adding more fat, without the added liquid of the whites.
- Butter: A key ingredient in Brioche is butter. This recipe calls 6 tablespoon of softened butter during the second kneading. Make sure the butter is very soft, otherwise it will take a while to incorporate into the dough.
- Vanilla extract (optional): This ingredient is optional. I like adding it to flavor the dough when I'm making a sweet dough. If I am using this dough for a savory recipe, I omit the vanilla extract.
- Spices (optional): You can add a teaspoon or so of different types of spices. I add pumpkin pie spice in my Pumpkin Cheesecake Brioche Buns to give the dough a little more flavor.
- Zest (optional): Adding other flavors like zest from lemons or oranges is a great way to flavor the base dough, like in my Orange Cranberry Buns.
See recipe card for quantities.
🍴Special Equipment
Kitchen Scale - It's so important to use a kitchen scale for accurate results.
Mixing bowls - I love using glass Mixing Bowls when making batters and doughs.
Stand mixer - I love using my stand mixer when making enriched doughs because it takes a while to knead.
Spatula - A spatula would help scrape down the bowl when making dough.
✨ Variations
This base dough can be made as-is, or flavored!
Extracts: I like adding any type of extract or emulsions to flavor the dough when I'm making a sweet dough. If I am using this dough for a savory recipe, I omit the extracts.
Spices: You can add a teaspoon or so of different types of spices. I add pumpkin pie spice in my Pumpkin Cheesecake Brioche Buns to give the dough a little more flavor.
Zest: Adding other flavors like zest from lemons or oranges is a great way to flavor the base dough, like in my Orange Cranberry Buns.
𓎩 Step-by-Step Instructions
A few instruction photos to help you nail this recipe every time.

Step 1
In a small bowl, add the warm milk, yeast, and teaspoon of sugar and set aside to activate and foam, about 5-10 minutes.
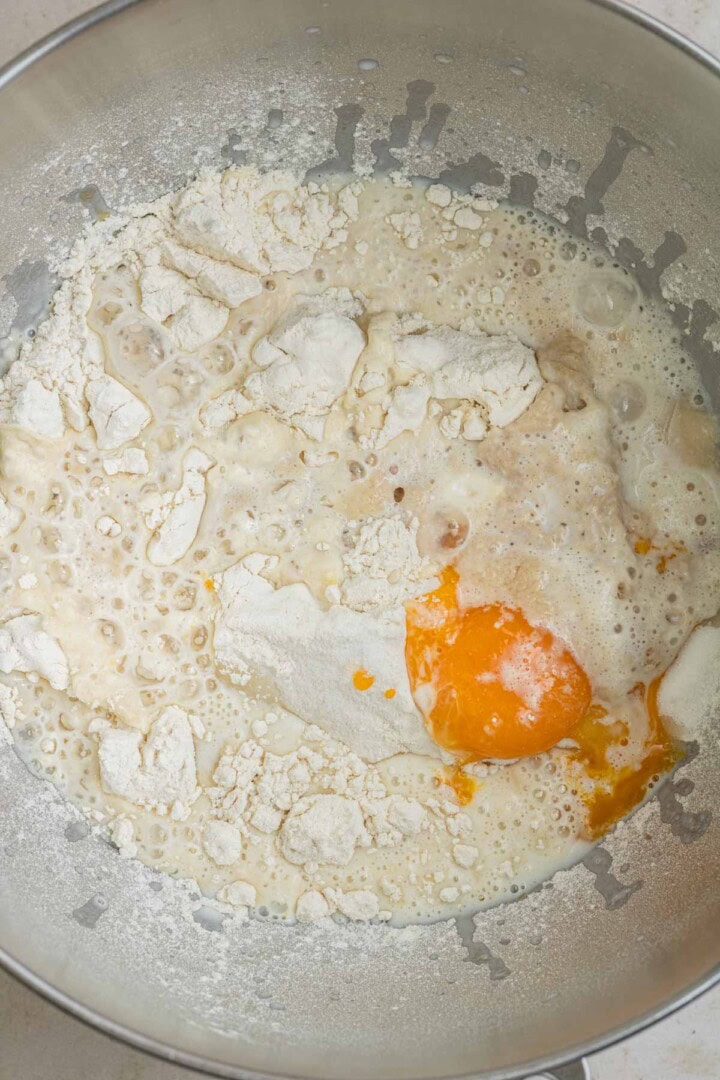
Step 2
In the bowl of a stand mixer, combine the bread flour, sugar, salt, egg yolks, vanilla extract, and yeast mixture.
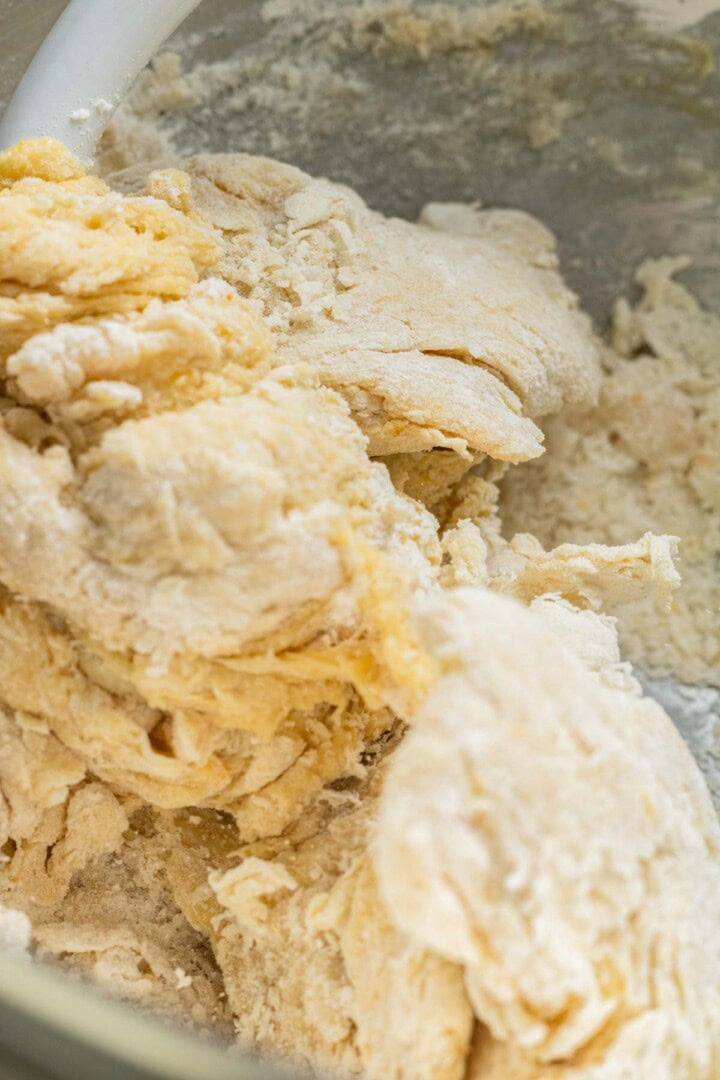
Step 3
Start kneading the dough with your stand mixer. At first, it will look shaggy and dry, but the more if kneads, the more it will come together.

Step 4
Knead (on medium speed: 2 to 4 on KitchenAid) for about 10 minutes until completely combined and forms a dough that pulls away from the bowl.

Step 5
Start adding the softened butter to the dough.
💡 Hint: The timings in this recipe is a guide. Your mixer and kitchen are different, so you may need to knead for longer than 10 or 20 minutes. Your dough may need to proof for longer or less time, depending on how the temperature is in your kitchen.
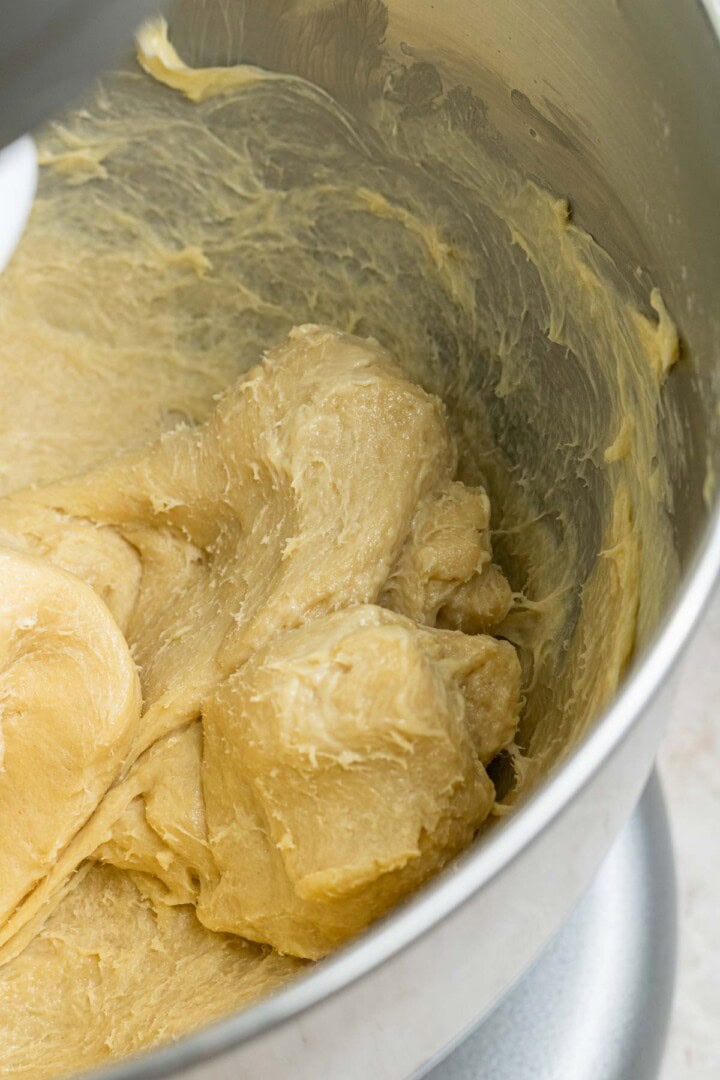
Step 6
Knead (on medium speed: 2 to 4 on KitchenAid) for an additional 10-20 minutes until the dough is smooth and elastic. The dough will look wet, ugly, and like it will never come together. Just trust the process and knead, knead, knead!
NOTE: In this step, make sure the softened butter completely incorporates with the dough. You may need to use a spatula to scrape down the bowl and mix in the dough a few times during the knead.
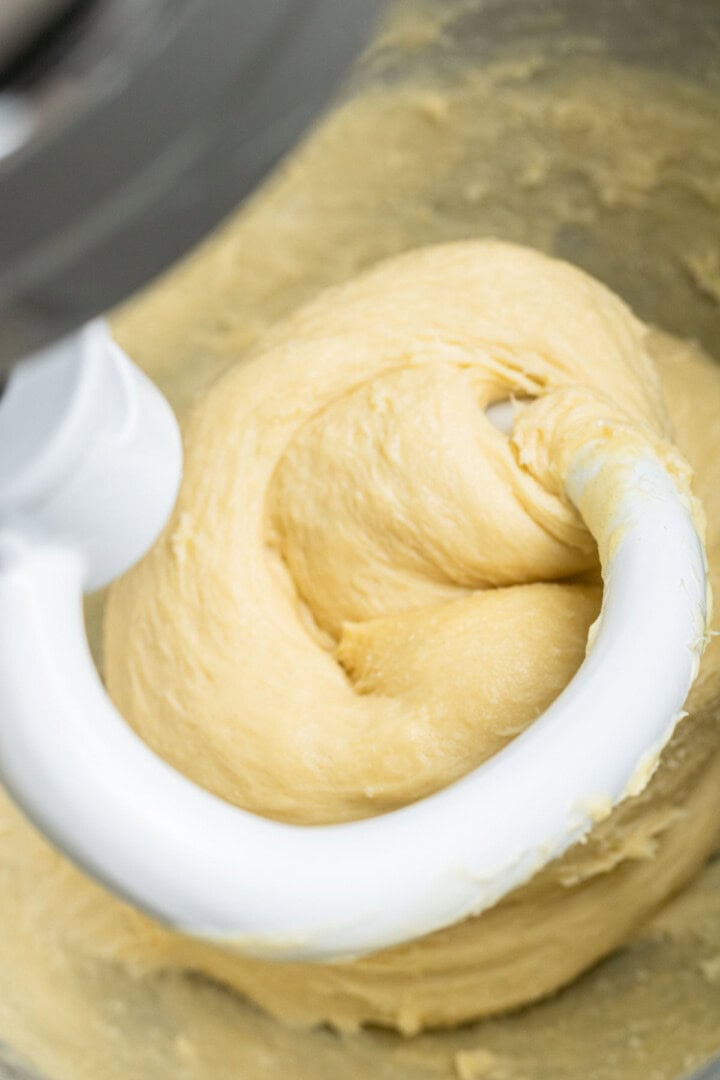
Step 7
The more you knead, the more it will pull away from the bowl, the more it will be elastic and smooth.
🎩Trick: If you feel like your dough isn't coming together and not passing the windowpane test, let it rest for 5 minutes, then knead it for 5 minutes, and perform the test again. If your dough is VERY wet after 10-20 minutes, add a tablespoon of dough, then knead for 5-10 minutes.
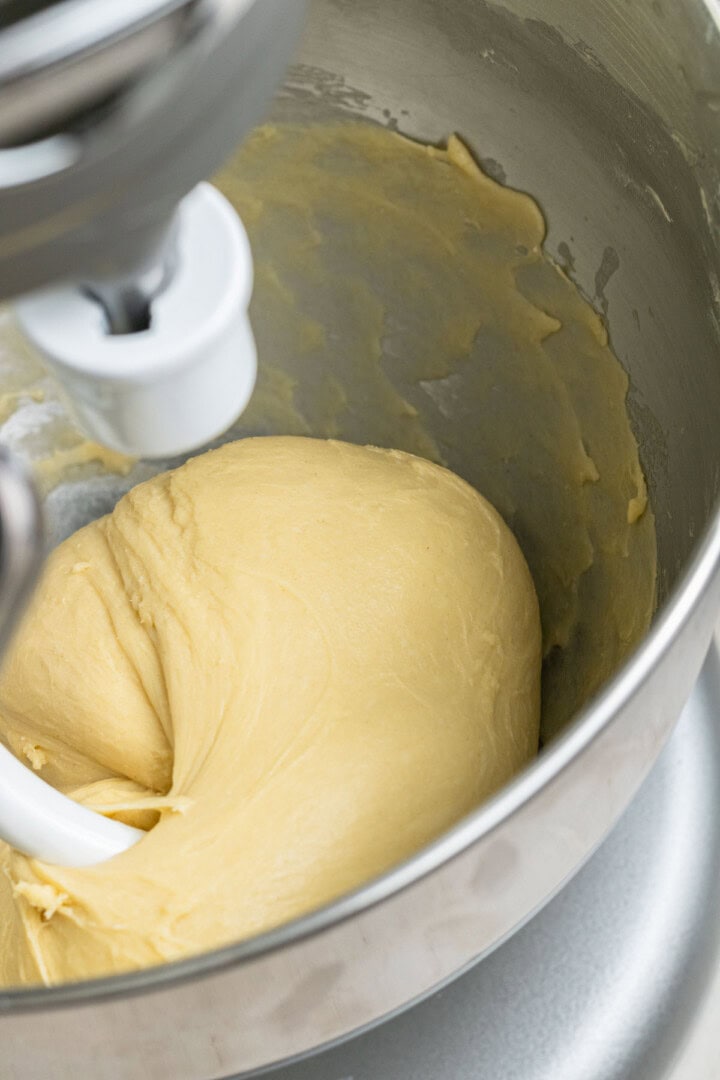
Step 8
Once the dough forms a ball that pulls away from the bowl, is smooth, and elastic, it should be ready for proofing.
To know when the dough is ready, perform the windowpane test: Take a small piece of dough and stretch it between your fingers until it's thin and light can pass through it without tearing (See video below for windowpane test being performed after kneading is complete).
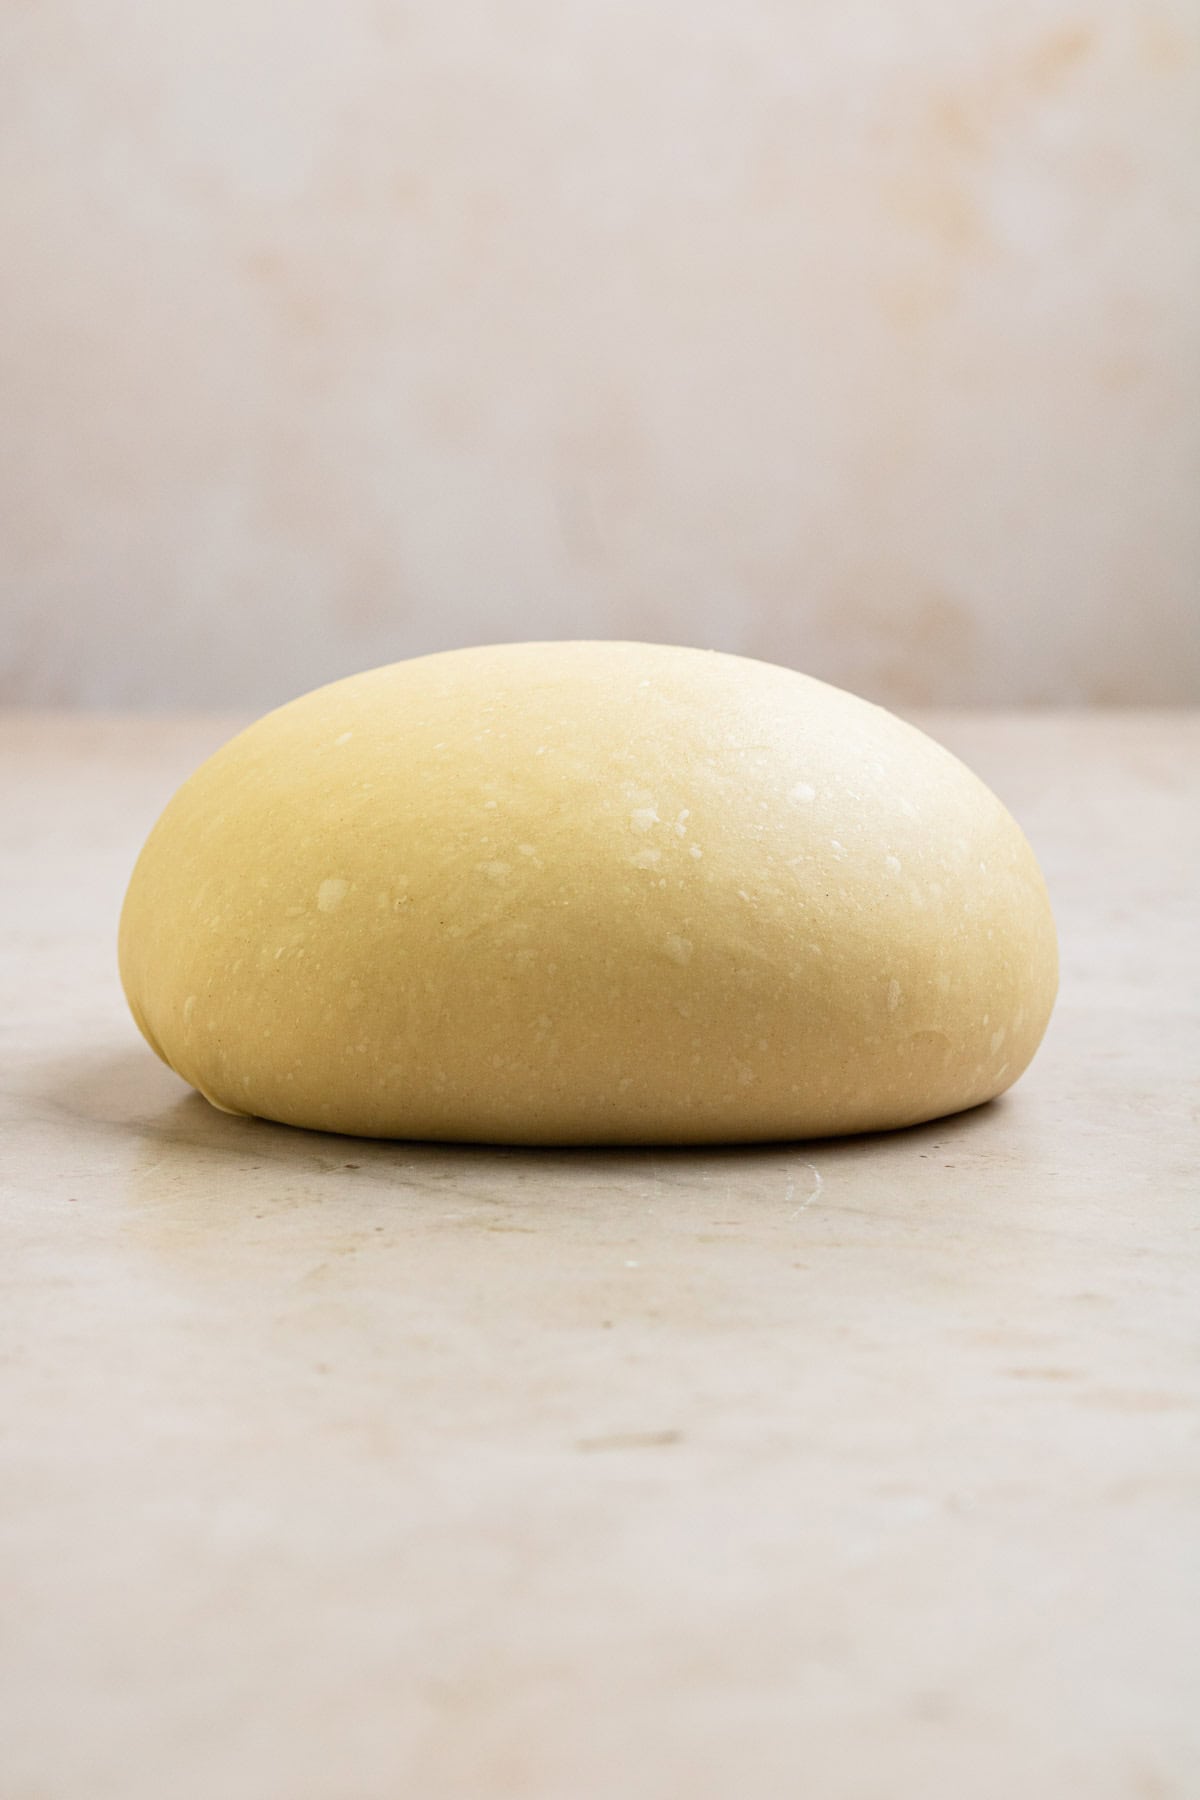
Once dough is ready, let proof in a warm spot, and proceed with whatever recipe you're following.
💬 FAQ
Brioche Buns recipe or Brioche bread recipes are different than regular dough recipes because of the amount of fat it contains. A regular bread recipe typically contains flour, yeast, water, salt. A brioche bread recipe is an enriched recipe that contains milk, eggs, and butter. My Brioche Buns recipe contain ¼ cup of sugar to give it an extra hint of sweetness, which is not typical in a regular bread recipe.
My milk temperature is a guide so that you don’t use too hot of milk (could kill the yeast) or too cold of milk (won’t activate the yeast). Milk temperature between 105-115 degrees F. will do the trick and yield best results.
To know if your dough is ready, perform the windowpane test where you take a small piece of dough and stretch it out between your fingers. If it stretches out without tearing and light can pass through, then it has passed the windowpane test. If it tears, let the dough knead another 5 minutes, then perform the test again.
I haven't tried making brioche buns with dairy-free butter and milk, especially since we need the fat in both the butter and the milk to enrich the dough. You are more than welcome to try though.
You can absolutely make this recipe ahead of time by letting the dough proof in the refrigerator overnight for the first rise. When you’re ready to use, remove from the refrigerator and continue with the recipe. You won’t need to let the dough come to room temperature because you’ll still need to proof a second time, so it will have plenty of time.
💡Pro Tips
Measure Flour Correctly - As always, with any recipe, use a kitchen scale, as it is the best form of measuring your ingredients. If you don't have a kitchen scale, fluff your flour, scoop flour with a spoon into a measuring cup and level off.
Don't Skip Kneading: Knead the dough for at least 10 minutes before adding the softened butter. This will ensure the dough forms and pulls away from the bowl. Then once you add the butter, knead for another 10-15 minutes until the butter is completely incorporated and the dough has pulled away from the bowl again.
Don’t add too much flour: This dough will be tacky, but shouldn’t stick to your hands. It will also be very silky (this due to all the butter added). If while kneading, the dough doesn’t come together after 15 minutes, you can add one tablespoon of flour at a time. But be patient before adding the flour. You don’t want a dry dough.
Make Ahead: You can absolutely make this brioche dough ahead of time by letting the dough proof in the refrigerator overnight for the first rise. When you're ready to use, remove from the refrigerator and continue with the recipe. You won't need to let the dough come to room temperature because you'll still need to proof a second time, so it will have plenty of time.
Proof in pre-heated oven: One trick I love doing is to pre-heat the oven to 170 degrees Fahrenheit, then turning off the oven and letting my dough proof in the oven. This cuts down on proofing time, especially if I’m in a hurry, but it also helps in the winter when it’s especially cold.
Windowpane test: To know if your dough is ready, perform the windowpane test where you take a small piece of dough and stretch it out between your fingers. If it stretches out without tearing and light can pass through, then it has passed the windowpane test. If it tears, let the dough knead another 5 minutes, then perform the test again.
❄ Storage
Room Temperature: For the first rise, proof this dough at room temperature for about an hour or until doubled in size. It depends on how warm or cold your house is.
Refrigerator: This brioche dough recipe can be cold proofed for up to 24 hours in the refrigerator.
🍞 Brioche Recipes to Try
📖 Recipe Card
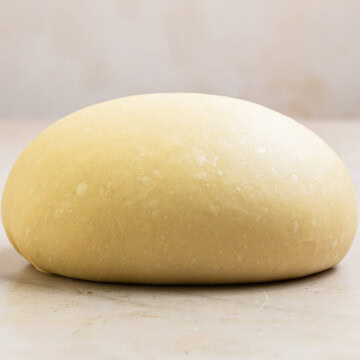
How to Make Brioche Dough
Equipment
- Stand mixer with dough hook attachment
- Mixing Bowl
Ingredients
Brioche Dough
- ¾ cup (202 g) +1 tablespoon warm milk, 110℉ (See notes)
- 1 teaspoon (4 g) granulated sugar
- 2¼ teaspoon (7 g) active dry yeast 1 package
- 3 cups (360 g) bread flour
- ⅓ cup (66 g) granulated sugar
- ¾ teaspoon (4.5 g) salt
- 2 (34 g) egg yolks
- 2 teaspoon (8 g) vanilla extract (for sweet doughs)
- 6 tablespoon (85 g) unsalted butter softened
Instructions
Brioche Dough
- In a small bowl, combine the warm milk, packet of yeast and a teaspoon of sugar and let sit and foam for about 5 minutes.¾ cup +1 tablespoon warm milk, 110℉, 1 teaspoon granulated sugar, 2¼ teaspoon active dry yeast, 2 teaspoon vanilla extract
- In a bowl of a stand mixer fitted with a hook attachment, add flour, sugar, salt, 2 egg yolks, vanilla extract, and the activated yeast mixture and let knead for at least 10 minutes until the dough comes away from the bowl and forms a sort of ball.3 cups bread flour, ⅓ cup granulated sugar, ¾ teaspoon salt, 2 egg yolks
- Start adding the softened butter slowly until all is incorporated and knead for an additional 10-20 minutes until the dough forms a smooth ball and does not stick to the sides of the bowl. When touching with your finger, the dough should not stick at all. The dough will be tacky and a lot smoother/silkier than a regular dough.6 tablespoon unsalted butter
- You know the dough is ready when it passes the windowpane test: take a small piece of dough and stretch it out between your fingers. If it stretches out without tearing and light can pass through, then it has passed the windowpane test. If it tears, let the dough knead another 5 minutes, then perform the test again.NOTE: If you stretch it long enough, it could still tear, but as long as you can get it thin where it becomes a little see-through, and light can pass through, then you're good to go.
- Place the dough in an oiled bowl and cover and let rise for at least an hour, then follow instructions on specific recipe on what to do next.
Video
Notes
Reader Feedback
Since developing my first brioche bun recipe in 2022, I've had many people remake them, with such great feedback. I have, however, had people mention that the dough can be a little too sticky/wet and they needed to add more flour. For this reason, I went back to the drawing board to test the recipe with ¼ cup less milk, so only ¾ cup total milk instead of 1 cup, and it turns out great! However, this is with my controlled environment, and with using a scale to weigh my flour. If you're a long-time reader who has had success with a whole cup of milk, then keep making the recipe that way. Tips for the best results:- Measure Flour Correctly: As always, with any recipe, use a kitchen scale, as it is the best form of measuring your ingredients. If you don’t have a kitchen scale, fluff your flour, scoop flour with a spoon into a measuring cup and level off.
- Don’t Skip Kneading: Knead the dough for at least 10 minutes before adding the softened butter. This will ensure the dough forms and pulls away from the bowl. Then once you add the butter, knead for another 10-20 minutes until the butter is completely incorporated and the dough has pulled away from the bowl again.
- Don’t add too much flour: This dough will be tacky, but shouldn’t stick to your hands. It will also be very silky (this due to all the butter added). If while kneading, the dough doesn’t come together after 15 minutes, you can add one tablespoon of flour at a time. But be patient before adding the flour. You don’t want a dry dough.
- Make Ahead: You can absolutely make this recipe ahead of time by letting the dough proof in the refrigerator overnight for the first rise. When you’re ready to use, remove from the refrigerator and continue with the recipe. You won’t need to let the dough come to room temperature because you’ll still need to proof a second time, so it will have plenty of time.
- Proof in pre-heated oven: One trick I love doing is to pre-heat the oven to 170 degrees Fahrenheit, then turning off the oven and letting my dough proof in the oven. This cuts down on proofing time, especially if I’m in a hurry, but it also helps in the winter when it’s especially cold.
- Windowpane test: To know if your dough is ready, perform the windowpane test where you take a small piece of dough and stretch it out between your fingers. If it stretches out without tearing and light can pass through, then it has passed the windowpane test. If it tears, let the dough knead another 5 minutes, then perform the test again.
- Humidity: Due to reader feedback, I've updated the recipe to reduce the amount of milk to ¾ of a cup instead of a whole cup. See Reader feedback for more info.




Bella says
Friend from Florida here! The first time I tried this recipe it came out too sticky and didn't look too much like the photos, had to add a fair amount of flour until they came out right! Tried the recipe again today with 3/4 cup of milk and it worked out EXACTLY as described in the recipe, followed the photos and description to a T! I'm guessing the higher ambient humidity in my house (~60%) had a big impact! Just a tip for some other people if they have this problem!
Hakima says
Thank you so much for the feedback! Humidity definitely plays a roll in dough, and I find I have to add a little extra flour in the summer months vs. the winter. Thank you for trying out the recipe, Bella! 🙂
Cc says
Hi there - when kneading the dough with the mixer is it a low, medium or high speed? Thanks ☺️
Hakima says
I knead on 2-4 (so about medium).