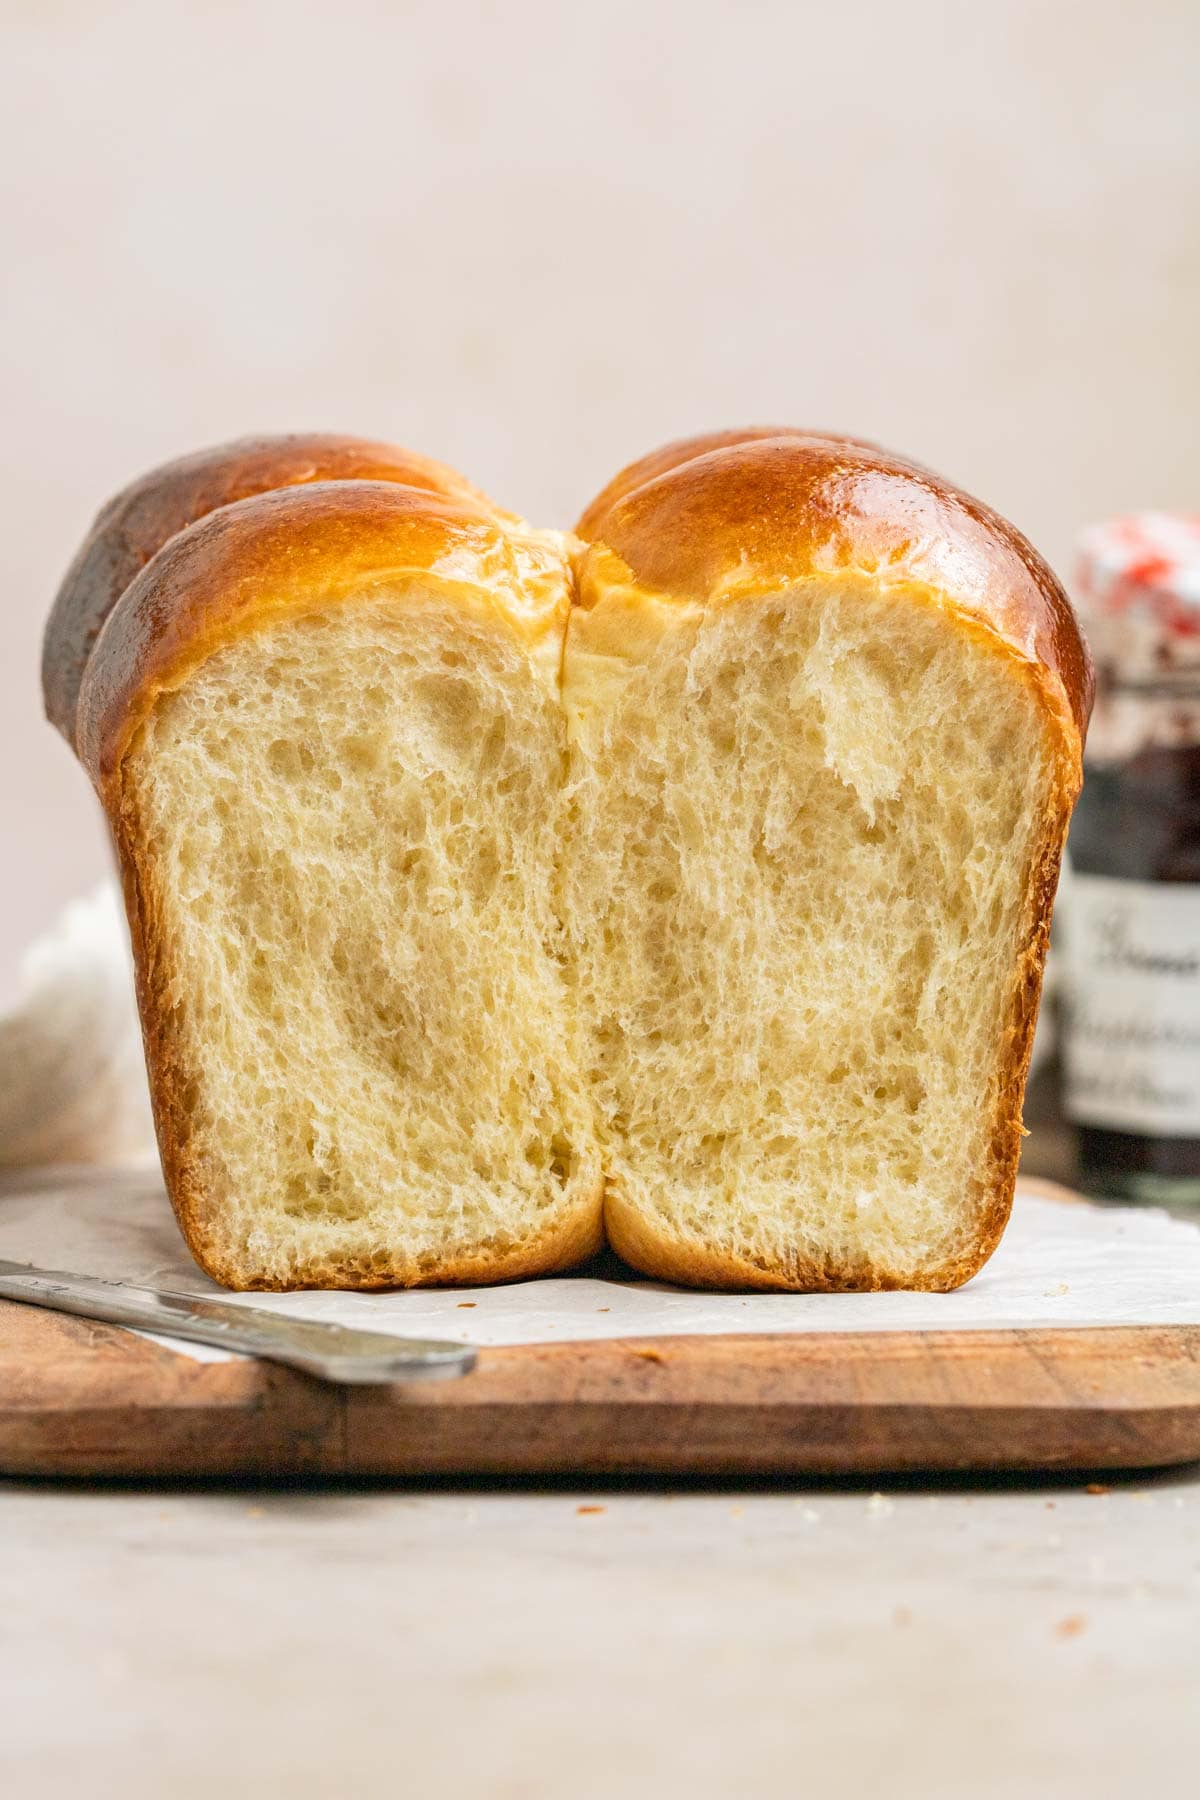
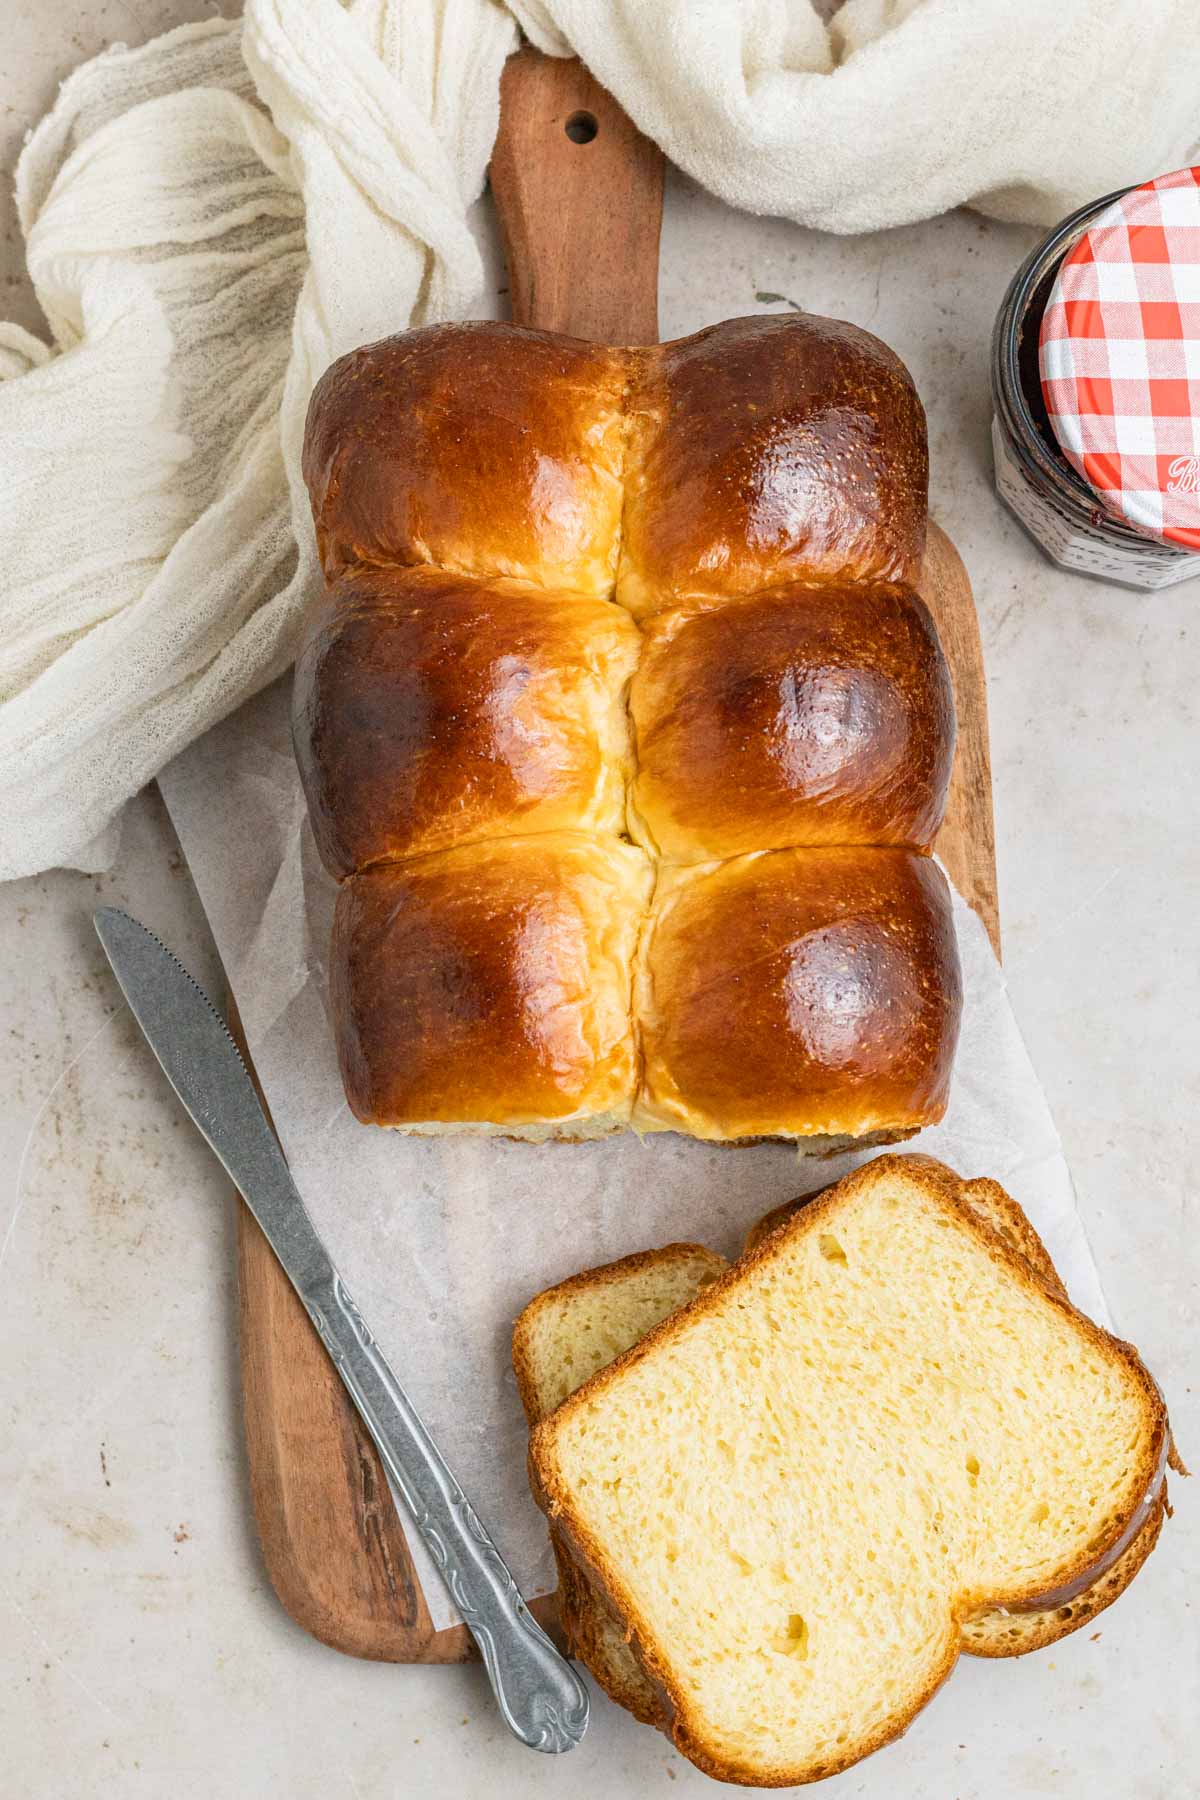
This Brioche Loaf Recipe is incredibly soft, buttery, fluffy, and absolutely delicious! It's made using my tried-and-true brioche dough recipe. This loaf can be made overnight or same day, and it produces one single brioche loaf that can be enjoyed in many different ways!
I've been making variations of my brioche dough for around two and a half years, and for some reason, I never thought to turn it into an actual brioche loaf until recently. On a whim, I whipped up a batch of my dough and decided to let it cold proof, then made it into a loaf, and to my surprise, it turned out amazing! The flavor, the texture, the smells! I did a few more test batches and thought it was time to add it to my collection.
This Brioche Loaf Recipe is simple. It uses my base brioche dough, and instead of turning it into sweet buns, you place those round dough balls in a loaf pan. A lot of the work is honestly just waiting around for it to rise. This french brioche bread has become a favorite in my household, and for very good reason! Buttery, fluffy, and ultra soft, you won't regret making it!

Jump to:
♥ Why You'll Love This Recipe
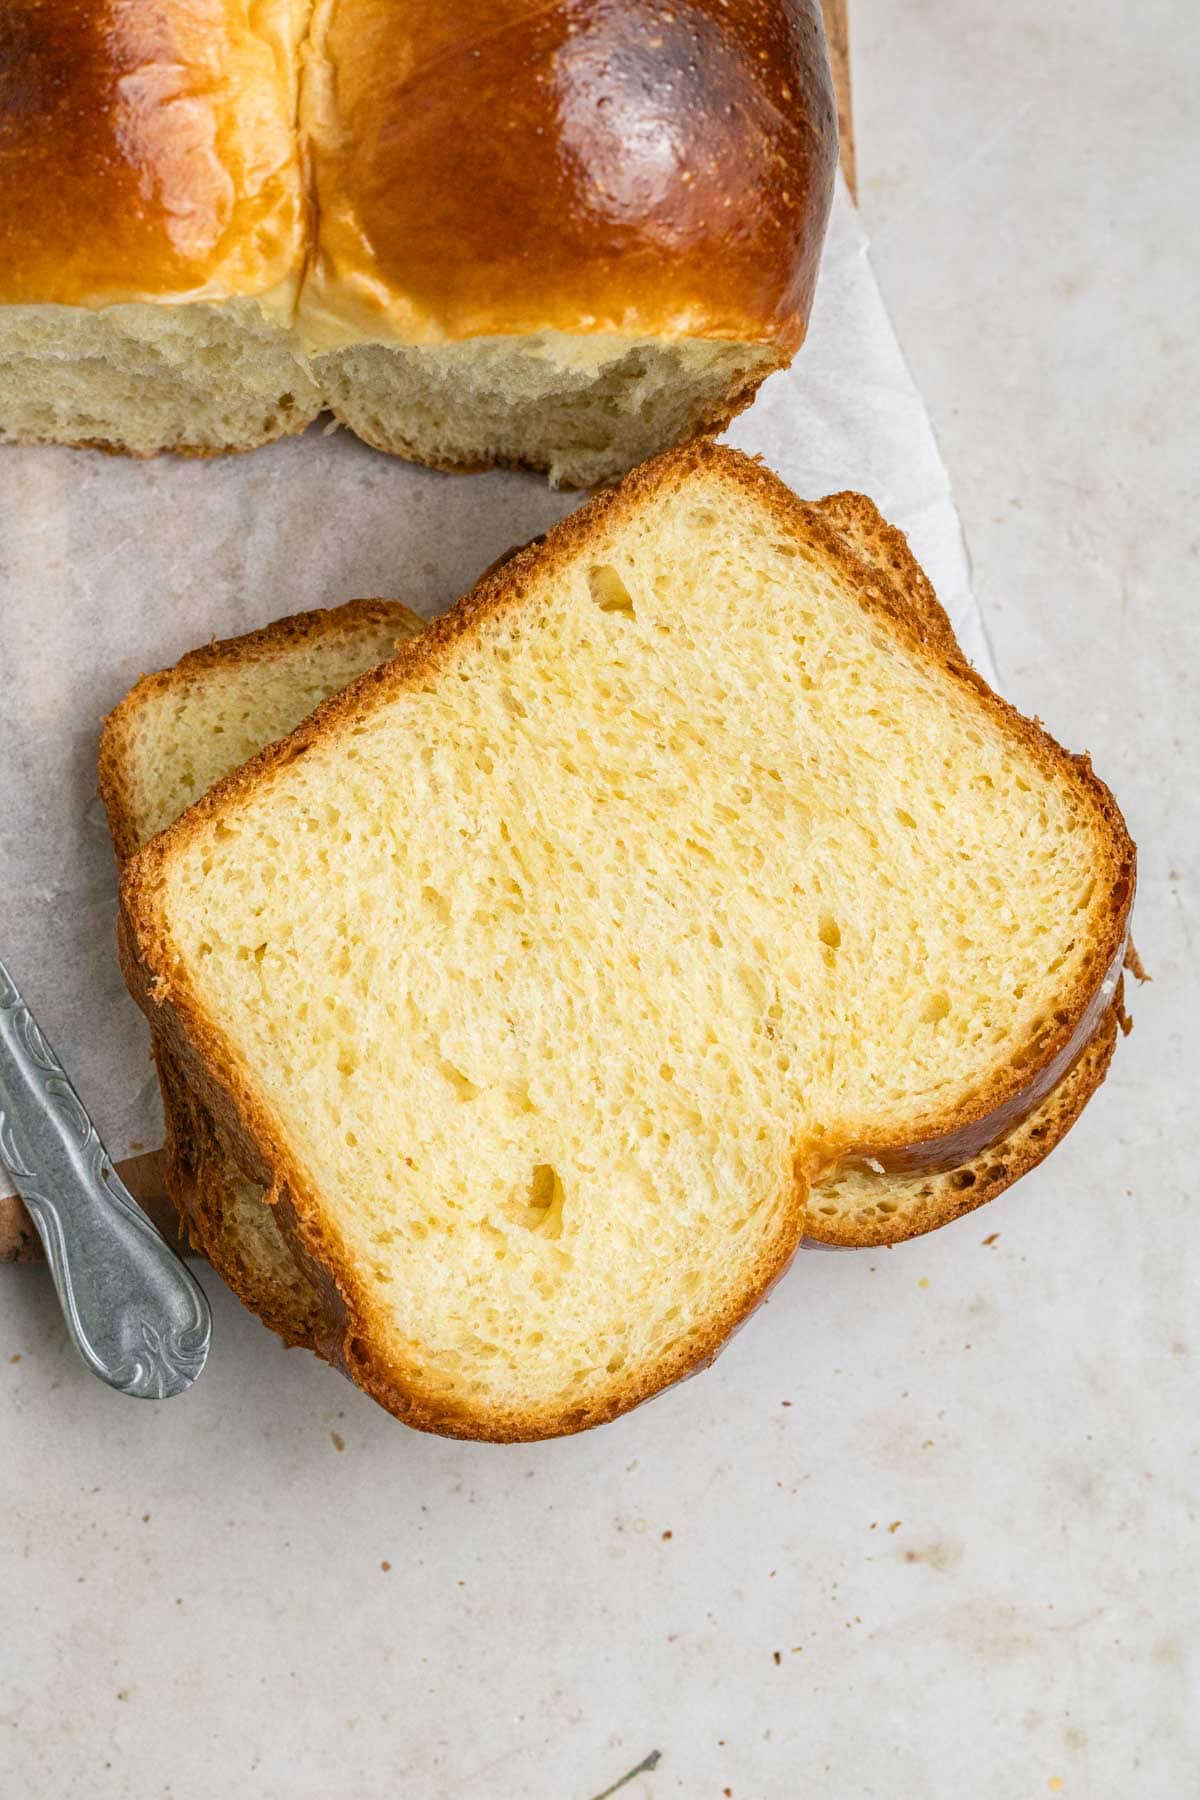
Soft & Fluffy - This brioche loaf recipe is sooooo soft and fluffy, you'll think you bought it straight from a bakery!
Absolutely delicious! - This recipe yields an incredible loaf of bread that can honestly be eaten on its own because it's SO good.
Buttery! - The butter in this dough gives absolutely delicious flavor!
Best recipe - Honestly, I feel like my brioche dough recipe is hands-down one of the best and easiest brioche recipes! I find it simple and straight forward!
🥖 What is Brioche?
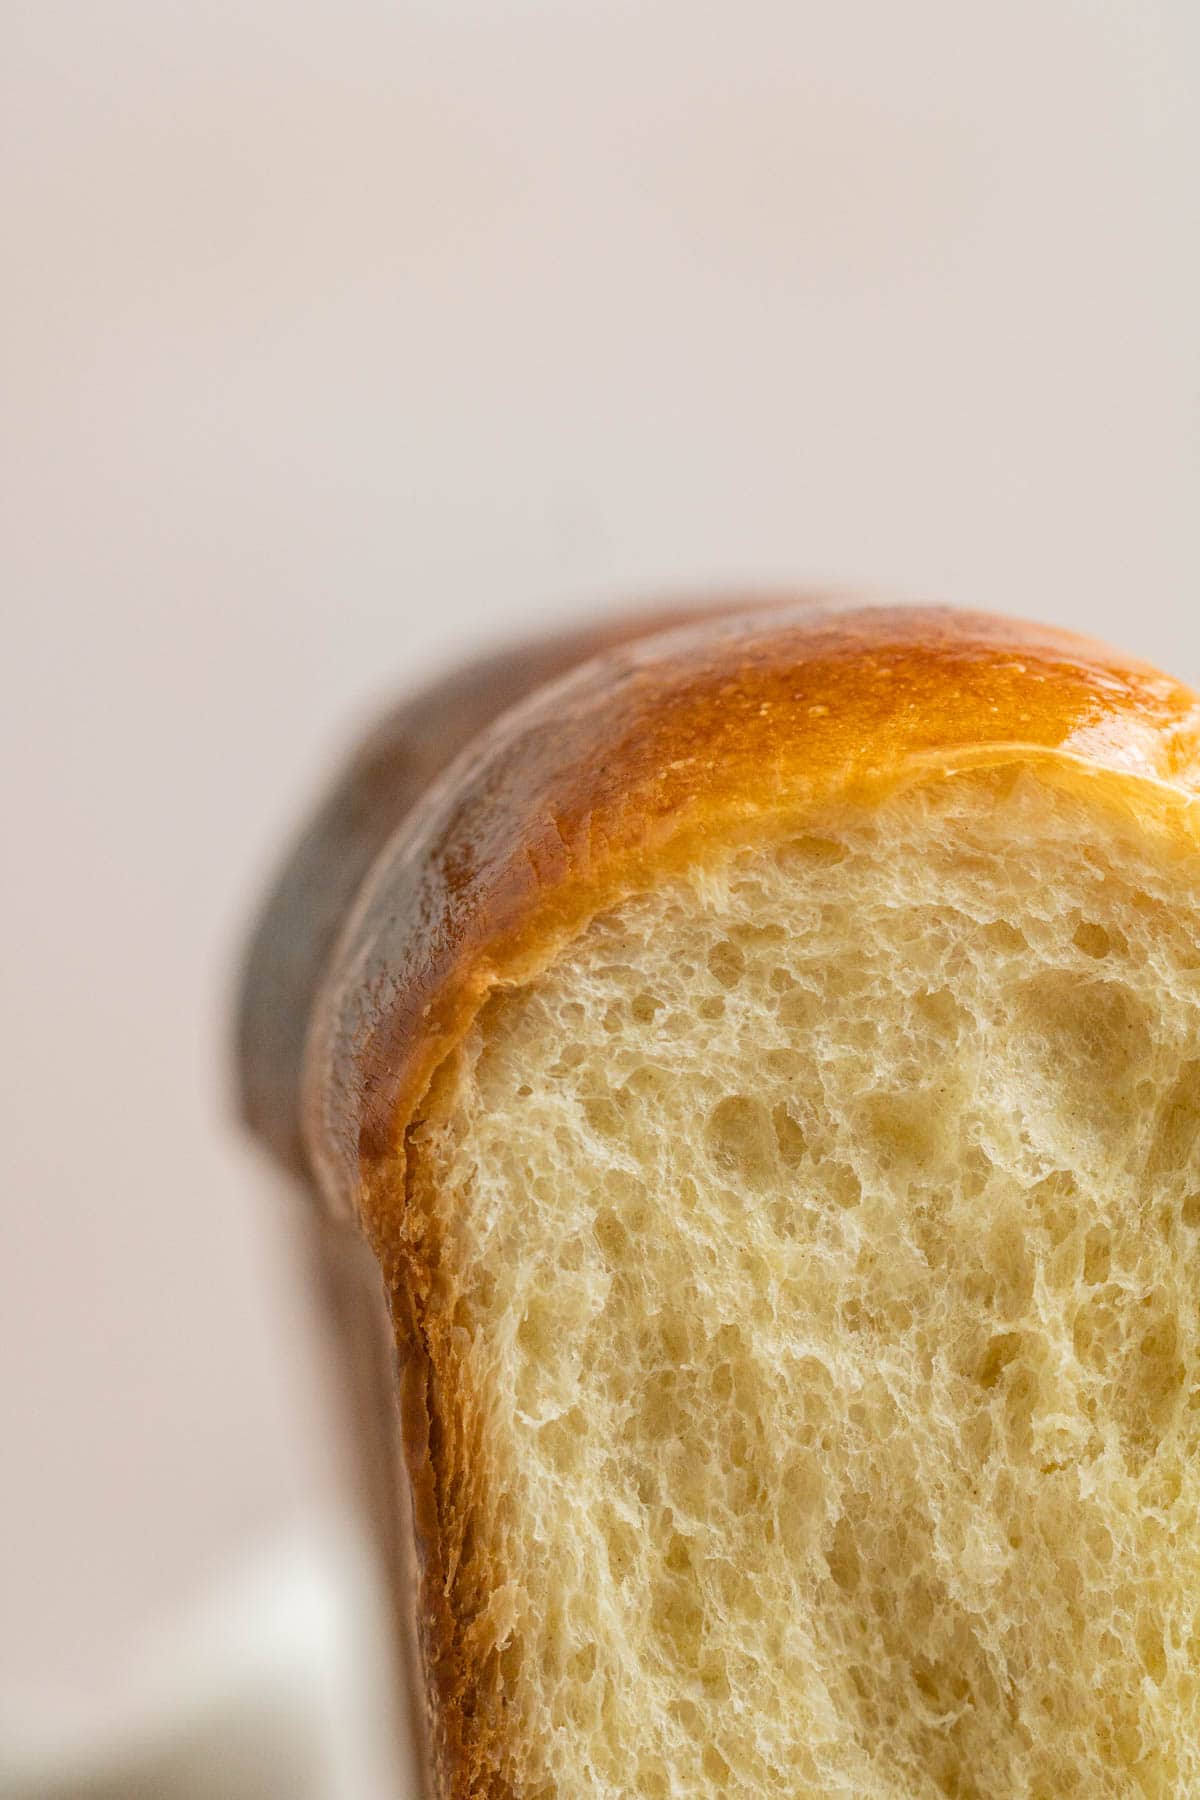
Brioche is a rich, buttery French bread made with eggs, butter, milk, and sugar, giving it a soft, airy texture and a slightly sweet flavor. It's known for its golden color and tender crumb, and can be used for a range of things, from breakfast pastries to savory sandwiches. The high fat content distinguishes it from other breads, making it both indulgent and versatile.
📝 Ingredient Notes
A full list of ingredients, quantities, and instructions are located in the recipe card at the end of the post.

- Flour: This recipe can be used with either Bread Flour or All-Purpose Flour. I prefer bread flour, but if you don't have any, all-purpose will work.
- Yeast: My favorite yeast to use is Active Dry Yeast, which requires proofing before adding it to the flour mixture.
- Milk: It's best to use whole milk since this is an enriched dough, the more fat, the better
- Granulated Sugar: This adds sweetness to the Brioche dough and creates a bit more of a softness.
- Egg: I use two egg yolks for this recipe, adding more fat, without the added liquid of the whites.
- Butter: A key ingredient in Brioche is butter. This recipe calls 6 tablespoon of room temperature butter during the second kneading.
See recipe card for quantities.

🍴Special Equipment
Kitchen Scale - It's so important to use a kitchen scale for accurate results.
Loaf Pan: You'll need a 9x5 loaf pan.
Mixing bowls - I love using glass Mixing Bowls when making batters and doughs.
Stand mixer - I love using my stand mixer when making enriched doughs because it takes a while to knead.
Spatula - A spatula would help scrape down the bowl when making dough.
✨ How to use Brioche Loaf
Sourdough - If you are familiar and love using sourdough, or want to experiment, you can try this Sourdough Brioche recipe.
Sandwiches - I've made these into a ton of different sandwiches. My personal favorite is using the brioche bread to make egg sandwiches in the morning! You could also use it to make these Chickpea Caesar Salad Sandwiches or Air Fryer Egg Toast.
French Toast - Imagine slices of brioche bread turned into french toast! A dream breakfast!
Baked French Toast - You could use this loaf to make Overnight Baked French Toast.
Croutons - How delicious would it be to add brioche croutons to your salad??
Bread pudding - Once this bread goes stale, don't throw it away! Turn in into bread pudding!
𓎩 Step-by-Step Instructions
A few instruction photos to help you nail this recipe every time.
Step 1
Make brioche dough. For full step-by-step instructions and process photos, see How to Make Brioche Dough.
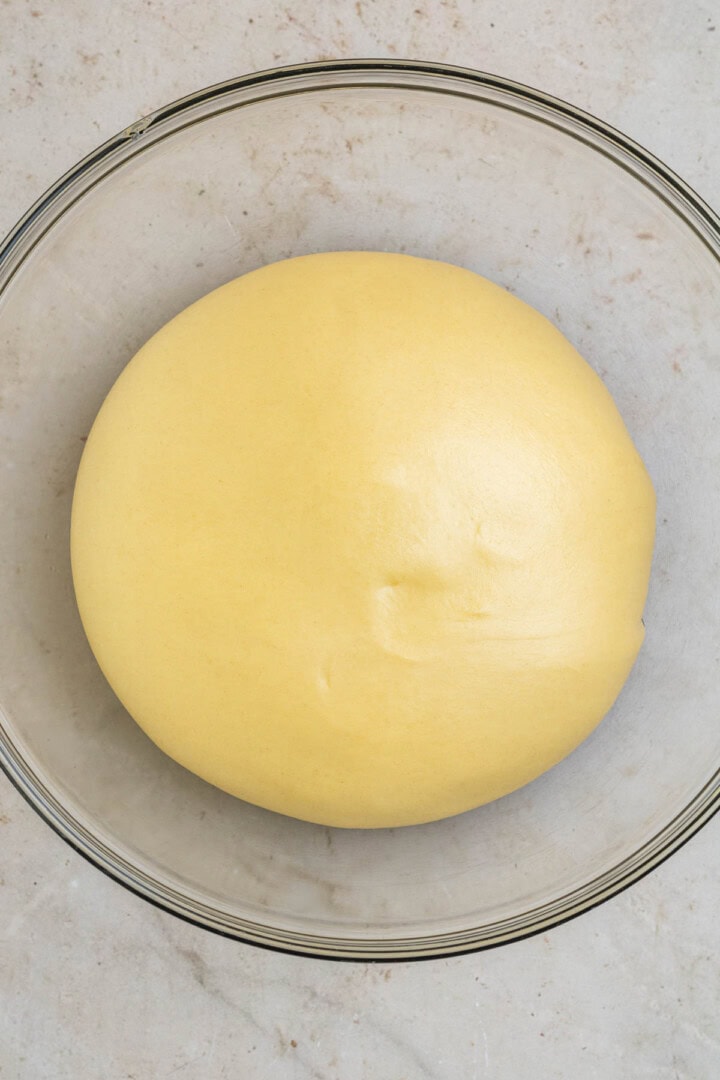
Once dough is ready, place in an oiled bowl, cover, and refrigerate for at least 12-24 hours.
Step 2
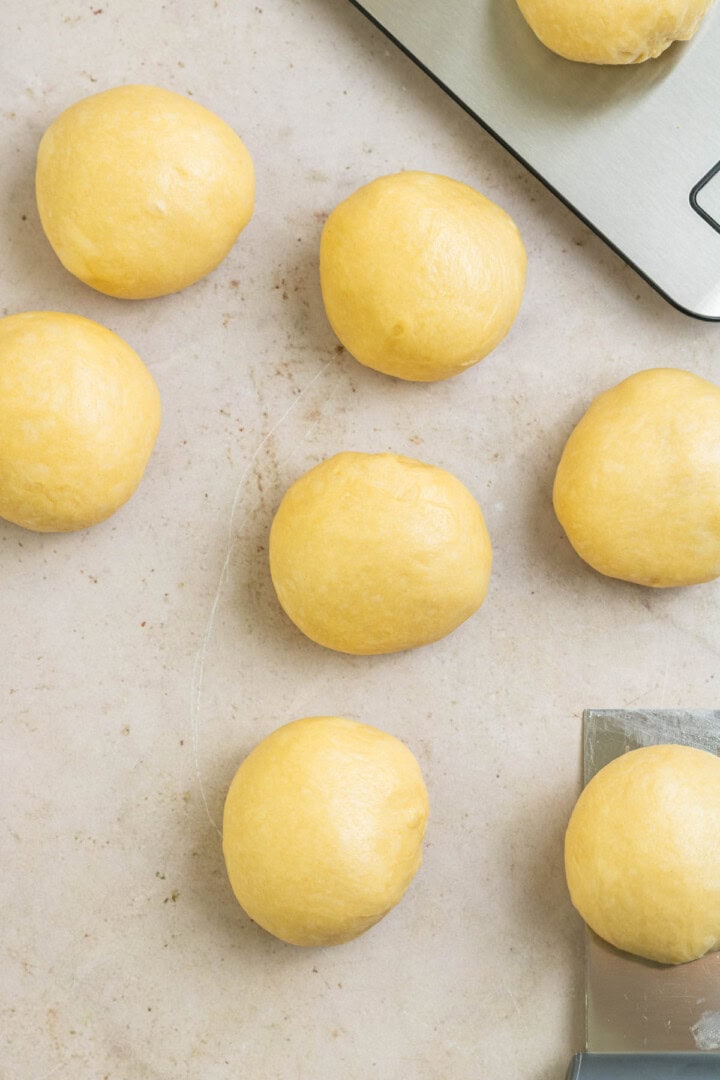
Once risen, punch the air out of the dough and remove from bowl and divide into 8 equal pieces. Measure using a kitchen scale for more accurate results.
To accurately measure: place the dough on a scale, then divide that number by 8.
Step 3
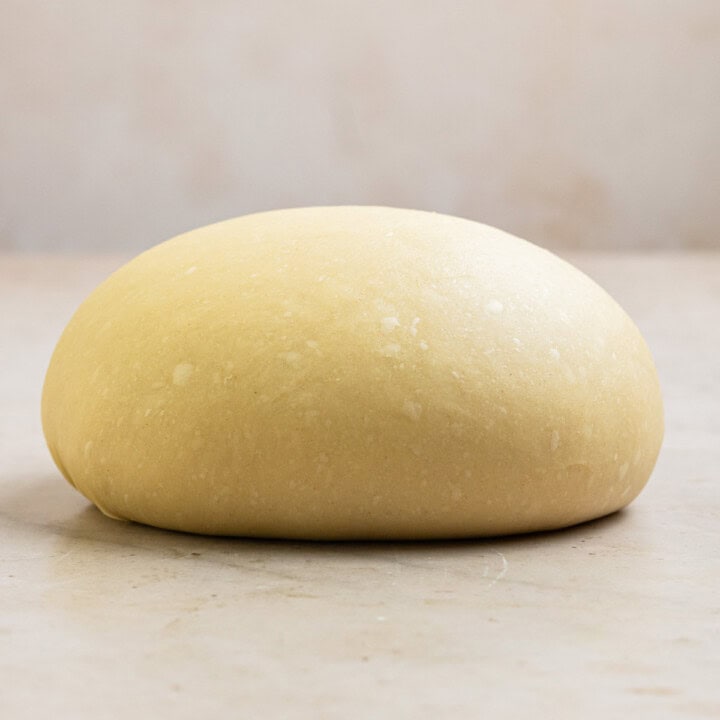
Shape the balls: take the outer edges of the dough and fold them towards the center, as if you're folding an envelope. This will create a small bundle in the middle. Once the edges are folded towards the center, pinch them together gently to seal the dough. Cup your hands around the dough and gently roll it in a circular motion on the work surface. This helps create smooth, round shape.
💡 Hint: During the second proof, the timings in this post are a guide. It's important to start checking your loaf around the 1 hour mark to make sure you don't over proof.

Step 4
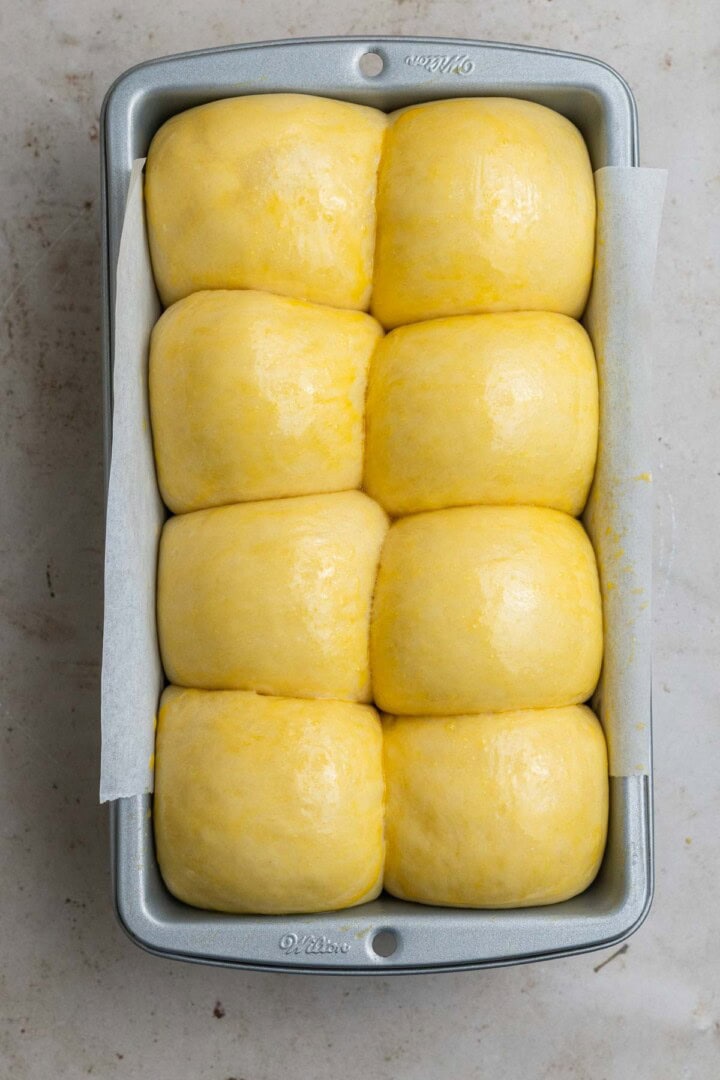
Place the dough balls into the prepared loaf pan, creating two rows next to each other. Cover with saran wrap and let rise for two hours, until the dough has risen above the rim of the loaf pan.
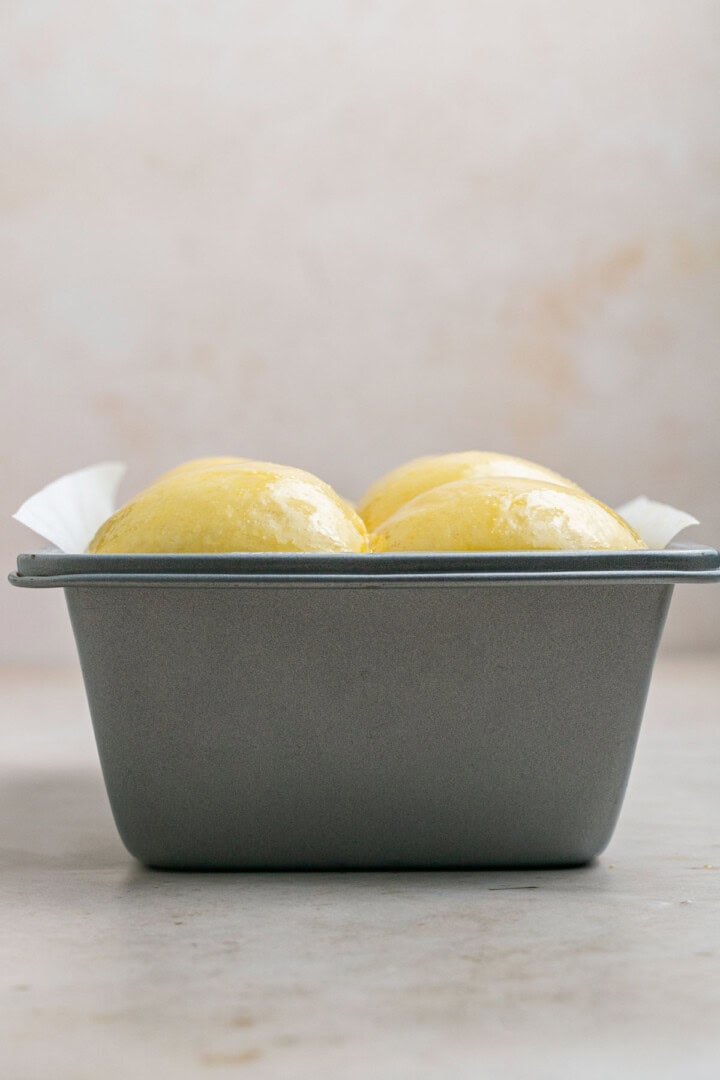
🎩Trick: For the second proof, I like to pre-heat the oven to 170 degrees Fahrenheit, then turning off the oven and letting my dough proof in the oven. This cuts down on proofing time, especially if I'm in a hurry, but it also helps in the winter when it's especially cold.
Step 5
Preheat the oven to 350℉ / 180℃.
Crack an egg into a bowl and whisk, then using a pastry brush, brush egg wash all over the top of the loaf.
Bake the loaf for 30-35 minutes until the top is golden brown and the internal temperature reaches 190℉ / 88℃.

Step 6
Bake the loaf for 30-35 minutes until the top is golden brown and the internal temperature reaches 190℉ / 88℃.
If the top is browning too much, you'll need to lightly place a piece of aluminum foil on top so that it doesn't burn. I have to do this around 20-25 minutes into baking.
💬 FAQ
Yes, you can. But keep in mind that it may rise faster, so it's very important to keep an eye on it and check on it sooner.
You can, but it will take a lot longer to knead, much longer than 20 minutes.
If you overproof your loaf, you'll have to remove it from the pan, reshape it, and then let it rise again. Keep an eye on it to make sure it does not over proof again.
💡Pro Tips
Measure Flour Correctly - As always, with any recipe, use a kitchen scale, as it is the best form of measuring your ingredients. If you don't have a kitchen scale, fluff your flour, scoop flour with a spoon into a measuring cup and level off.
Don't Skip Kneading: Knead the dough for at least 10 minutes before adding the softened butter. This will ensure the dough forms and pulls away from the bowl. Then once you add the butter, knead for another 10-15 minutes until the butter is completely incorporated and the dough has pulled away from the bowl again.
Don't add too much flour: This dough will be tacky, but shouldn't stick to your hands. It will also be very silky (this due to all the butter added). If while kneading, the dough doesn't come together after 15 minutes, you can add one tablespoon of flour at a time. But be patient before adding the flour. You don't want a dry dough.
Cold Rise: I highly recommend a cold rise in the fridge for the first rise. Chill the dough for at least 12 hours. This helps the dough develop more flavor! If you're in a hurry, you can let the dough rise at room temperature for at least an hour.
Windowpane test: To know if your dough is ready, perform the windowpane test where you take a small piece of dough and stretch it out between your fingers. If it stretches out without tearing and light can pass through, then it has passed the windowpane test. If it tears, let the dough knead another 5 minutes, then perform the test again.
❄ Storage
Room temperature - Store any leftover brioche loaf in an airtight container for around 3 days.
Freezer - To last longer, you can freeze the brioche loaf for about 2 months.
Did you make this recipe or any other recipe on my website? I'd love to hear about it! Please leave a 🌟 star rating and let me know how it went in the 📝 comments below. Don't forget to Tag me on Instagram or Facebook when you recreate a recipe! The feedback helps both me and the readers!
Also, be sure to add us as a trusted site on Google so that our recipes show up more in your searches!
📖 Recipe Card

Brioche Loaf Recipe
Equipment
- Stand mixer with dough hook attachment
- Mixing Bowl
- 1 9x5 loaf pan
Ingredients
Brioche Dough
- ¾ cup (200 g) +1 tablespoon warm milk, 110℉ (See notes)
- 1 teaspoon (4 g) granulated sugar
- 2¼ teaspoon (7 g) active dry yeast 1 package
- 3 cups (360 g) bread flour
- ⅓ cup (66 g) granulated sugar
- ¾ teaspoon (4.5 g) salt
- 2 (34 g) egg yolks
- 6 tablespoon (85 g) unsalted butter softened
- egg for egg wash
Instructions
Brioche Dough
- In a small bowl, combine the warm milk, packet of yeast and a teaspoon of sugar and let sit and foam for about 5 minutes.¾ cup (200 g) +1 tablespoon warm milk, 110℉, 1 tsp (4 g) granulated sugar, 2¼ tsp (7 g) active dry yeast
- In a bowl of a stand mixer fitted with a hook attachment, add flour, sugar, salt, 2 egg yolks, and the activated yeast mixture and let knead for at least 10 minutes until the dough comes away from the bowl and forms a sort of ball.3 cups (360 g) bread flour, ⅓ cup (66 g) granulated sugar, ¾ tsp (4.5 g) salt, 2 (34 g) egg yolks
- Start adding the softened butter slowly until all is incorporated and knead for an additional 10-20 minutes until the dough forms a smooth ball and does not stick to the sides of the bowl. When touching with your finger, the dough should not stick at all. The dough will be tacky and a lot smoother/silkier than a regular dough.6 tbsp (85 g) unsalted butter
- You know the dough is ready when it passes the windowpane test: take a small piece of dough and stretch it out between your fingers. If it stretches out without tearing and light can pass through, then it has passed the windowpane test. If it tears, let the dough knead another 5 minutes, then perform the test again.NOTE: If you stretch it long enough, it could still tear, but as long as you can get it thin where it becomes a little see-through, and light can pass through, then you're good to go.
- Place the dough in an oiled bowl and cover and let rise in the refrigerator for at least 12 hours and up to 24 hours. NOTE: You could also make it same-day by letting it rise at room temperature for 1-2 hours.
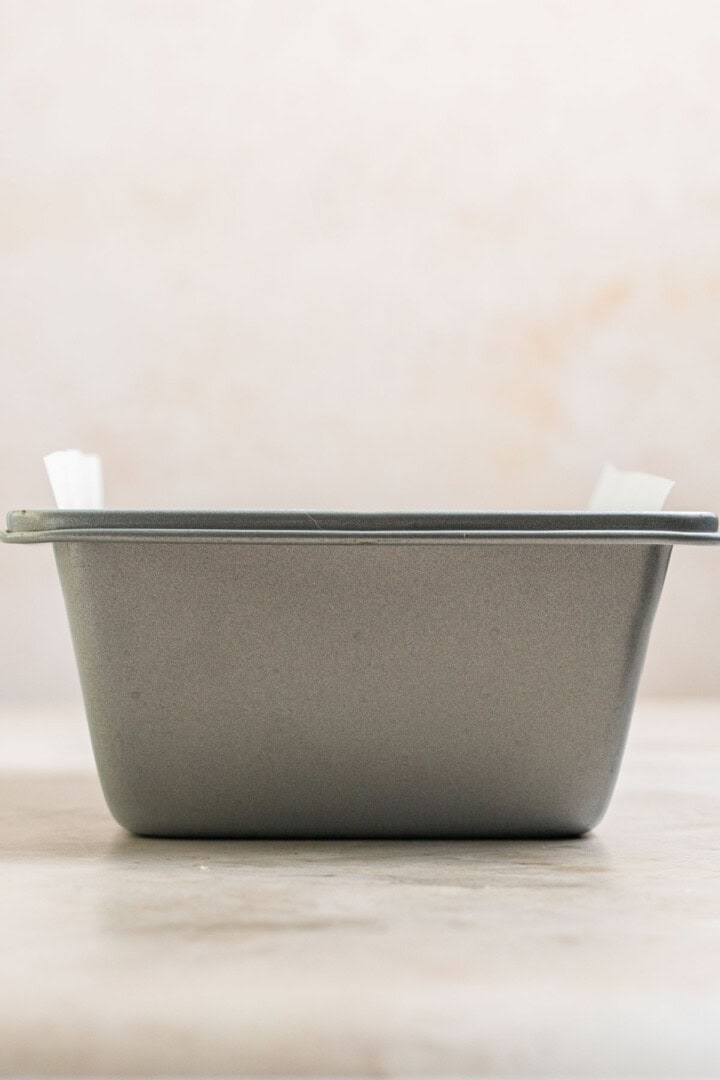
- Line a 9x5 loaf pan with parchment paper. Make sure to let some hang over the sides for easy removal once baked.
- Shape: Once risen, punch the air out of the oven and divide the dough into 8 equal-sized pieces. Then shape them into balls: take the outer edges of the dough and fold them towards the center, as if you're folding an envelope. This will create a small bundle in the middle. Once the edges are folded towards the center, pinch them together gently to seal the dough. Cup your hands around the dough and gently roll it in a circular motion on the work surface. This helps create smooth, round shape. Place the dough balls into the prepared loaf pan, creating two rows next to each other. Cover with saran wrap and let rise for 1-2 hours, until the dough has risen above the rim of the loaf pan. start checking on it at the 1 hour mark. Don't overproof.
- Preheat the oven to 350℉ / 180℃.Crack an egg into a bowl and whisk, then using a pastry brush, brush egg wash all over the top of the loaf.egg for egg wash
- Bake the loaf for 30-35 minutes until the top is golden brown and the internal temperature reaches 190℉ / 88℃. NOTE: If the top is browning too much, you'll need to lightly place a piece of aluminum foil on top so that it doesn't burn. I have to do this around 20-25 minutes into baking.
- Remove from the oven and let cool for at least 10-15 minutes before removing from the pan. Once completely cooled, slice and enjoy. Any leftovers can be stored in an airtight container for around 3 days.
Notes
Reader Feedback
Since developing my first brioche bun recipe in 2022, I've had many people remake them, with such great feedback. I have, however, had people mention that the dough can be a little too sticky/wet and they needed to add more flour. For this reason, I went back to the drawing board to test the recipe with ¼ cup less milk, so only ¾ cup total milk instead of 1 cup, and it turns out great! However, this is with my controlled environment, and with using a scale to weigh my flour. If you're a long-time reader who has had success with a whole cup of milk, then keep making the recipe that way. Tips for the best results:- Measure Flour Correctly: As always, with any recipe, use a kitchen scale, as it is the best form of measuring your ingredients. If you don't have a kitchen scale, fluff your flour, scoop flour with a spoon into a measuring cup and level off.
- Don't Skip Kneading: Knead the dough for at least 10 minutes before adding the softened butter. This will ensure the dough forms and pulls away from the bowl. Then once you add the butter, knead for another 10-20 minutes until the butter is completely incorporated and the dough has pulled away from the bowl again.
- Don't add too much flour: This dough will be tacky, but shouldn't stick to your hands. It will also be very silky (this due to all the butter added). If while kneading, the dough doesn't come together after 15 minutes, you can add one tablespoon of flour at a time. But be patient before adding the flour. You don't want a dry dough.
- Make Ahead: You can absolutely make this recipe ahead of time by letting the dough proof in the refrigerator overnight for the first rise. When you're ready to use, remove from the refrigerator and continue with the recipe. You won't need to let the dough come to room temperature because you'll still need to proof a second time, so it will have plenty of time.
- Proof in pre-heated oven: One trick I love doing is to pre-heat the oven to 170 degrees Fahrenheit, then turning off the oven and letting my dough proof in the oven. This cuts down on proofing time, especially if I'm in a hurry, but it also helps in the winter when it's especially cold.
- Windowpane test: To know if your dough is ready, perform the windowpane test where you take a small piece of dough and stretch it out between your fingers. If it stretches out without tearing and light can pass through, then it has passed the windowpane test. If it tears, let the dough knead another 5 minutes, then perform the test again.
- Humidity: Due to reader feedback, I've updated the recipe to reduce the amount of milk to ¾ of a cup instead of a whole cup. See Reader feedback for more info.


I made it and didn't let it rise enough in the pan because it didn't look like yours. I thought I read to let it rise for only an hour. So I read it again and decided to make it one more time the next day and this time, I let it cold proof and then let it rise in a warm spot for 2 hours or so. It did rise beautifully and the results were 10/10. The taste is delicious with a hint of sweetness. The texture is soft and somehow a little airy too. I highly recommend. It was an easy recipe to follow. Thank you for sharing on instagram with us!
I'm so glad it worked out the second time around! Yes, I do give a 1-2 hours proof time, but that really can vary depending on many elements, especially how warm or cold your house is. Thanks for leaving a review!
I love this recipe, how can I double to make two loaf in one batch?
You can just double the recipe and once it's completely kneaded, divide the dough in half and let them rise individually. 🙂